

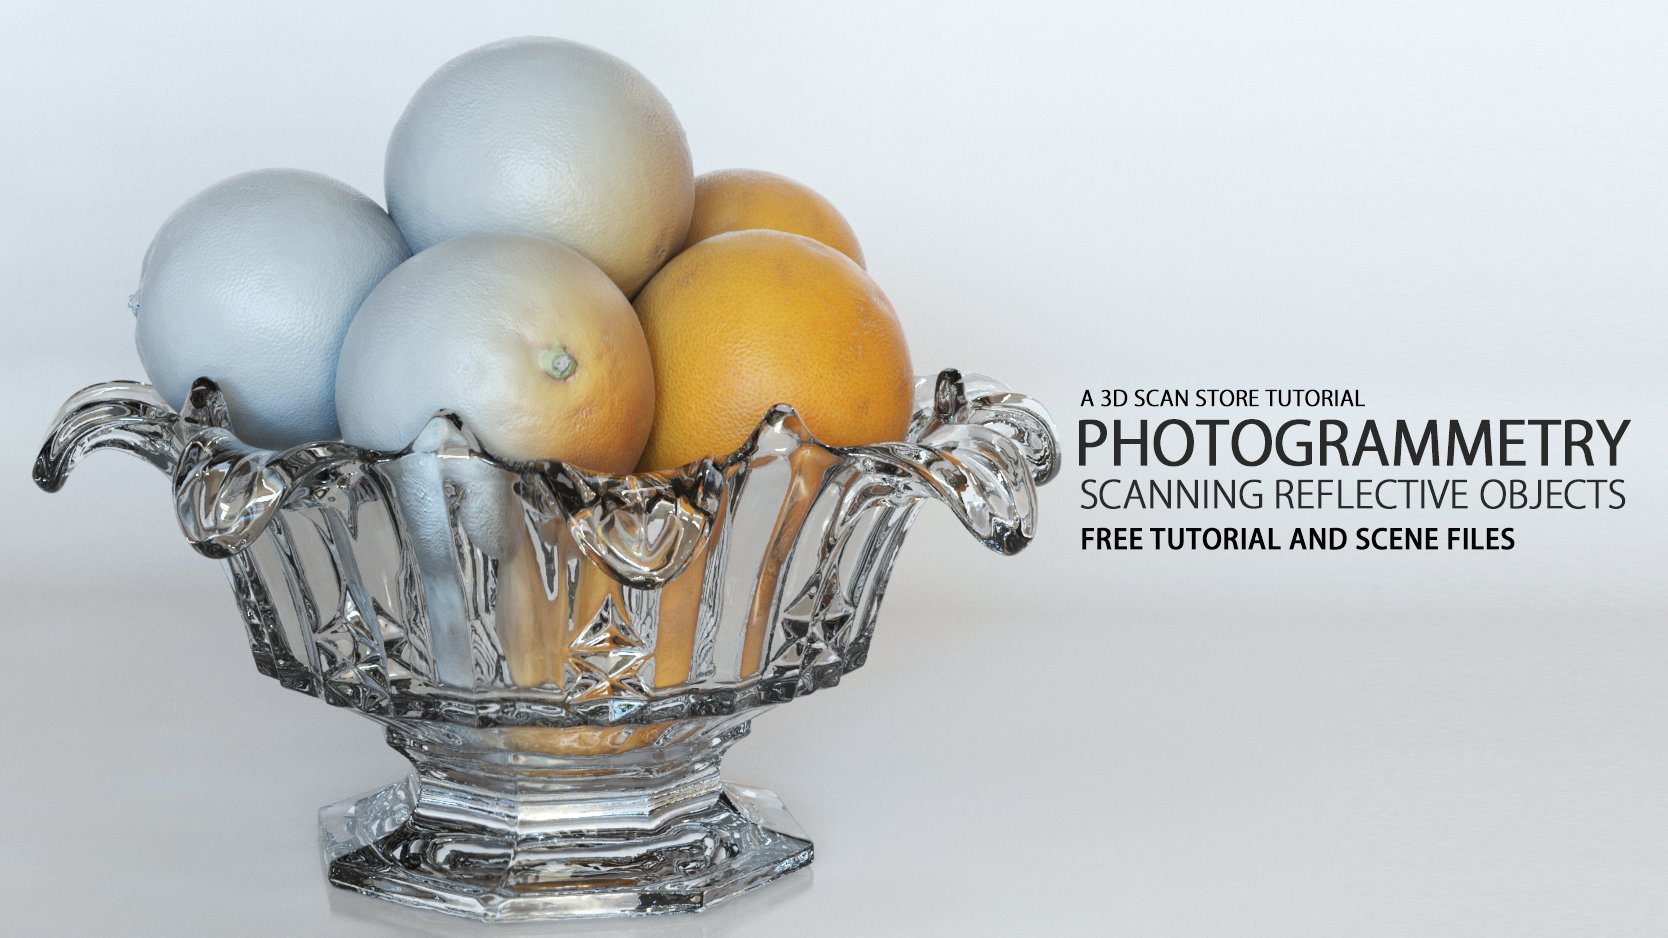
3D Scanning Reflective Objects With Photogrammetry
By James Busby
One question I see rising time and time again is “how do I scan shiny or reflective objects with photogrammetry” The answer is, you can't, it's impossible to scan a / transparent / reflective or very shiny objects using photogrammetry without some kind of surface preparation or complicated projection technique. Photogrammetry works by defining exact positions of reference points on a given surface. So an object like the glass bowl we are going to use for this example will have little to no surface detail for the software to pick up on. Anything that is there will be confused by reflections and refractions within the surface of the glass. A few people have expressed the opinion that using a polarising filter on the camera lens will help in some way, whilst it will help to remove unwanted reflections the surface will still contain little or no detail and therefore will not scan well. In this tutorial, I'm going to show you a fast and relatively non-destructive way to scan almost any reflective surface.
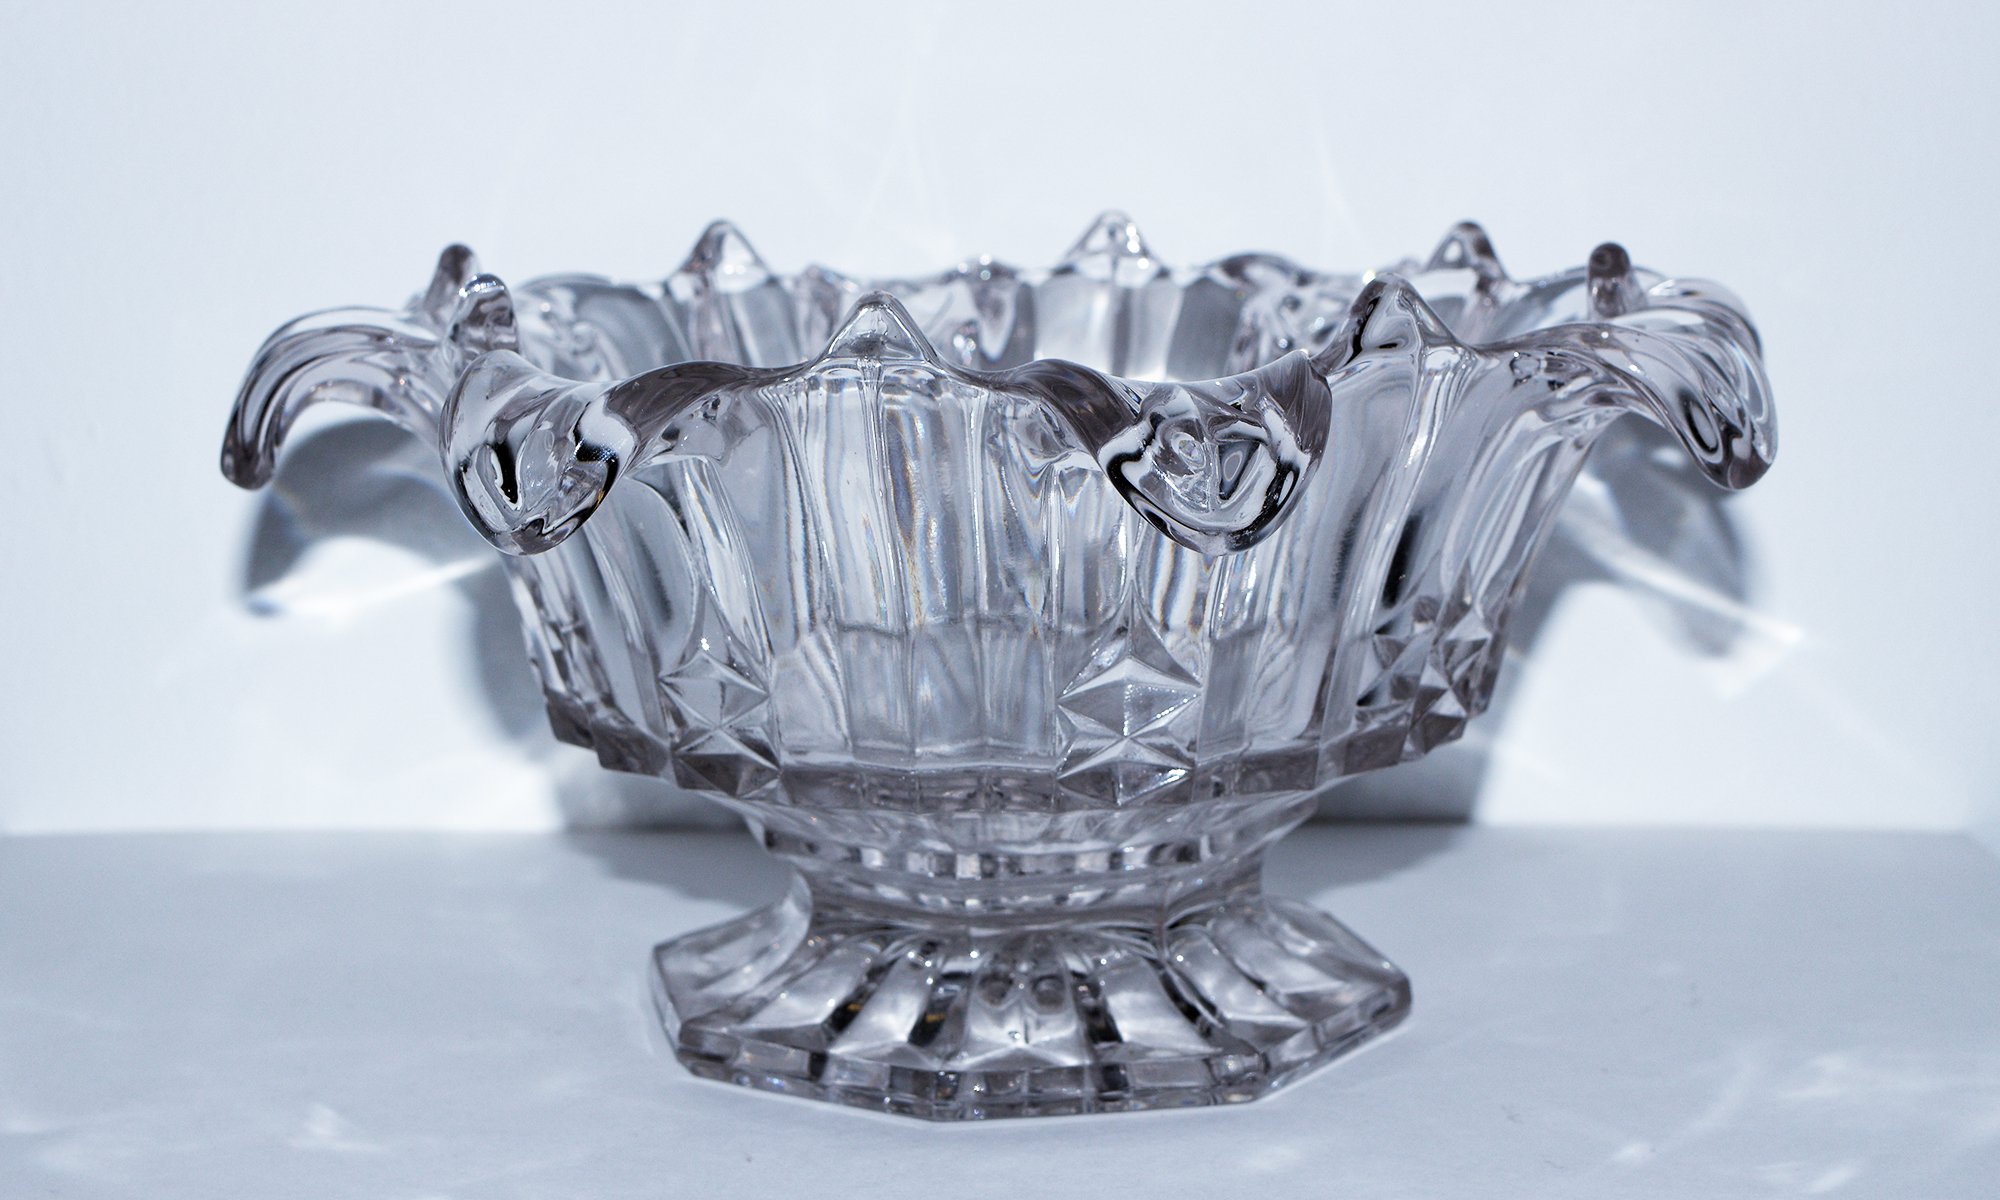
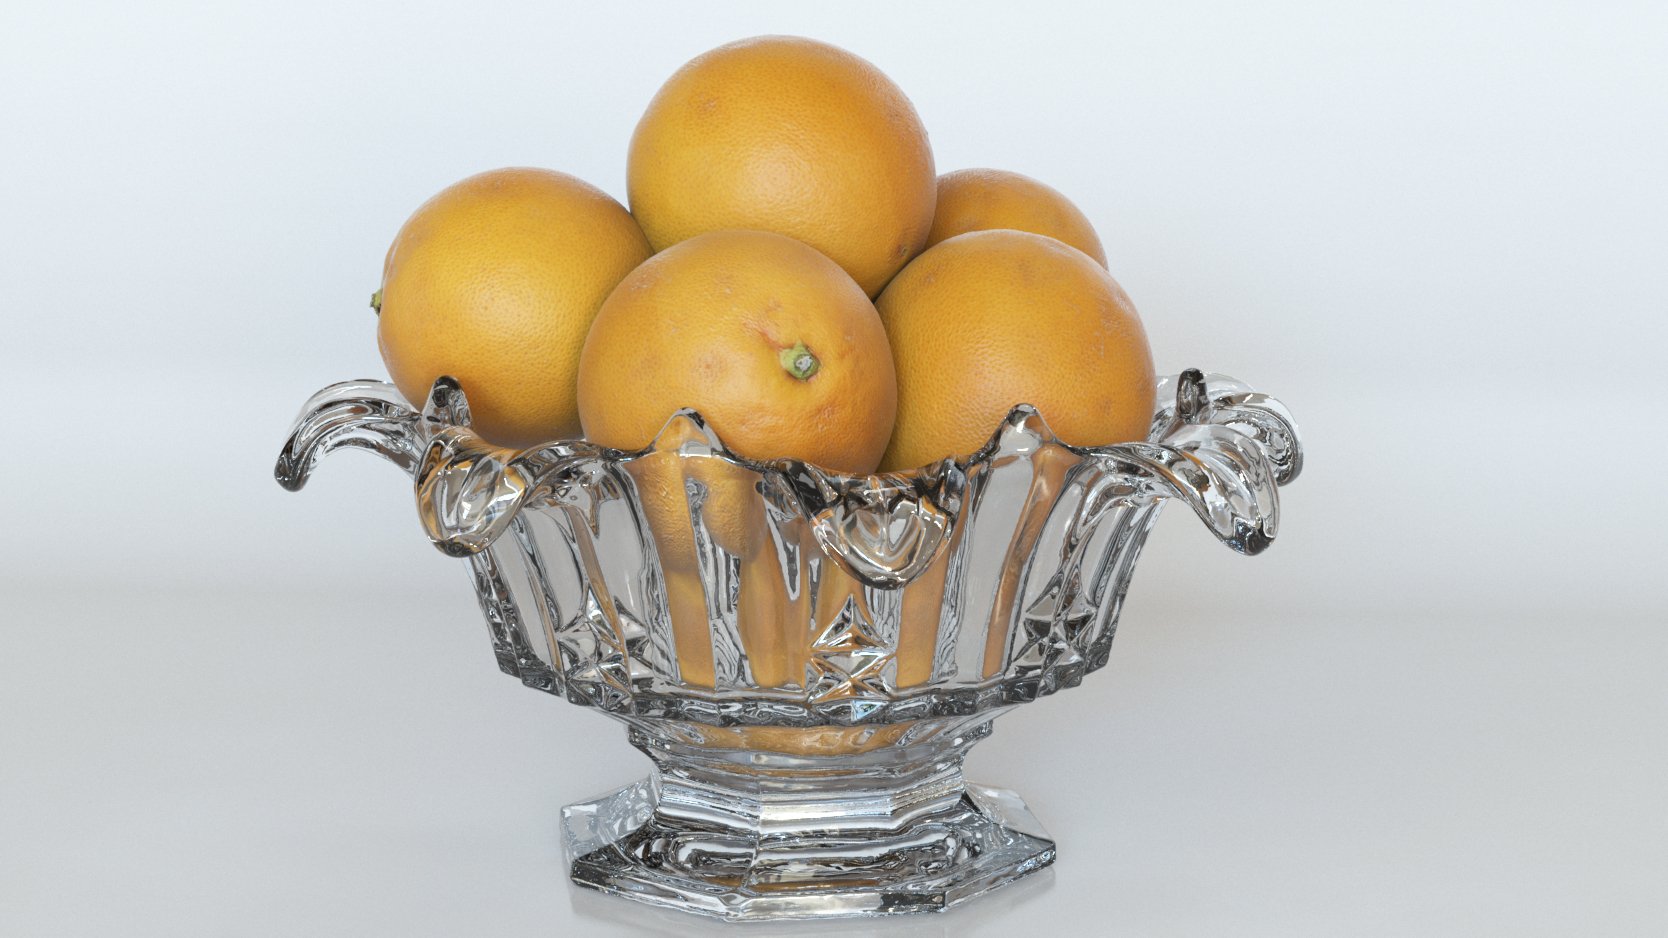
There is only really one way around the problem and that is to coat the surface with something that will scan. I realise that the techniques in this tutorial might not be suitable for all objects such as high-value items that the owner might not take to kindly to having sprayed with matting powder or historical artefacts. But is the only way to really get good scan data from such an object using photogrammetry. For this example, I've chosen the hardest possible subject. A highly polished transparent glass bowl, a photogrammetry nightmare if ever there was one.
So the first stage is to prepare the tools and equipment that you will need.
Camera
Any camera will do but if you want the best results a DSLR with manual exposure ISO and aperture control is best, failing that a point and shoot with manual controls. For this tutorial, I'm using a Canon 100d with a 35mm prime lens.
3D Coating spray
- Available from David this is very fine grain powder that will stick to most surfaces but more importantly can easily be removed after the scan. There are other coating sprays out there but we have found this is the easiest to apply and importantly remove later. Link to spray here
Black water based paint
- For this example, I'm using "Snazaroo classic colours" black face paint as it's PH neutral and is very easily removed. Link to face paint
Toothbrush
- Any type will do as long as it has bristles left and you never intend to brush your teeth with it ever again.
Software
- You will need a copy of either AGI photoscan, Reality Capture or if your budget doesn't stretch to those Autodesk Remake has a free version. For this tutorial I'm going to be using Reality capture as it's my software of choice at the moment but the same principals apply to all the above.
Method
Step 1 Prepare the surface for scanning
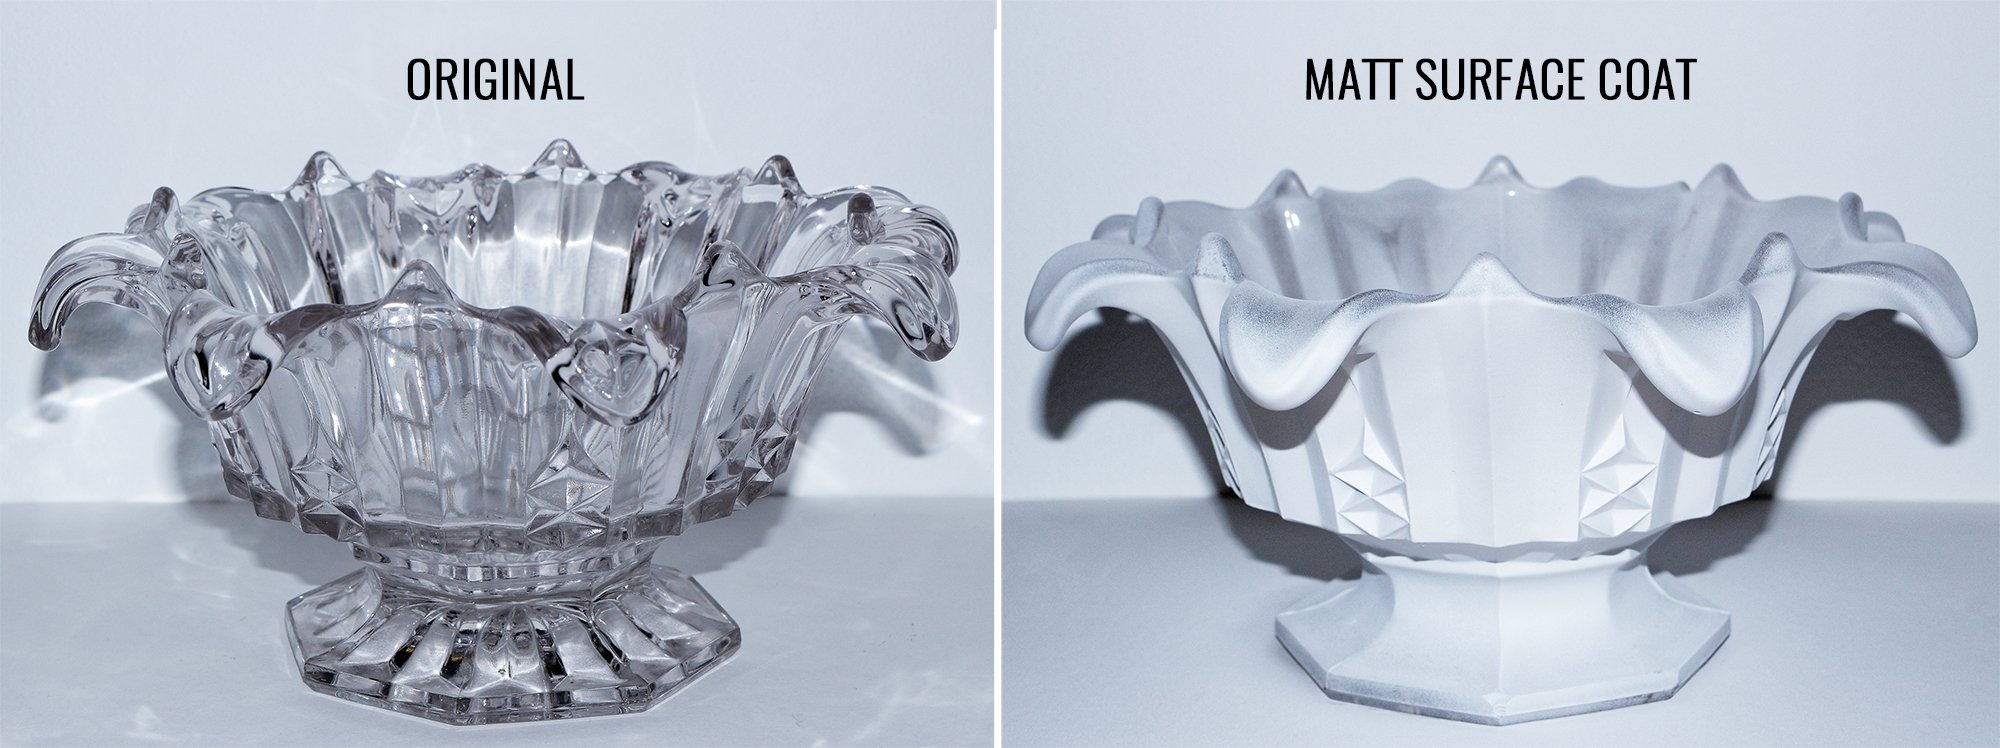
The first thing we're going to do is prepare the surface of the bowl for scanning, as we discussed earlier the only way to capture an object like this is to transform the surface from something featureless and reflective to something a little more conducive to scanning. I.e loads of features with a matt surface.
- Place the object on a piece of wood / thick card or a surface that you can easily pick up and move around without disturbing the subject. The reason for this is we are about to spray it with the coating powder and in all likelihood, you're not going to want to do that in the same location that you capture the images. I would recommend doing this in a large well-ventilated room or outside in the shade where this is very little wind.
- Use the 3D coating spray to apply an even surface to the entirety of the object making sure not to miss any overhanging areas, nooks or crannies.
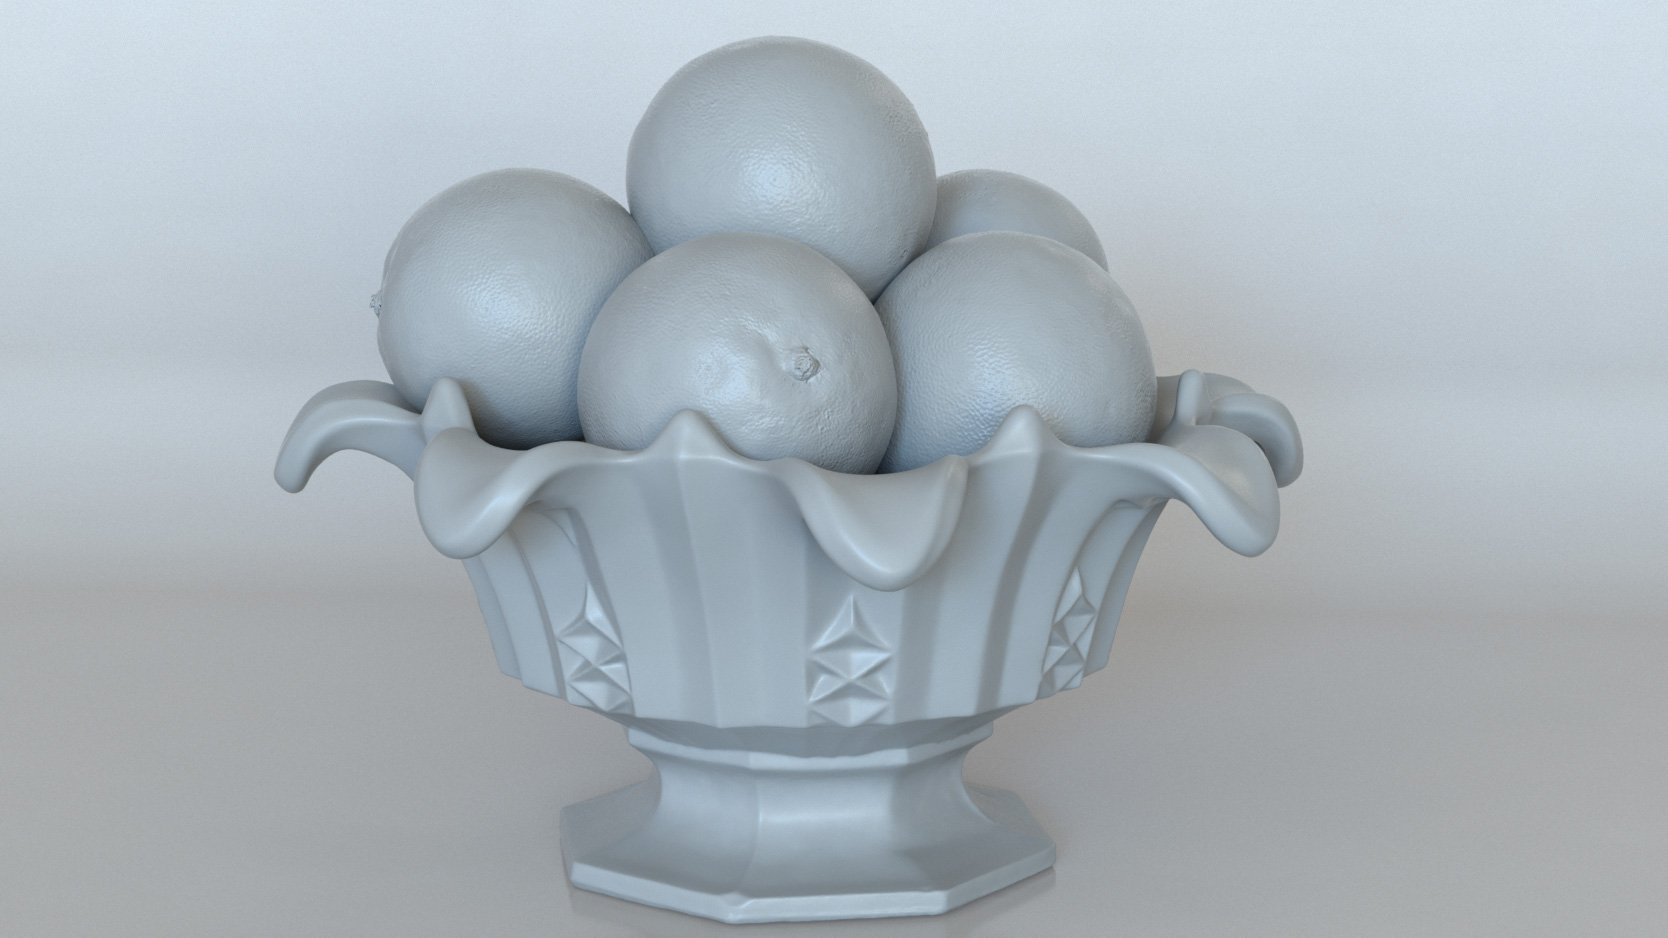
- Leave the spray to dry for approximately 10 minutes, at first, it might appear that surface has not turned matt but as the spray dries into a powder it will become increasingly matt. You should end up with something similar to the image below
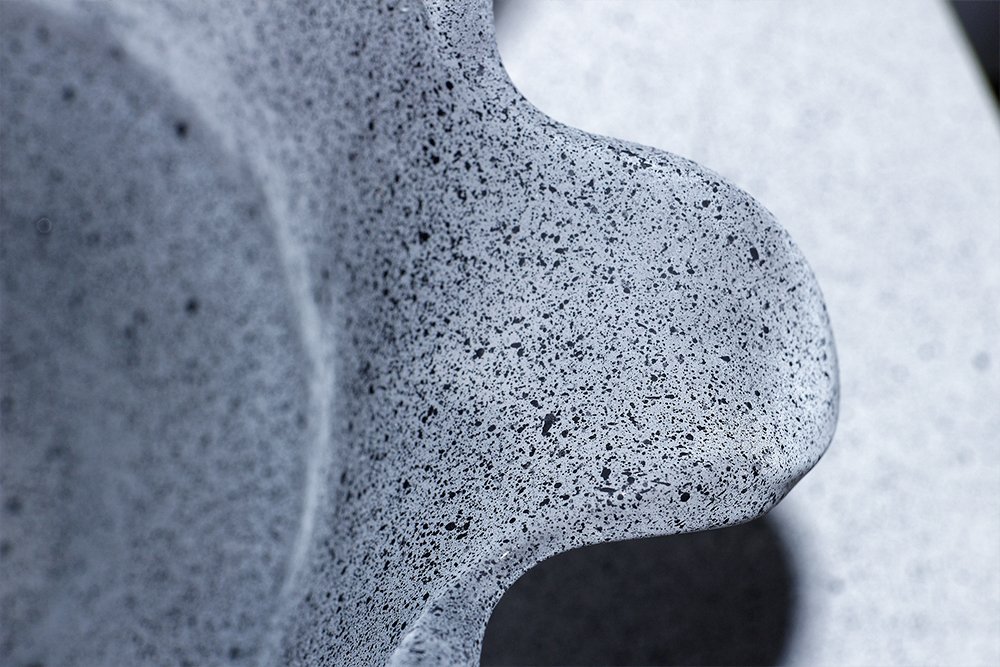
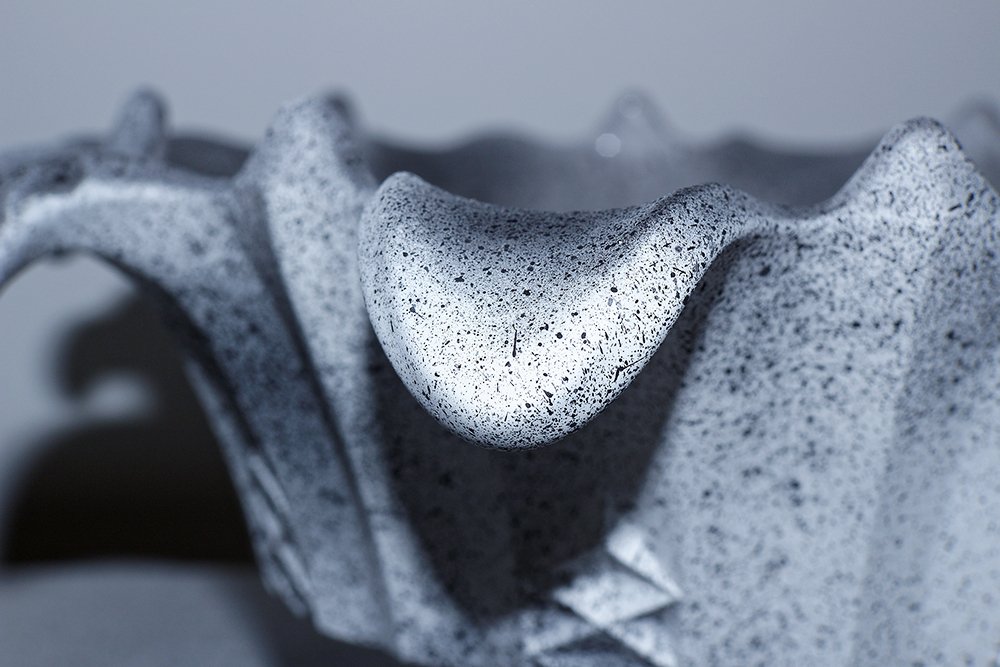
Now for the fun part, take your toothbrush and dip it in a cup of water to make is nice and wet, then rub the bristles onto the surface of the facepaint until they have picked up a good amount of black paint. Now just as you learned in primary school brush your thumb over the top of the toothbrush whilst pointing it at the surface of the object. You will immediately see 10000's of tiny little splatters of paint appearing on the surface, do this for the entire object. This is the detail that we need in order to reconstruct a good 3d scan so remember the more dots the better the scan. You should end up with something that resembles the images below.
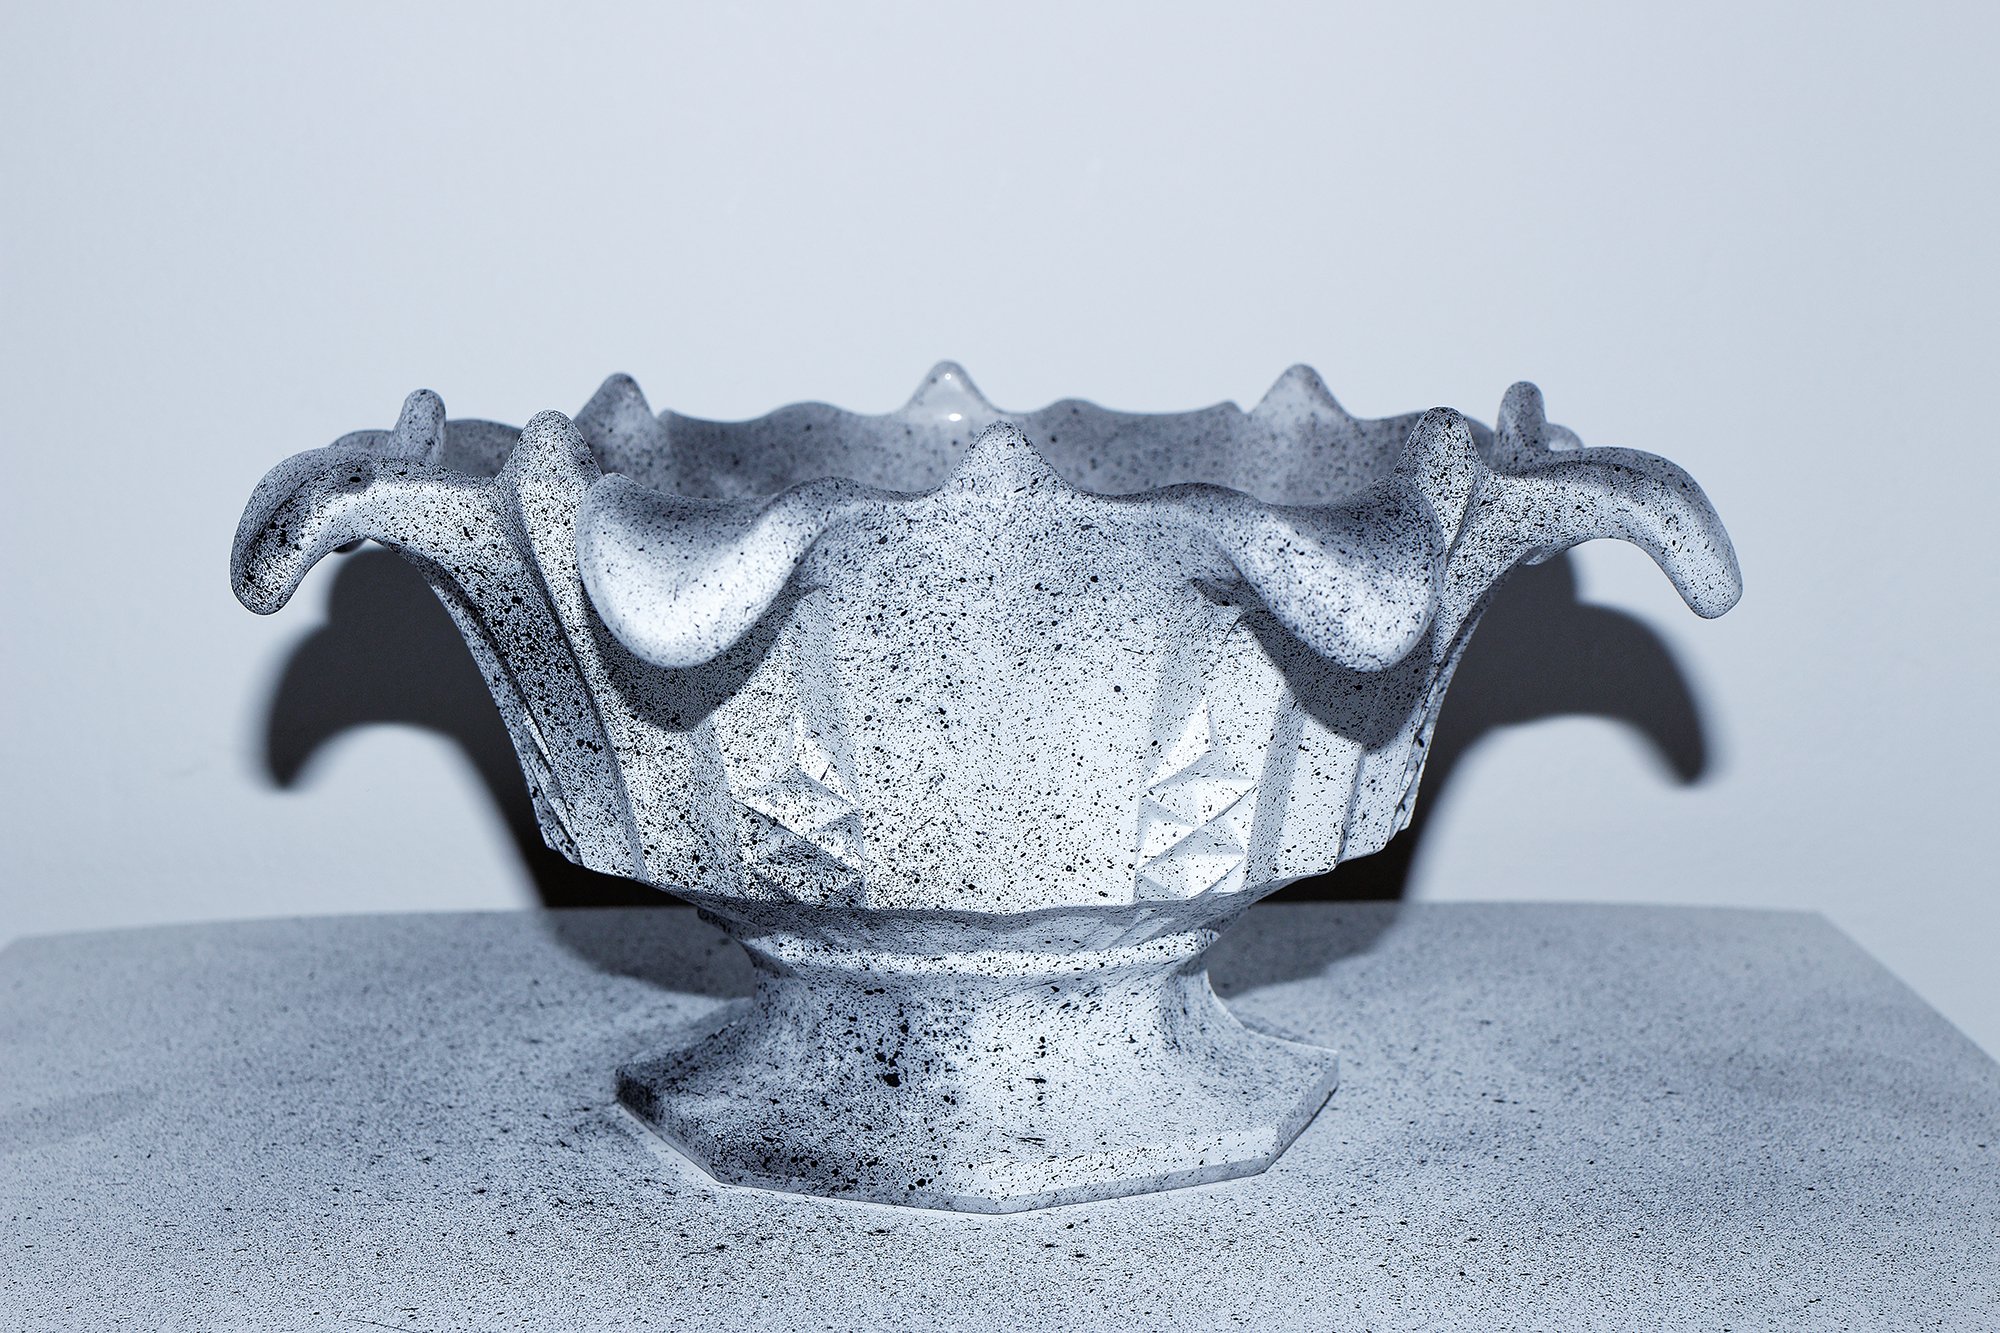
- Wait for the facepaint to dry, at least 5 minutes and we are done. Both the facepaint and the coating spray can easily be washed off after the scan.
Step 2 Camera and location setup
- Make sure your camera is set to the fastest possible shutter speed with the lowest possible ISO for this example I'm using F8, ISO 200 and shutter speed of 1/100th of a second. If you're worried about motion blur you can use a tripod however if you are shooting outside be aware of the weather and changing light. The setting I'm using here i.e 1/100th of a second is not really fast enough to get blur-free handheld shots and with F8 there will be quite a shallow depth of field. I'm doing this because I want to show what can be achieved with not only lower quality cameras abut also relatively low-quality images not everyone is going to get it right the first time and I figured I'd make it hard for myself. If you want really sharp images I would say 1/200th of a second minimum shutter speed and minimum aperture of F11 this will, however, mean bumping the ISO up to around 800 so be aware of noise.
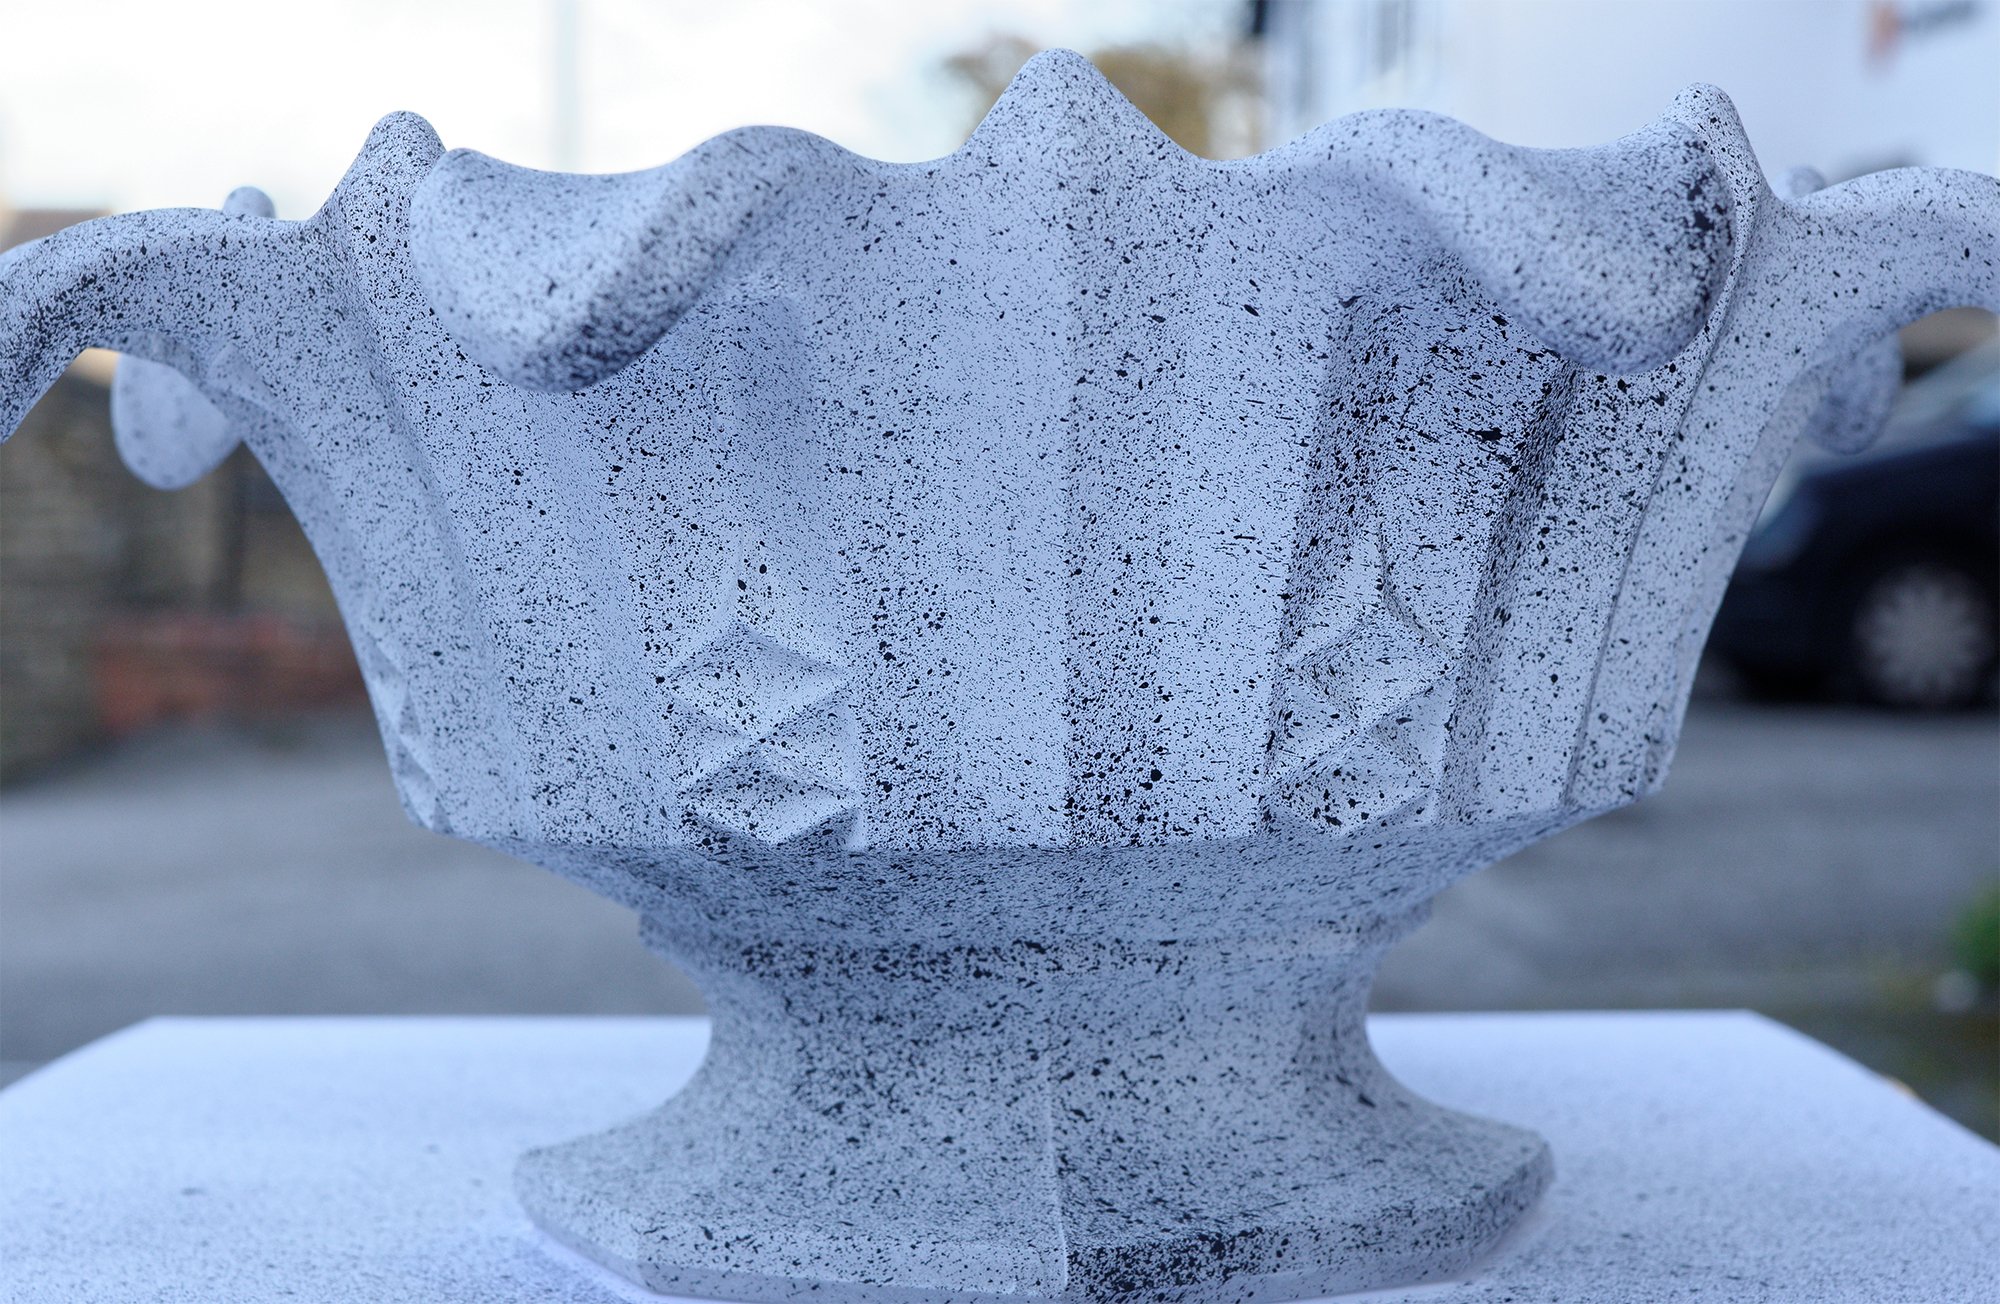
- For this example I'm going to shoot the images outside, we do have a studio but I want this tutorial to be relevant to everyone not just those with access to a professional lighting setup. When shooting it's important to choose a day when the sky is overcast or somewhere where there is no direct sunlight, shooting on a bright day in the shade can work as I have done here. Below is an example of an image taken from this shoot.
Step 3 Shooting
- Move around the subject taking pictures in a cylindrical motion. The technique I'm using here is a very simple tried and tested process. I'm going to pick 8 points around the object, so every 45 degrees or so. Starting down low on my knees at the first point I take 3 shots from the same position moving the camera about 10 cm left then up between each shot. Then I move around the object about 45 degrees and do the same again. once you I've completed the lower ring of shots I move to a crouch so that the next ring will be slightly higher and do the same again remembering each time to take 3 images with roughly 10cm offsets on each one.

- I can't express the importance of overlapping images enough, for every shot that you take there should be at least 1/3 of the same area viewable in the last shot. When taking the three shots from the same position you should only offset the actual framing by only a few centimetres.
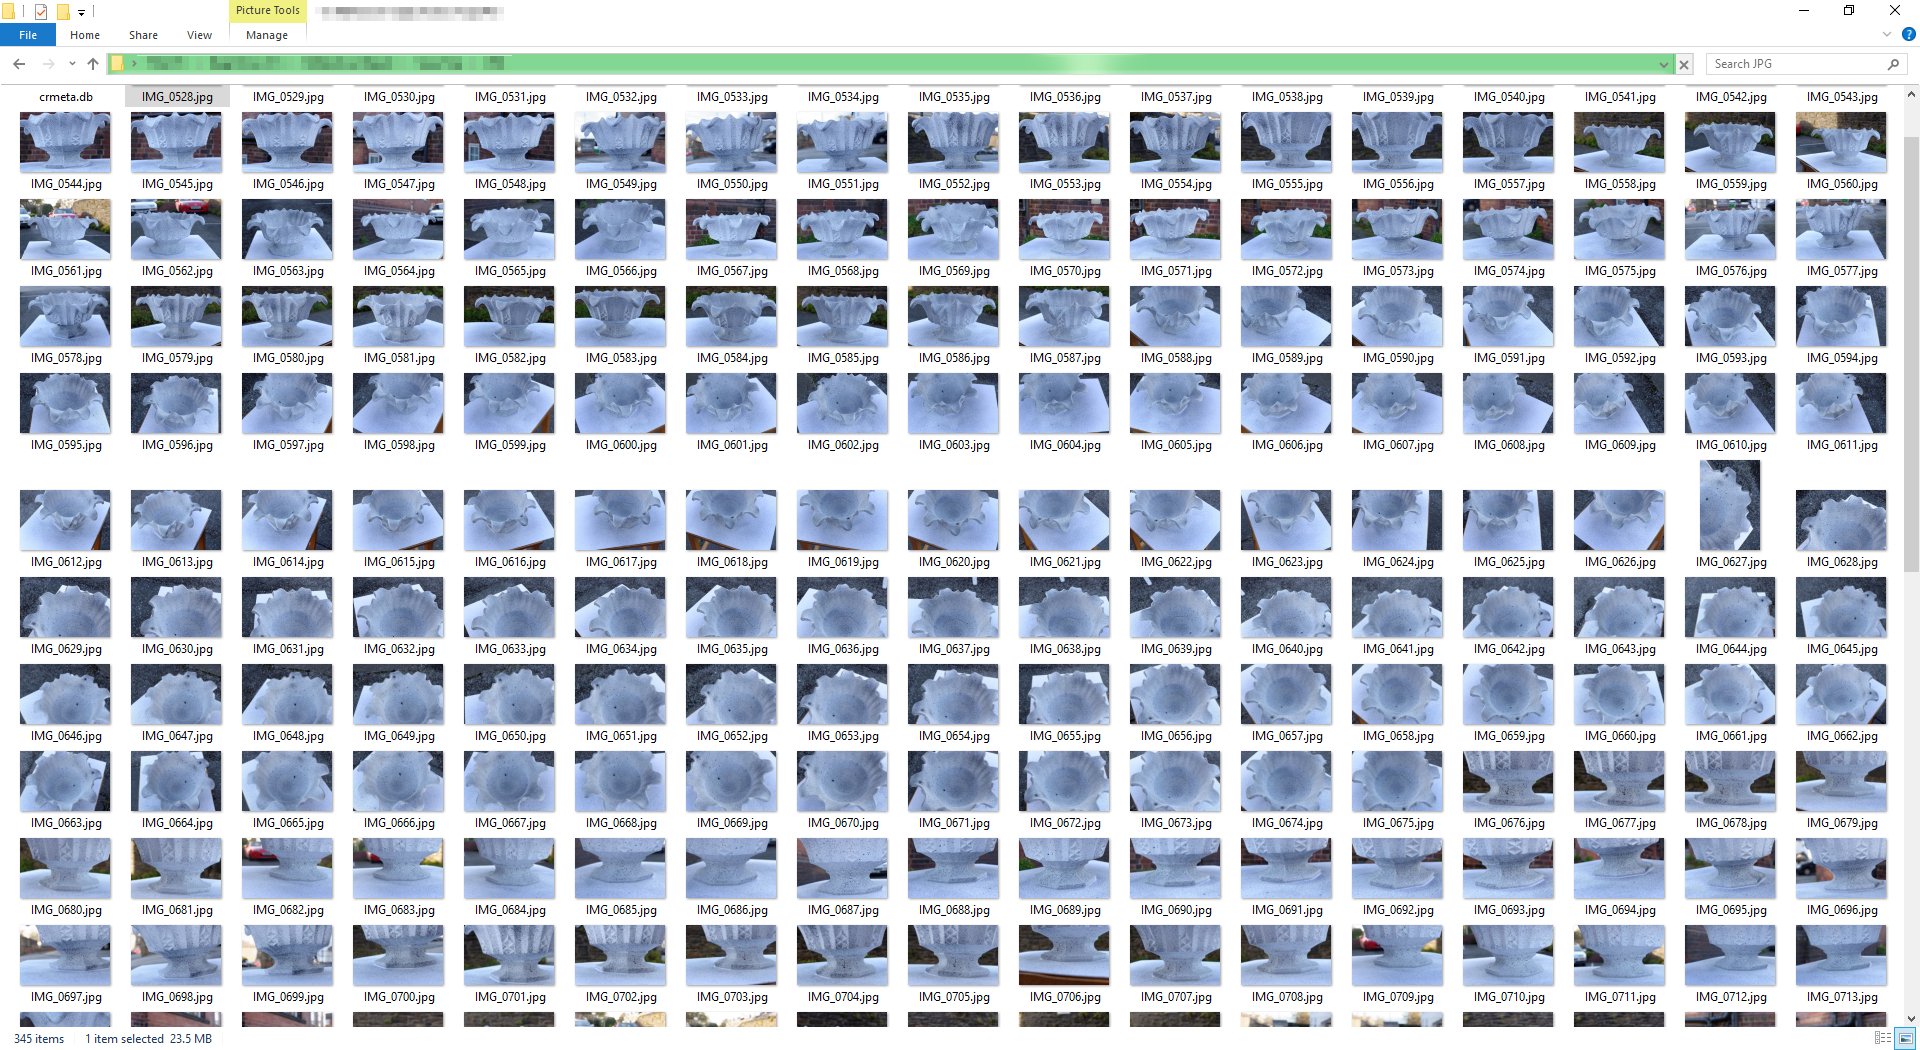
- For this example, I shot around 345 images In RAW format, however for the purposes of this tutorial I have converted them to JPG because not everyone has a camera that shoots RAW.
Step 4 Converting images to geometry
Ok so that's the scanning part over, pretty simple really. What I'm going to do now is show you how to build clean and combine the scans you just shot in order to create a high-resolution scan of our reflective object.
- Im going to be using Reality Capture, you can use AGI photoscan or any of the other solutions out there but this is our software of choice but the steps are more or less the same for AGI, Align, Build, Export.
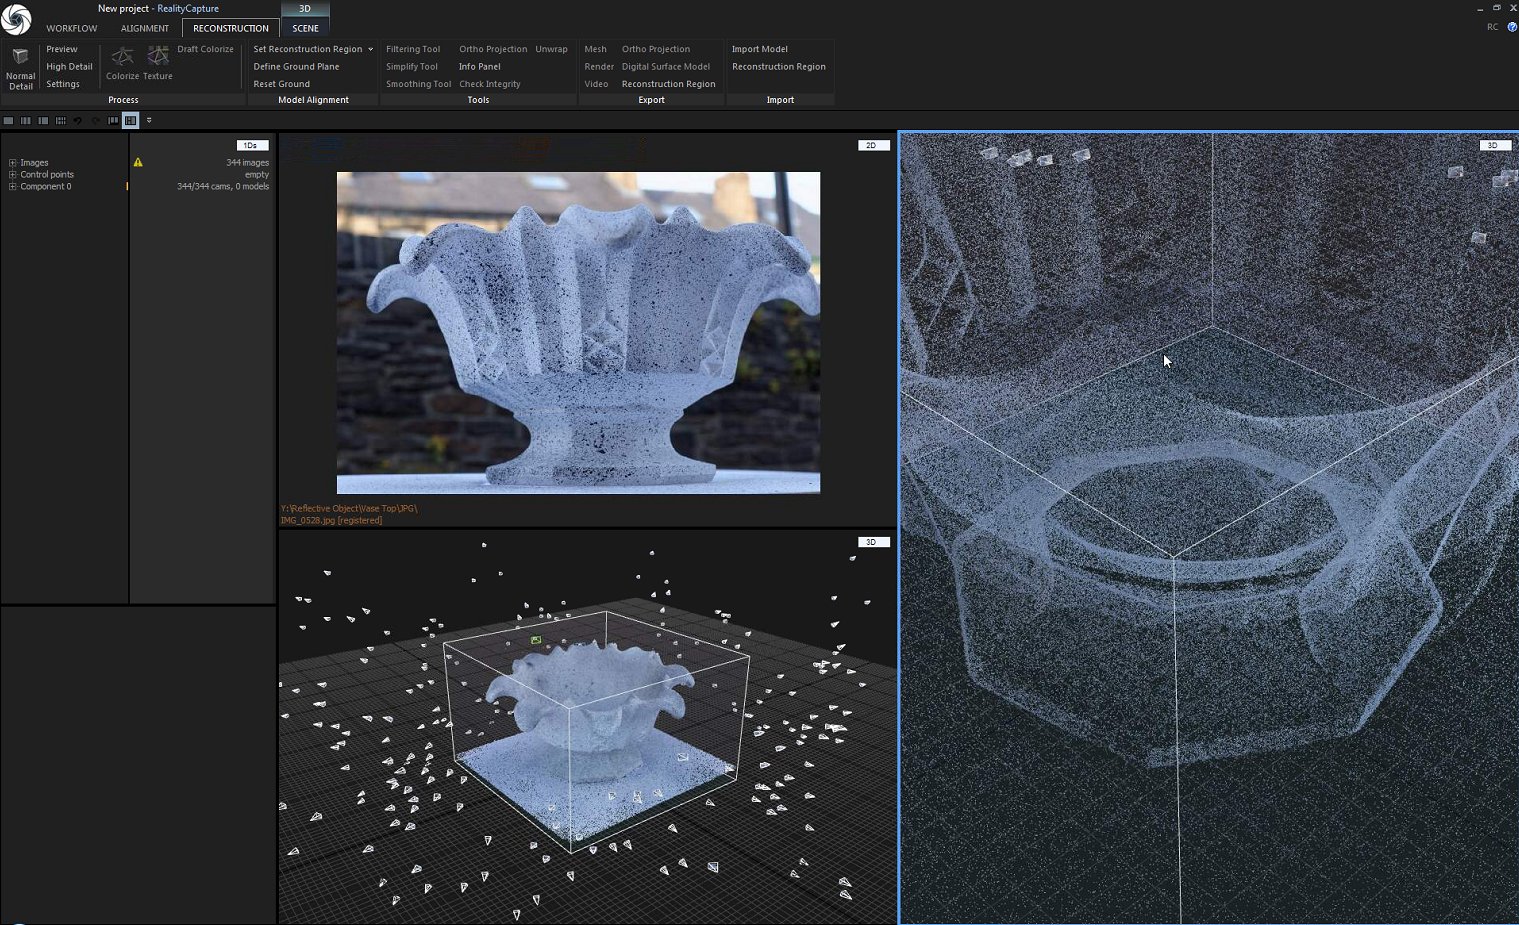
- The first thing we're going to do is load all the images into Reality Capture (RC for short) Simply hit the "Align Images" button and depending on the speed of your computer within 10 minutes you will have a sparse point cloud as shown below. This determines the positions of the cameras in preparation for the high detail build. As you can see here all 344 of my images aligned perfectly.
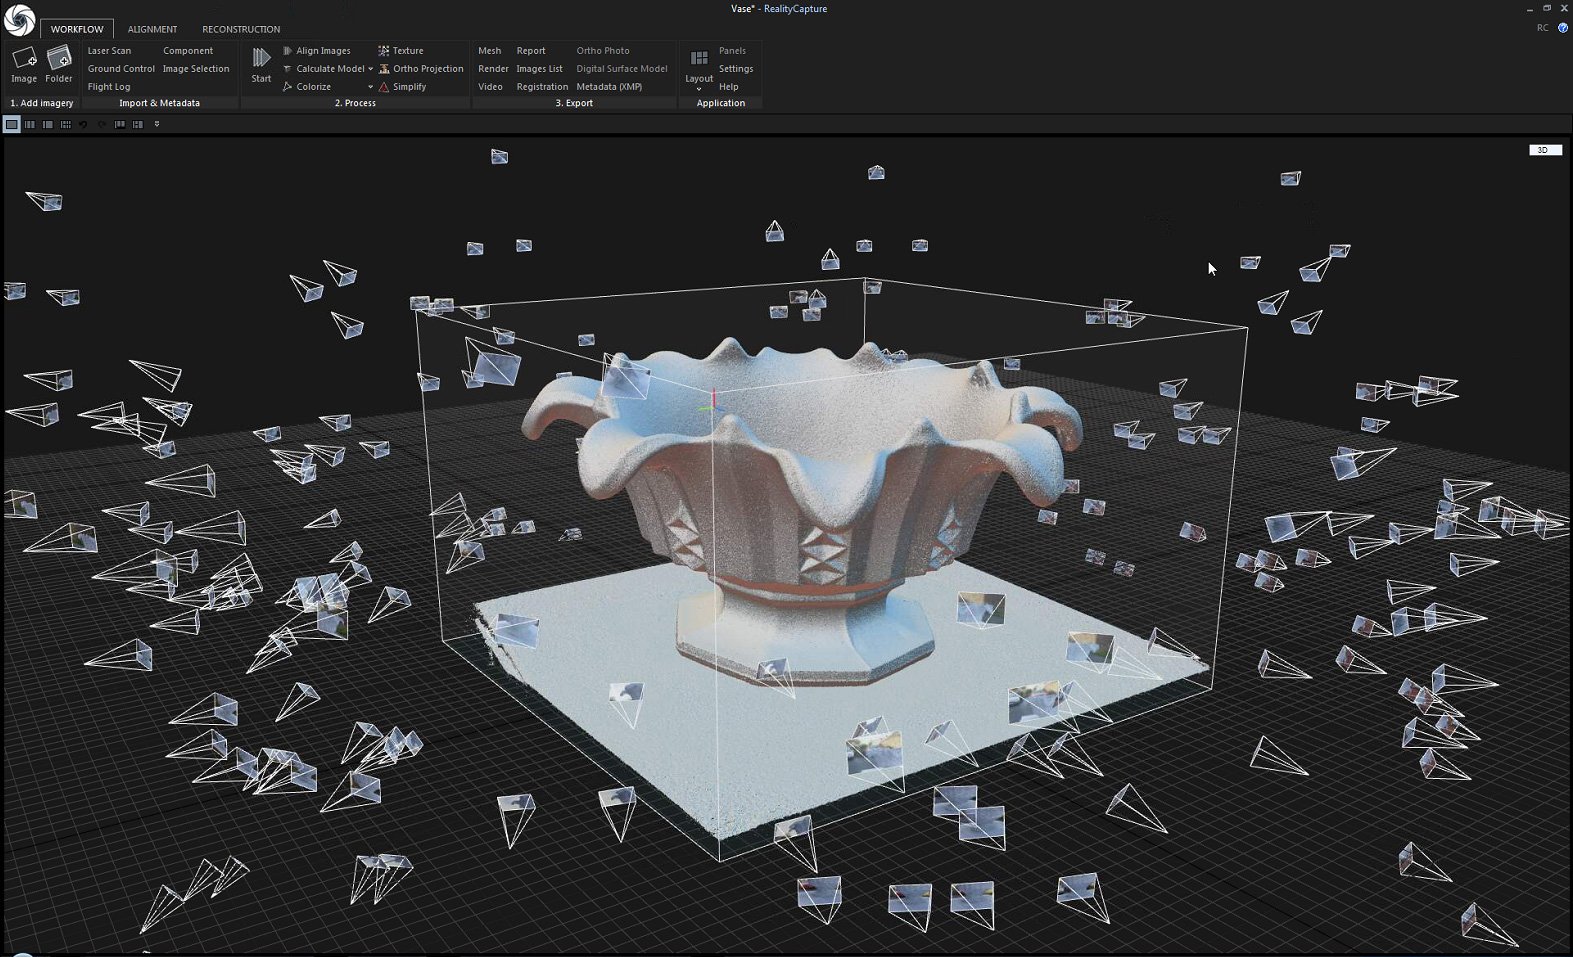
- Once the alignment is complete we can click the "High Detail" button to begin the dense point cloud generation. This can take a long time, our 20 core Xeon machine took about 2.5 hours to generate this mesh so please be patient with it. some slower machines could take up to 10 hours. The best thing to do is to leave it going overnight and wake up to a nice mesh. You can see the dense point cloud in the image below
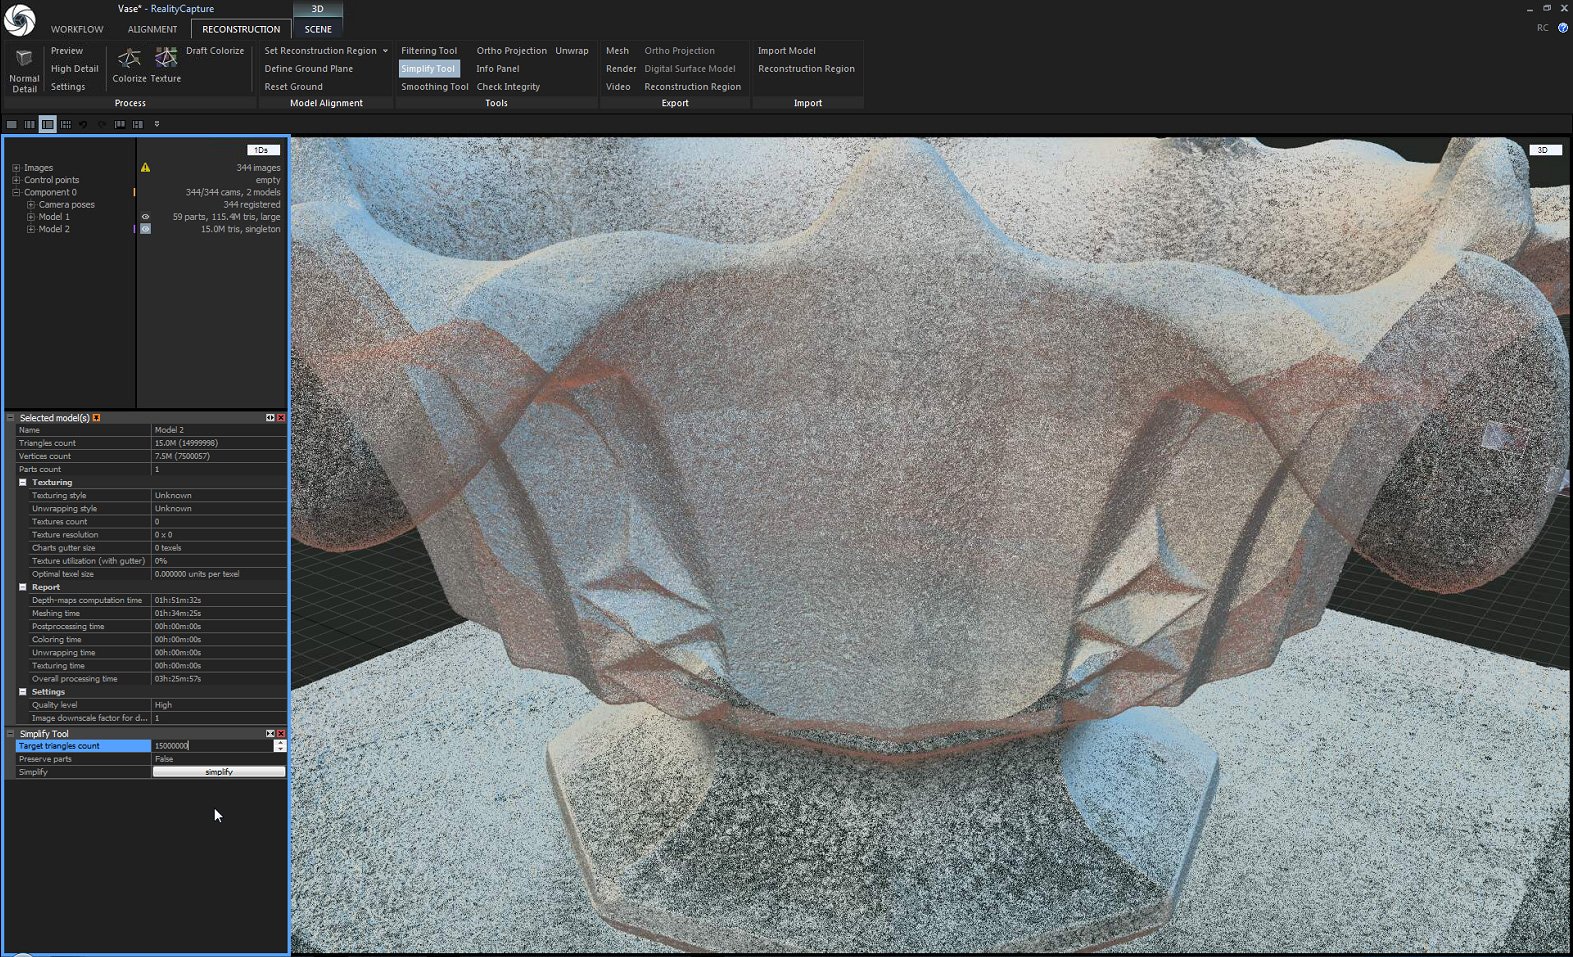
- Because this point cloud is about a zillion polygons we need simplify it before we can export. Click the "simplify" in the reconstruction tab and enter the desired polygon count. For this example, I'm using 15 million polygons. It's quite a large mesh but I can easily load it into ZBrush and decimate it further from there. Try experimenting with the level of simplification to find a setting that works best for you. The image below shows the simplified point cloud that we will be exporting.
- Hit the "Export mesh" button in the reconstruction tab and chose a location to save the file. I'm exporting as OBJ as its compatible with Zbrush.
Step 5 Zbrush Cleanup
Because I shot this outside with a fairly low shutter speed 100/th of a second and only F8 there is quite a lot of out of focus sections of the images and not all the shots were perfectly in focus due to shaky hands. This is one of the problems shooting outside without a tripod. Anyway, the result of this is that there is an amount of high-frequency surface noise covering the entire object. I'm not going to go into great detail about how to remove this in Zbrush as this will be the topic of another tutorial. But if you follow a few simple steps it's fairly easy to do.
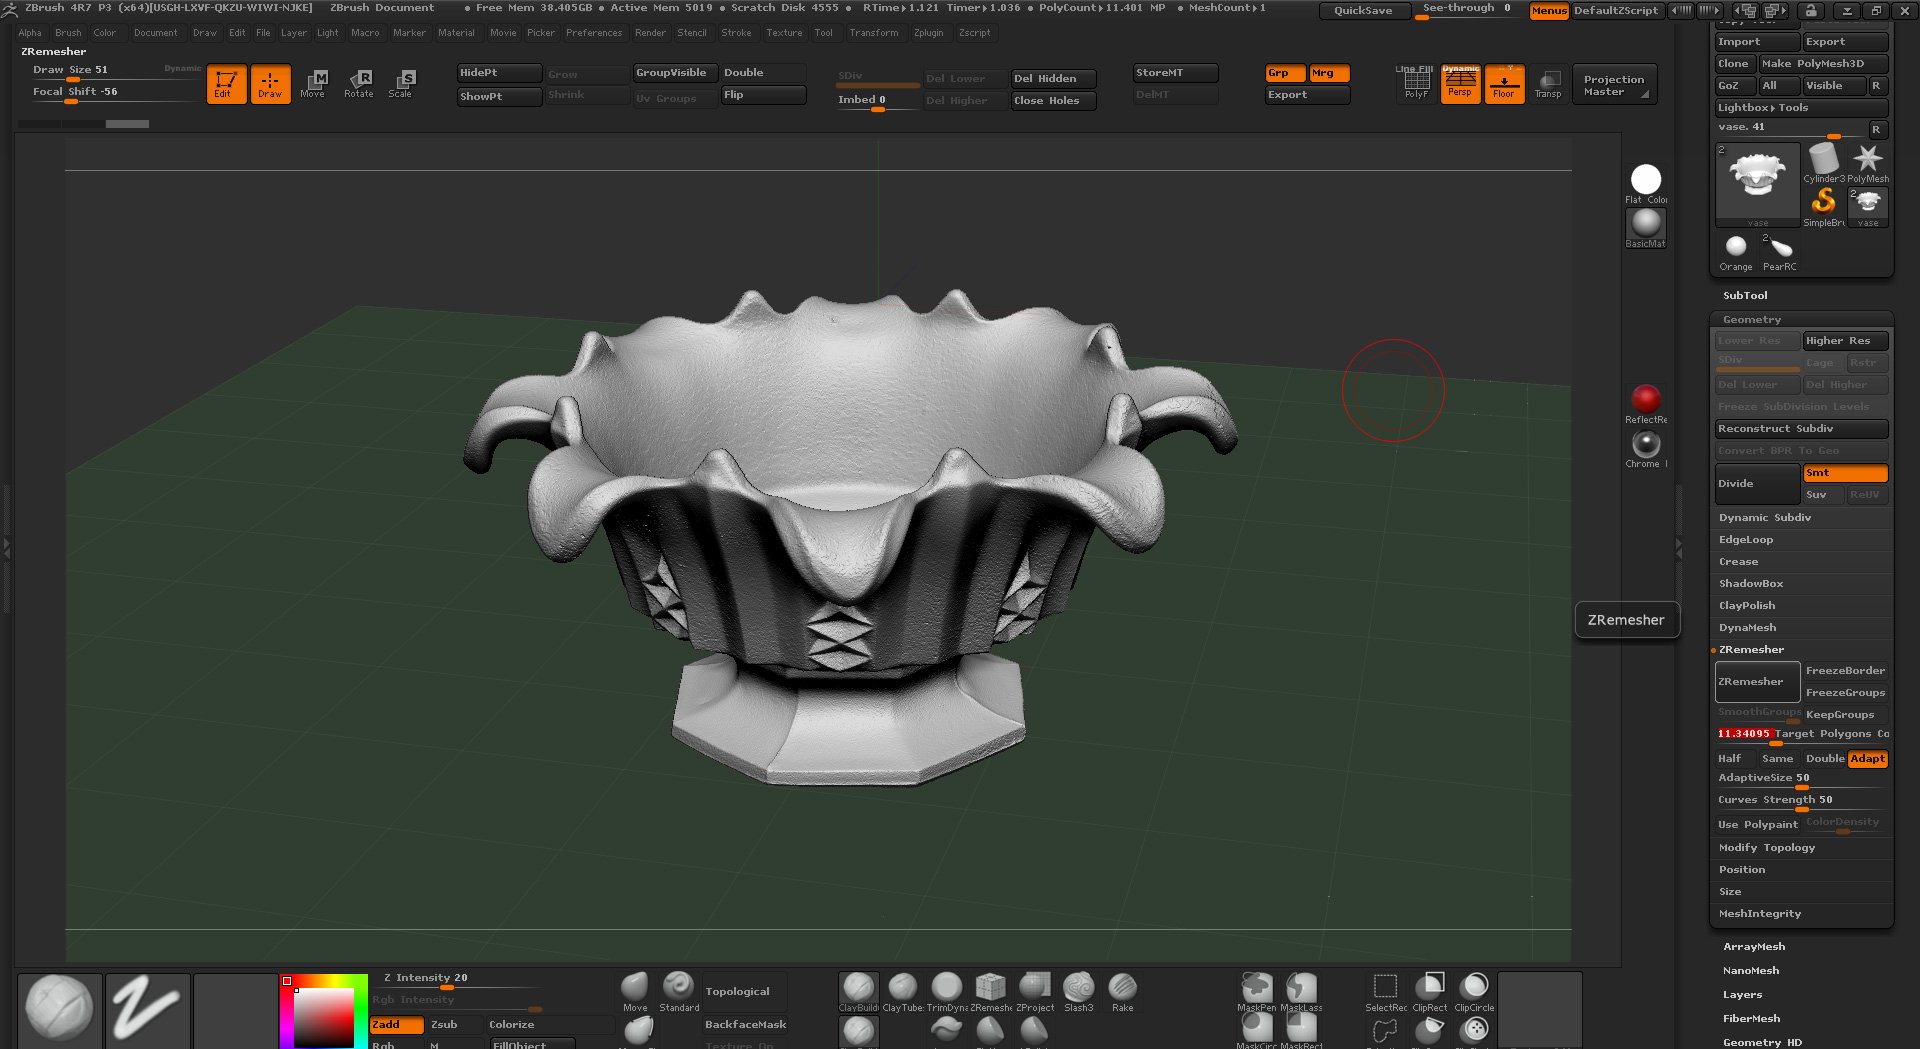
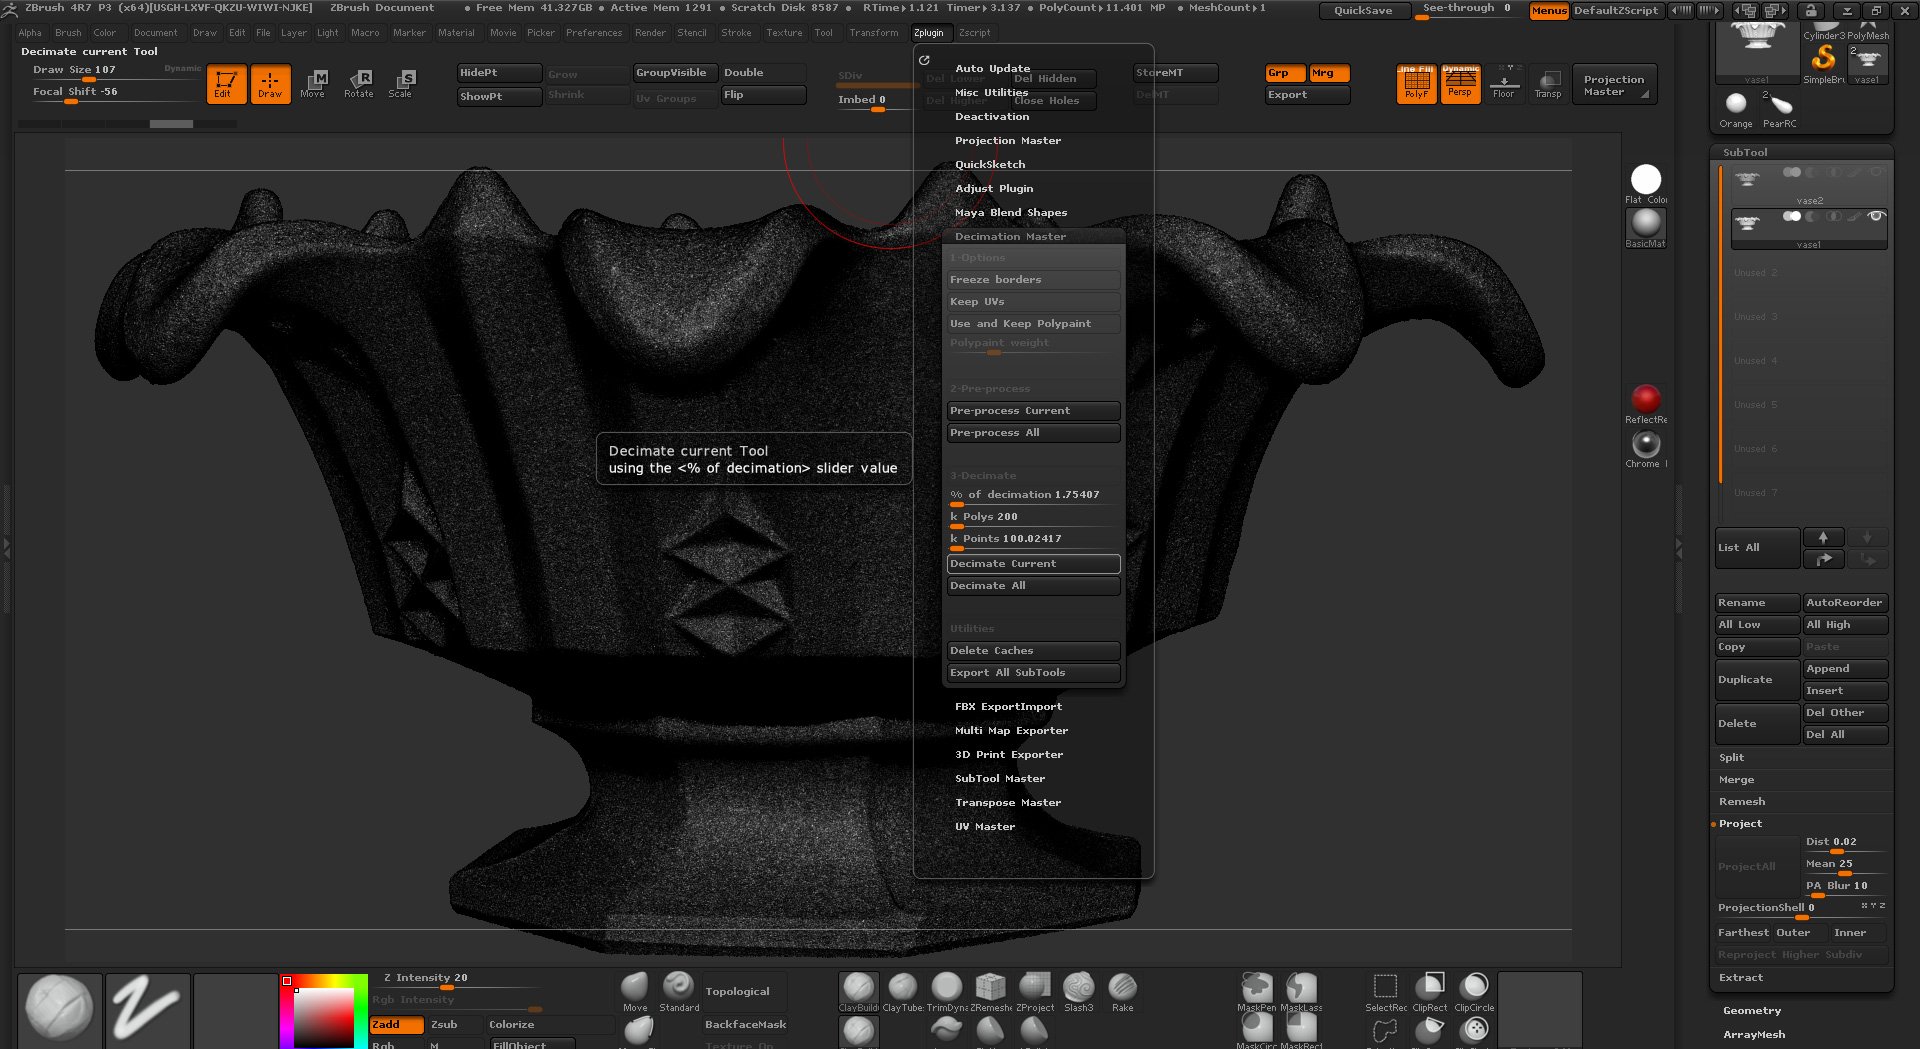
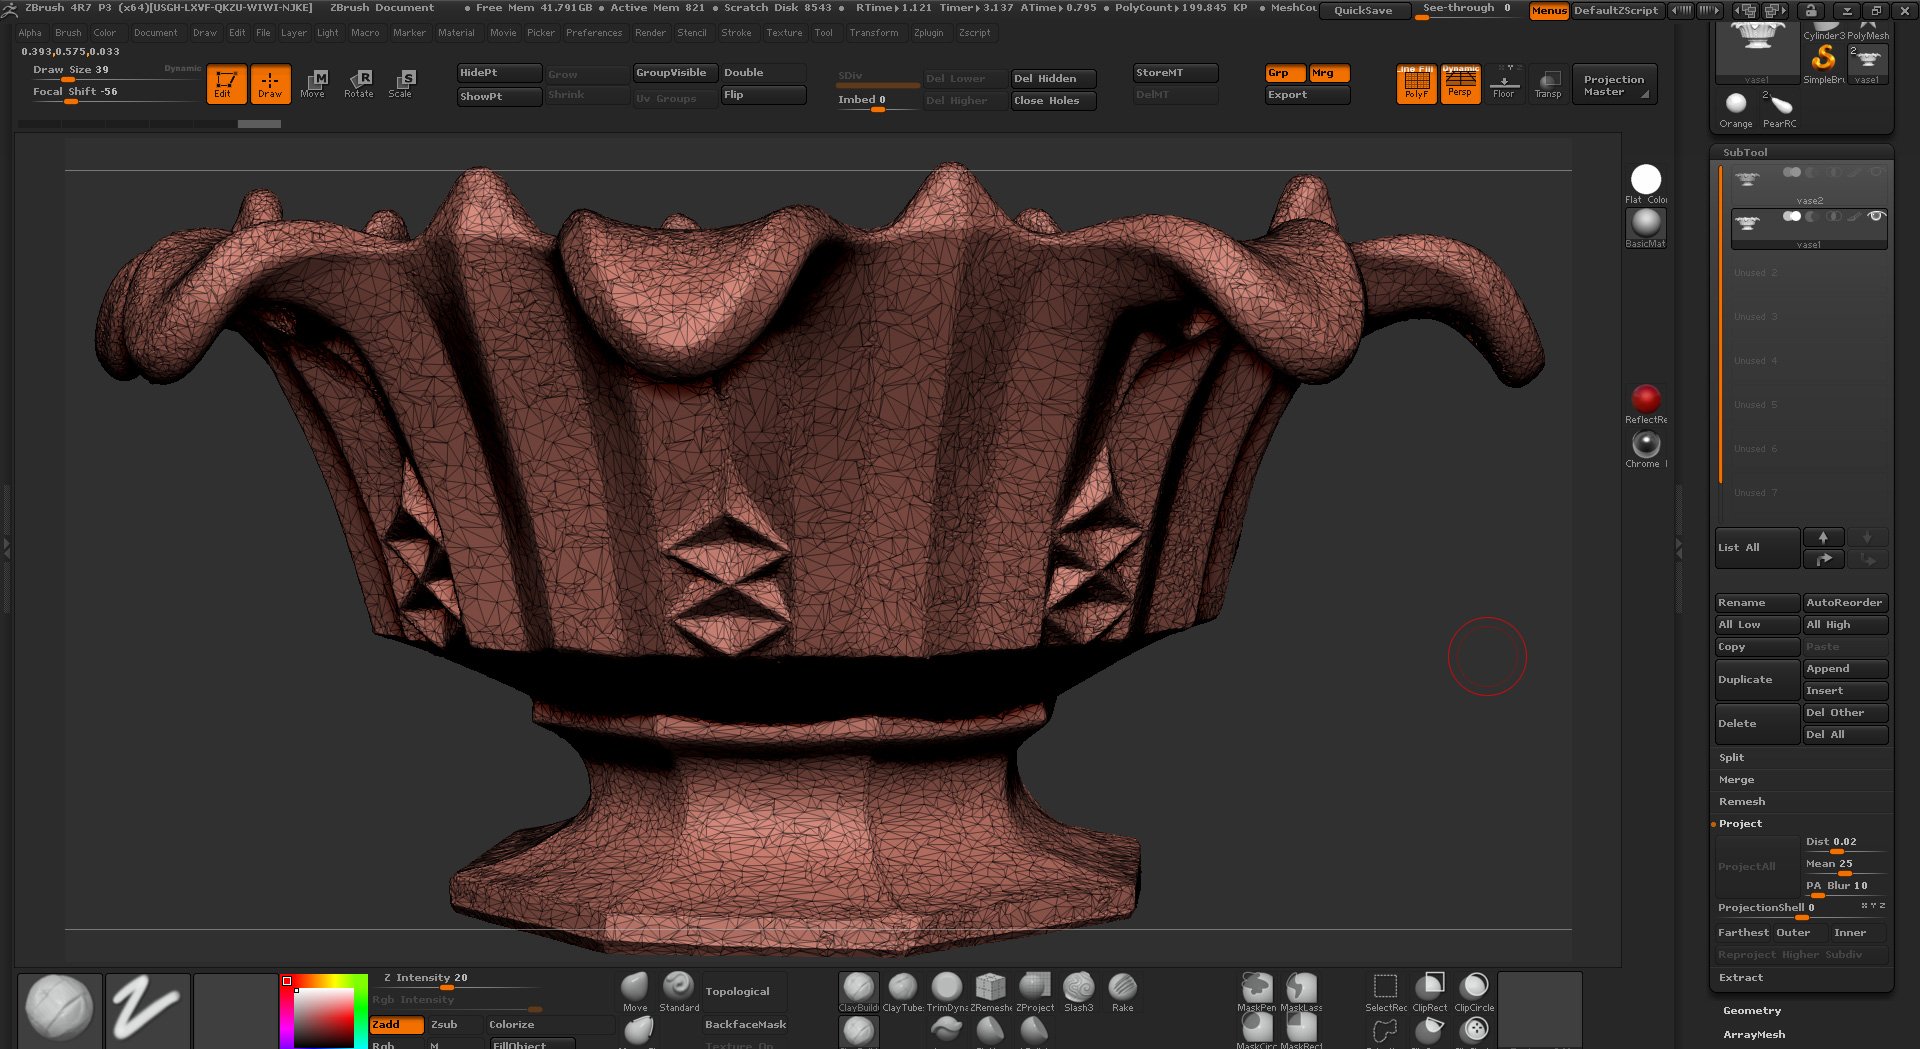
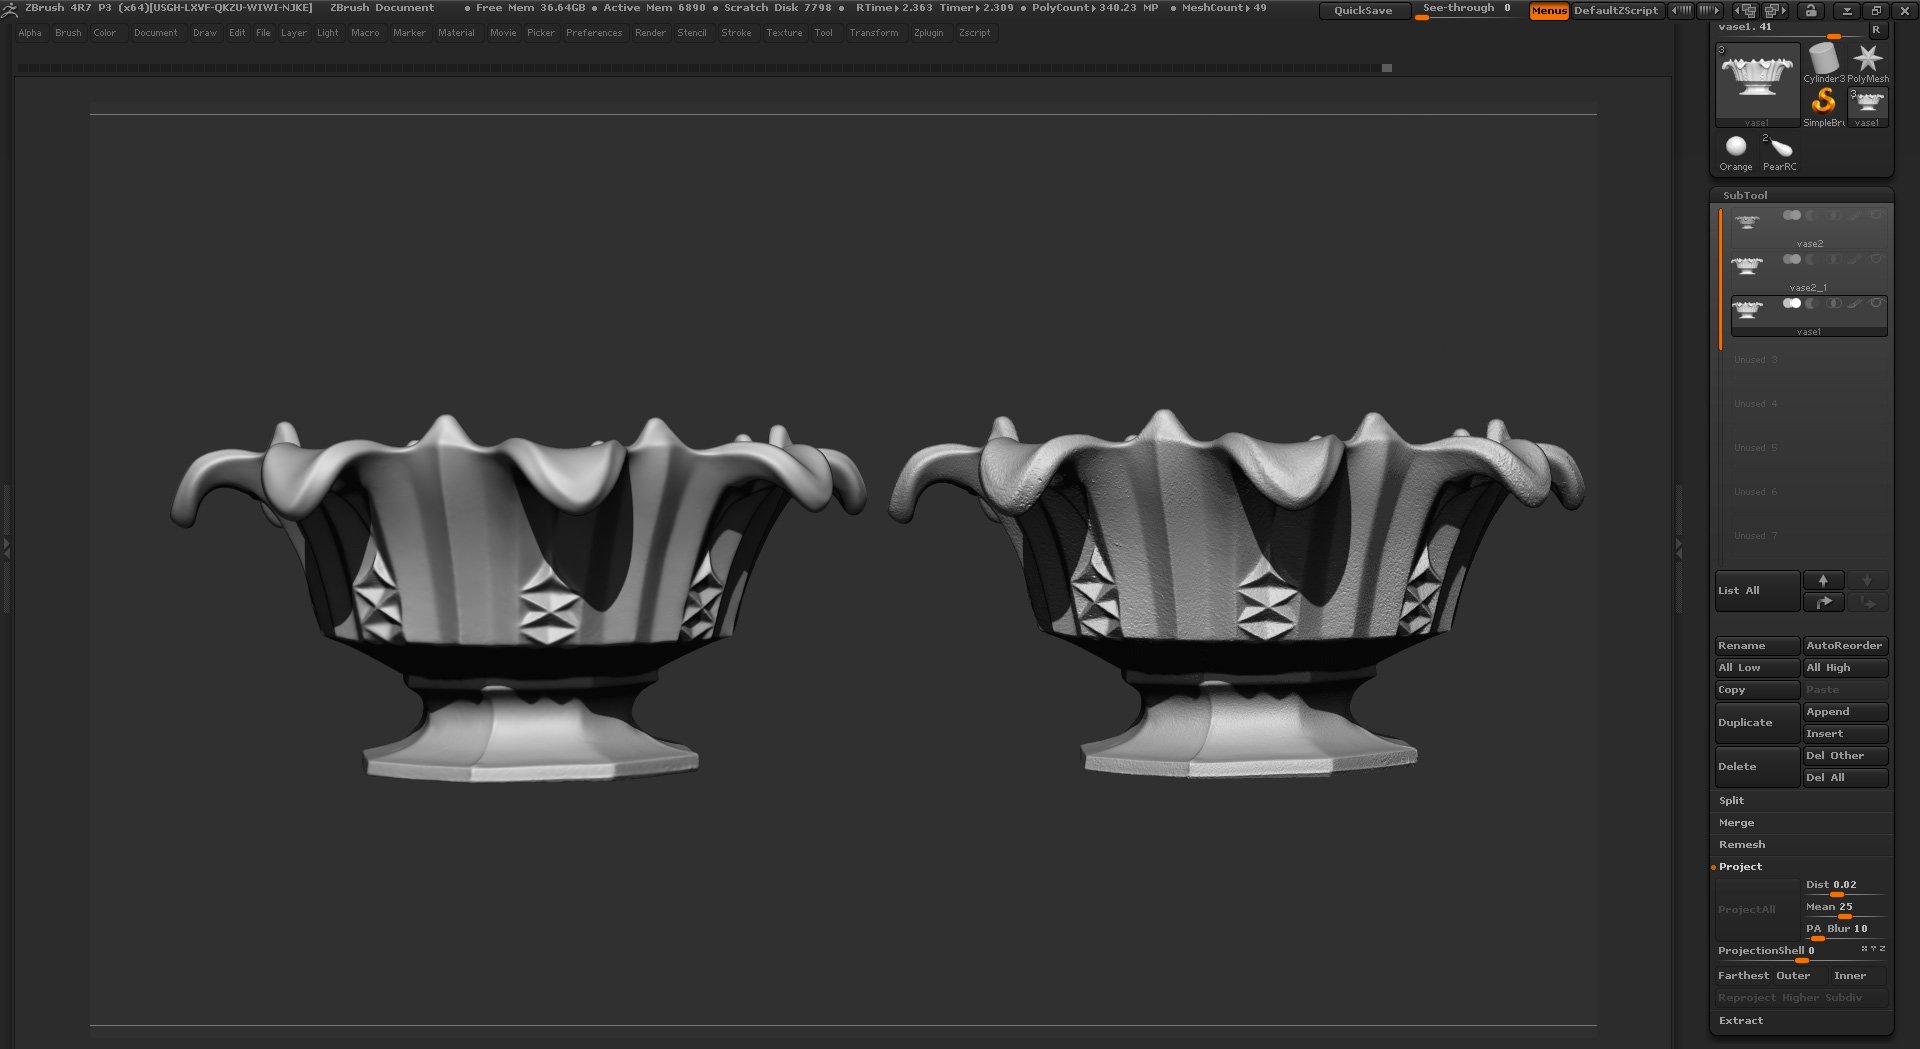
- Decimate the mesh down to around 200k polygons, this will increase the size of the triangles whilst still maintaining the shape of the mesh the upshot of this is that it does a fairly good job of removing any high frequency noise.
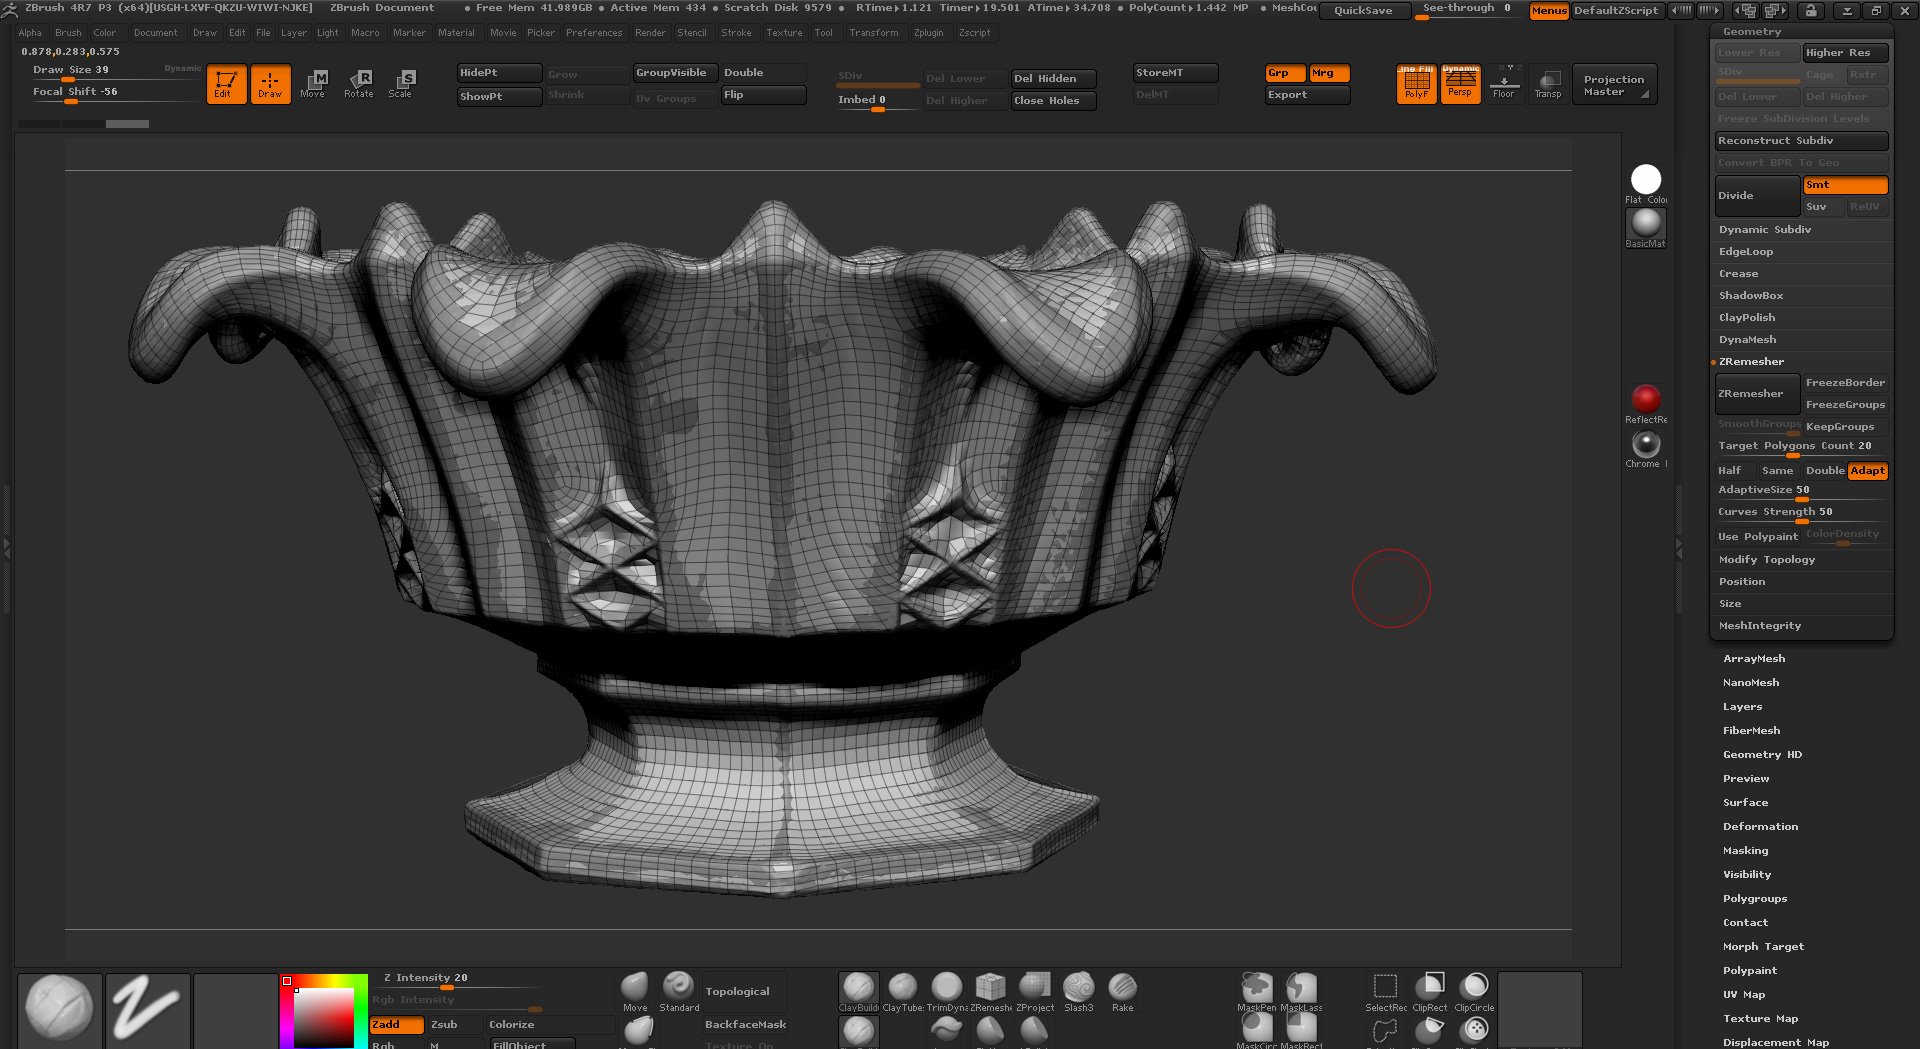
- Once the decimation is complete duplicate the layer and Subdivide the model 2 times and then perform a Zremesh on the duplicate layer with the slider set to around 20.
- Subdivide the new Zremeshed object 5 times and use the projection tool to project the details from the first decimated subdivided mesh back onto the new Zremeshed object.
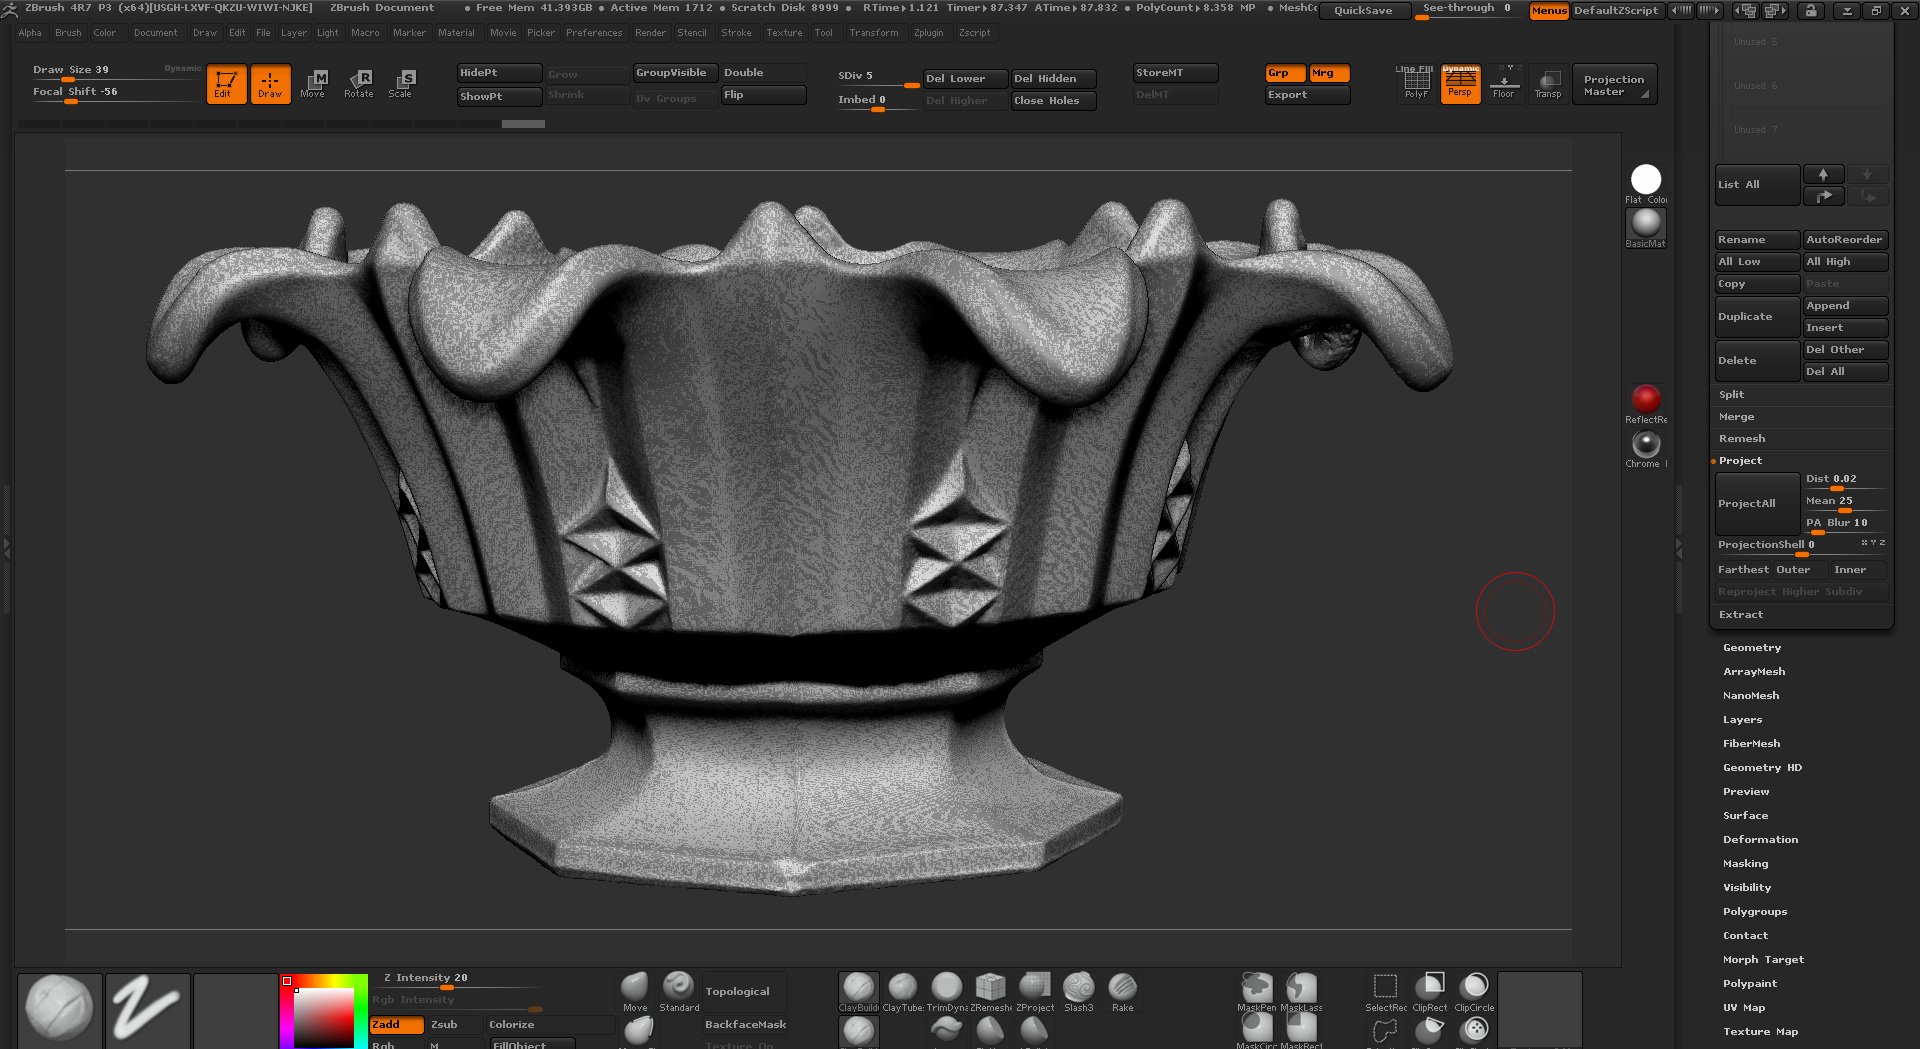
- Go in with a small smooth brush and carefully remove any remaining areas of noise, the Clay buildup tool is especially helpful for filling out areas that might have suffered from occlusion.
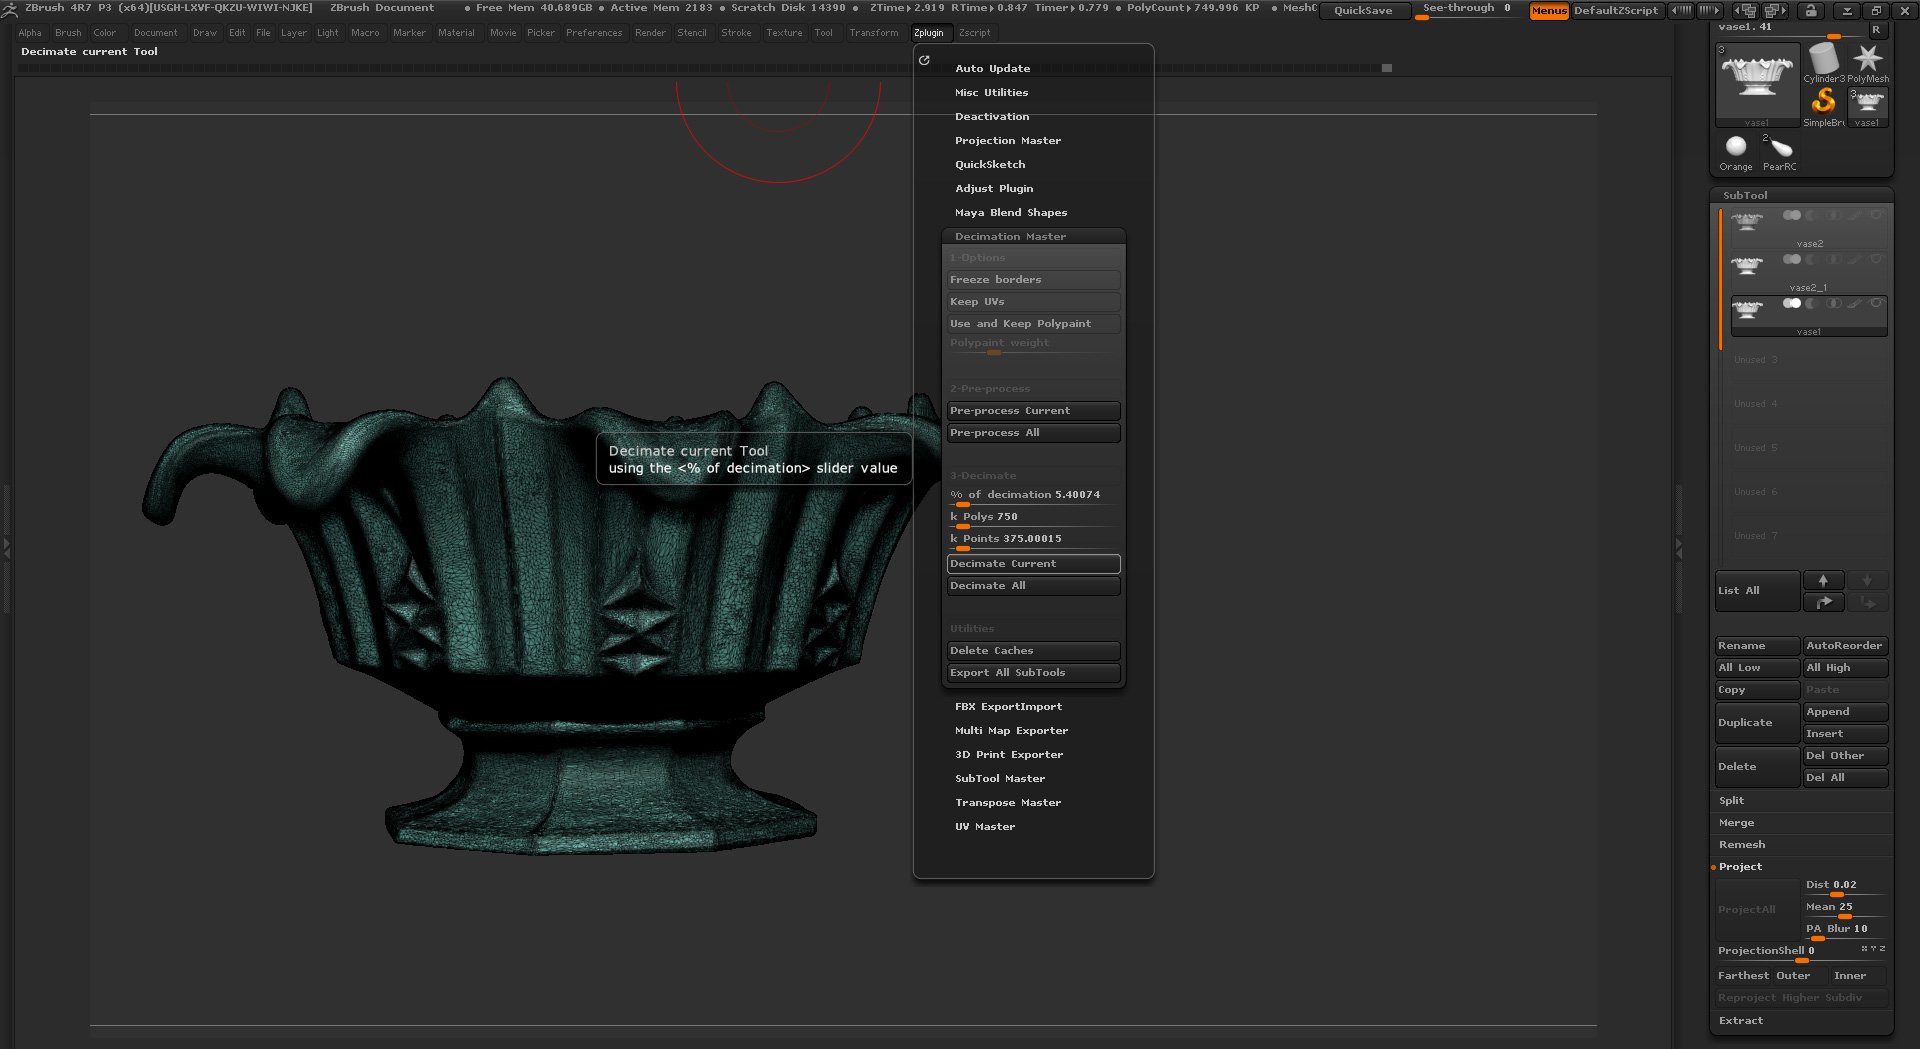
- Finally were going to do one more decimation on the cleaned re-meshed scan so that it can be exported to your rendering software of choice, for me that's Modo. Im goiI'm to use a setting of around 750 which will give me a 750,000 polygon object, small enough to easily load into modo but large enough to retain all the details. We could go down the route of exporting the low res mesh with a displacement and normal map, but for the purposes of this tutorial Im going to with the fastest and simplest technique.
Step 6 Rendering
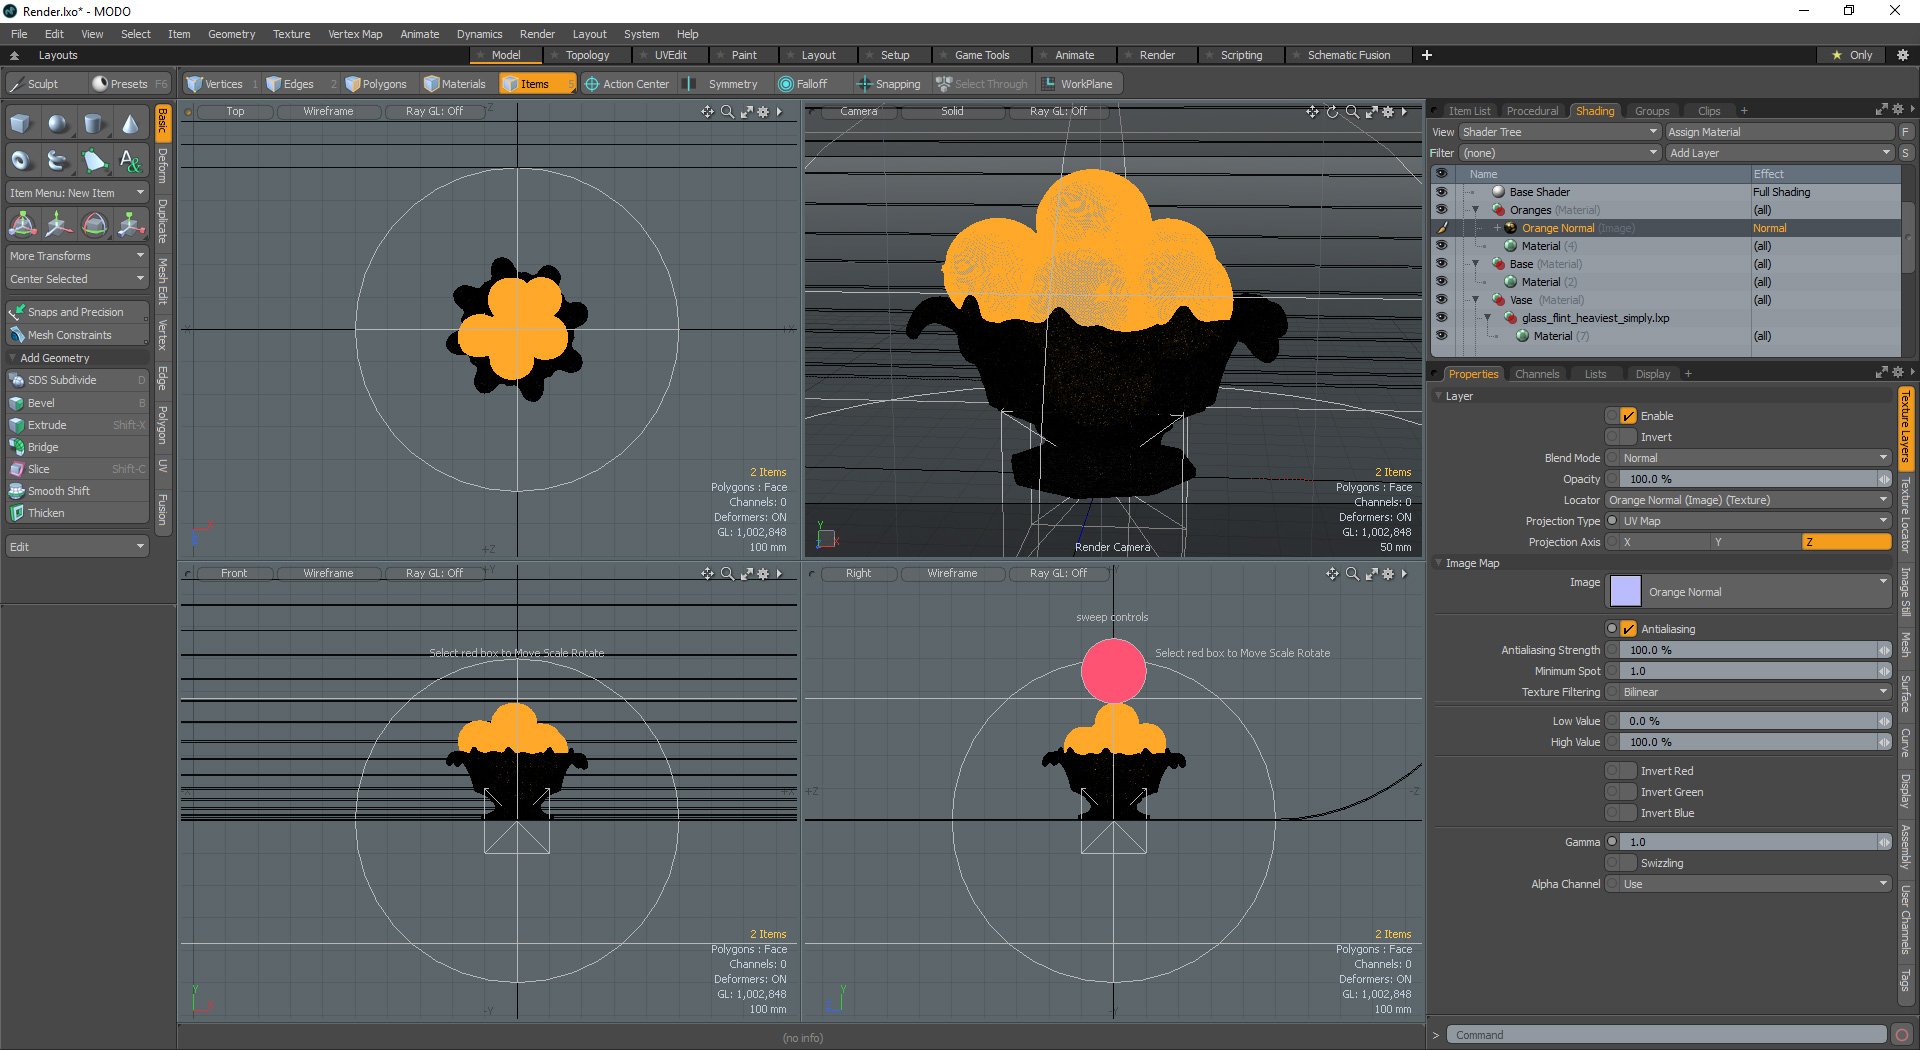
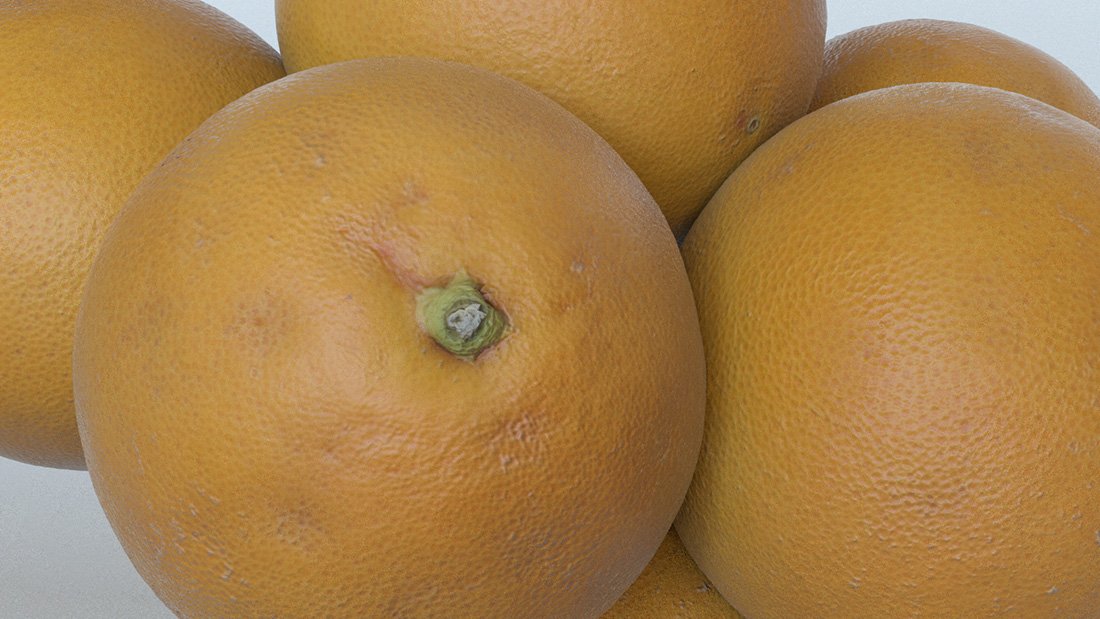
I'm going to be rendering this model in Modo, for the simple reason that its quick and easy to get amazing results with very little effort. For this render scene, I also scanned some oranges using the same techniques described before but without the surface coating, and orange has enough surface detail to scan easily.
- The first thing is to import the model file>import. I positioned the oranges in Zbrush and imported them into the scene the same way.
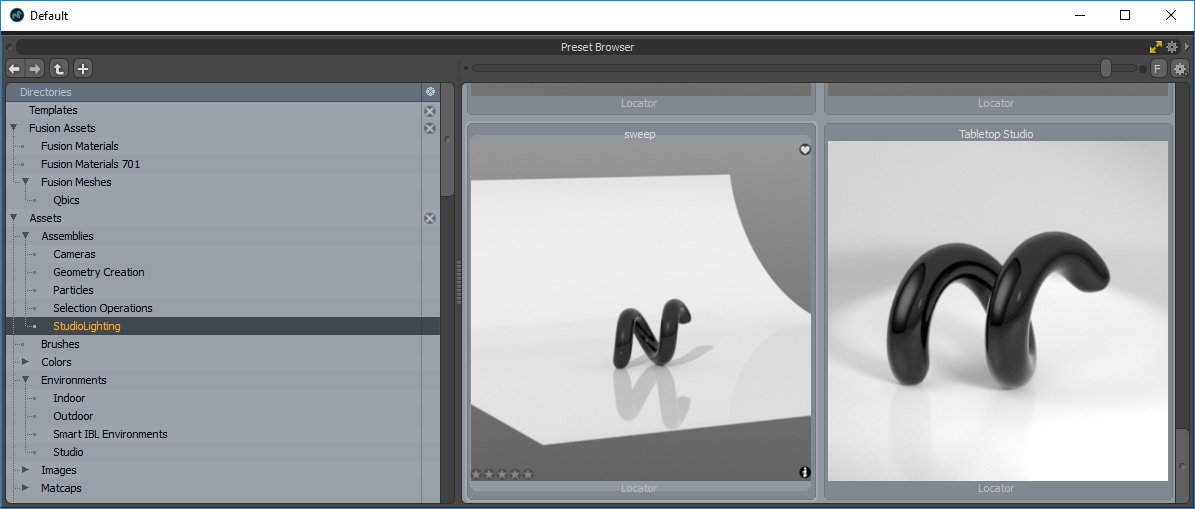
- Next, I loaded up the preset browser and imported the "Studio lighting sweep curve" for the background.
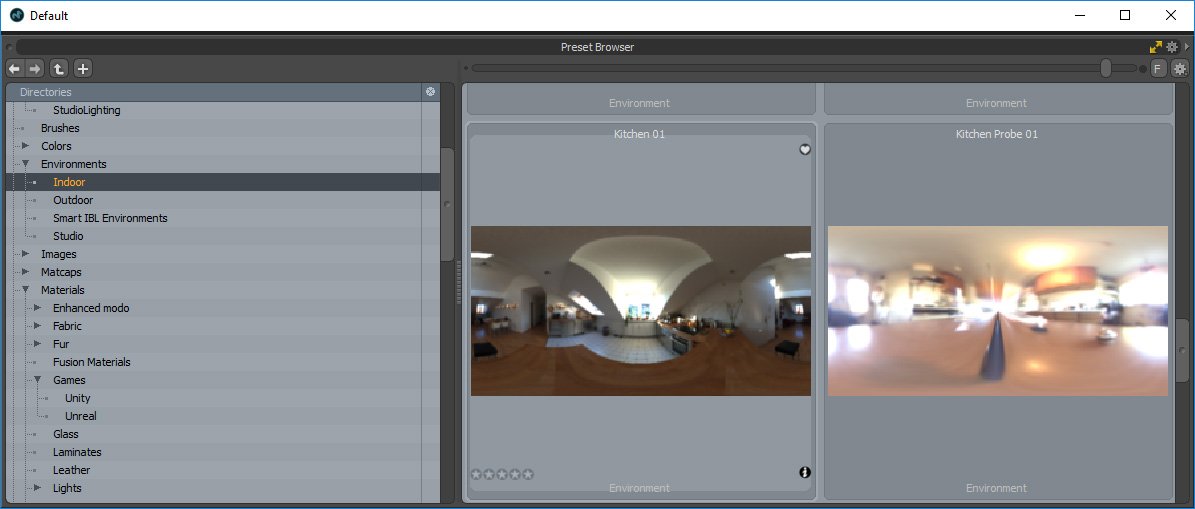
- For the lighting, I simply deleted the scene light and loaded the Kitchen 01 HDR from the presets panel.
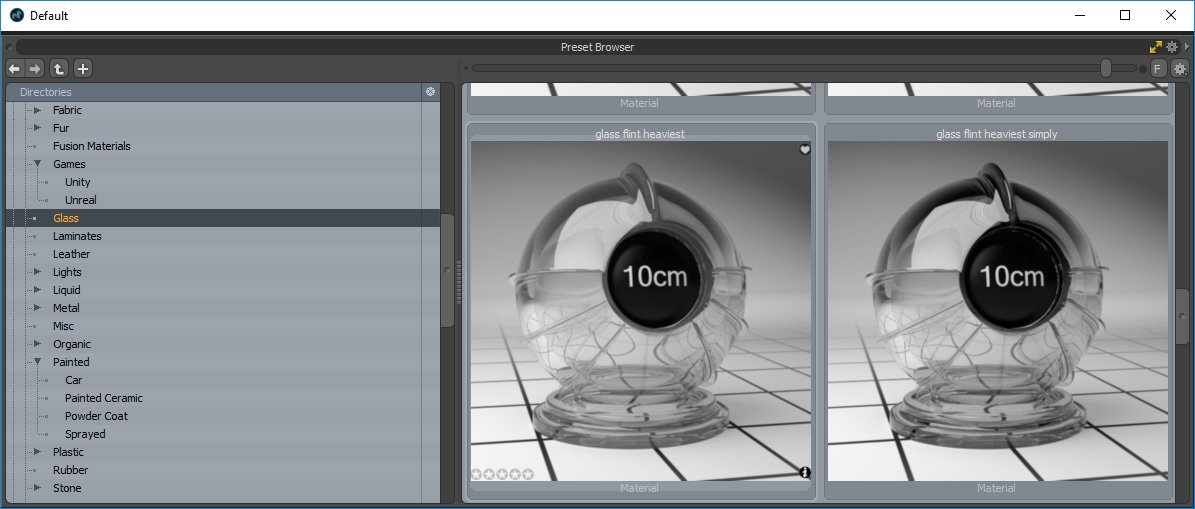
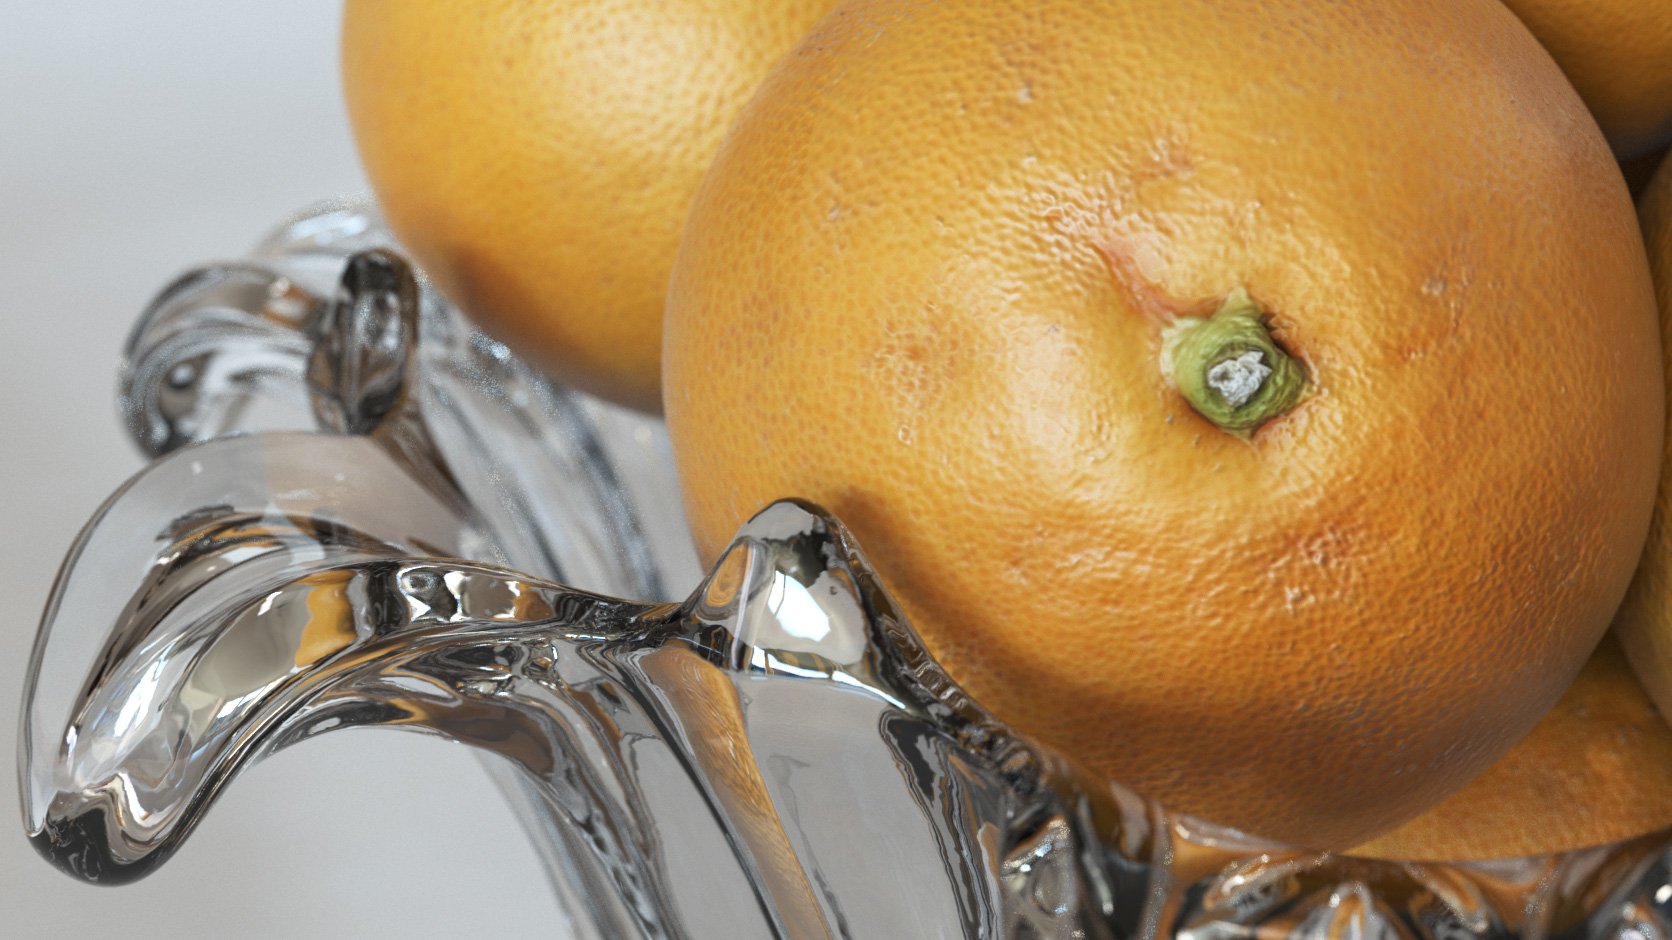
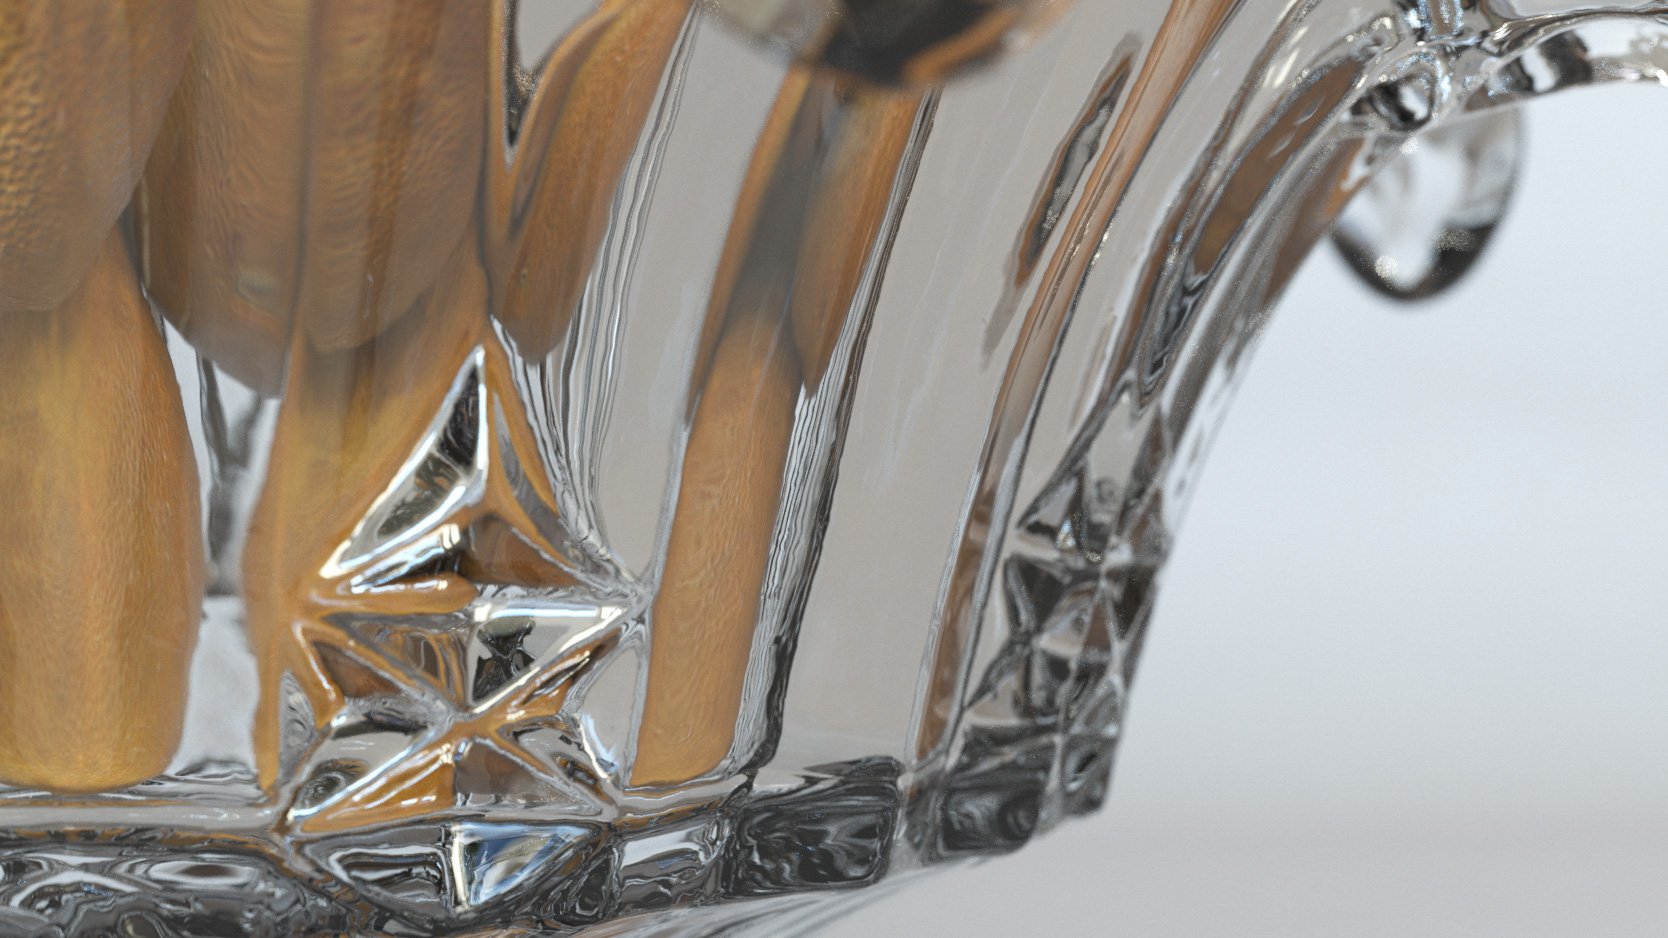
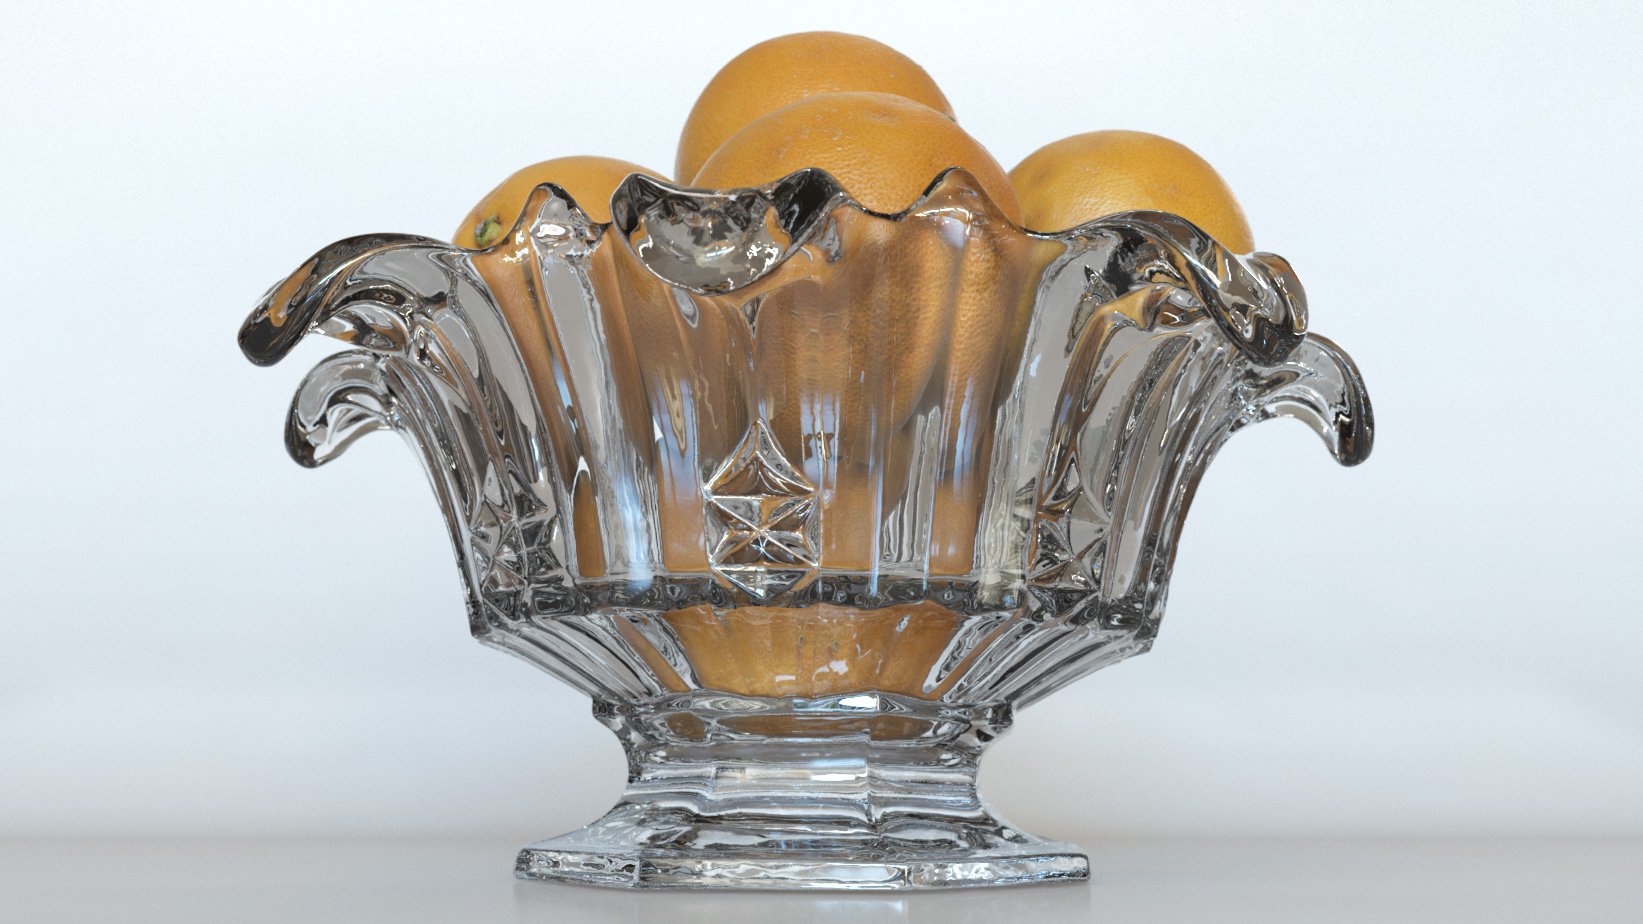
- To create the glass I simply dragged the "Glass flint heaviest" surface from the preset browser onto the object. make sure double sided is switched on in the material properties panel.
- For the orange surface, I used the standard shader with a slight blue tint to the specularity and the colour map as the bump map, very simple but effective in this situation.
And that's it really, If you've found this useful please help us out by sharing it on Facebook, Twitter, tumbler whatever you like to use. You can download the Modo scene files and all the supporting models using the link at the bottom of the page.
Final Renders - Click to enlarge
Download the scene files 115 MB

27 Comment(s)
Could you explain more why you use Capturing Reality over Agisoft? Also, would love to see a tutorial for setting up a shoot in a real studio. Thanks!
Basically it's down to speed, RC is about 20 times faster than AGI, its debatable if there is any quality difference but processing 350 images on Ultra in AGI could take days where as RC knocks it out in hours. I can do a sub section of this shooting in a studio. The results would be a lot better as we could use much higher F Stops and lower shutter speeds.
Have you tied AGI since the GPU bump? I was surprised how much faster it runs on the GPU.
Nick. RC 20 times faster if you run both AG and RC on GPU!
1
1
Amazing, thank you very much for the tutorial!
Thanks Dzmitry, no problem at all.
1
1
Great tutorial! Thanks very much for sharing.
Can you say how easy it was to remove the 3D coating spray afterwards? Did it involve lots of elbow grease and a pot scrubber, or was it just to soak the glass bowl and wipe the spray off?
Cheers, It was very very easy, its just powder when it dries so a wash under the tap takes it off along with the water based paint. No elbow grease involved at all.
1
1
Awesome mate! You guys are so good over there you don't even need to spray it down!
Best,
Iven
Cheers Iven :)
1
1
Nice1
Thanks Mark!
1
1
Thanks, great tutorial!
Cheers Daniel :)
1
1
Using a brush to splat thousands of alignment positions directly to the subject is just brilliant
I used just a matte coating before but would always get issues with bad alignments and parts of the model caving in. I can't wait to try this technique, thanks for the tutorial.
Im really glad it was helpful Corey, yea surface detail is the key to photogrammetry the more the better, you could try it with different colour paints if you wanted to squeeze even more detail onto the surface.
1
1
Hey James,
Great tutorial, well written and with great results!
I have been doing the same with black (or coloured) speckles for better scans using regular spray paint. For objects that are throw-away it makes it cheap to do. You basically apply a matte grey base coat followed by brown, black or white base coat (or all of the above).
Obviously your object can't be cleaned afterwards though. In the case of this glass object, I'm not sure that would have been a big loss :)
Cheers dude,
Wiek
Cheers Wiek! Yea on some objects we do the same with a spray can just spitting out little splatters, It works really well for stuff you dont need to keep.
1
1
Great Tutorial James! Keen to give this a try. Inspiring stuff =D
Thanks David! I hope it works for you.
1
1
sweet tutorial...
Thanks, I'm glad you like it.
1
1
great, thanks for that!
No problem Jerry
1
1
Thanks for this very clear and informative tutorial, it's become much clearer for me the importance of surface/texture detail. Two questions:
- for the orange, to get the entire object, did you simply "flip" it to get the bottom part and RC knows to stitch these two halves together?
- what would be a good way to proceed for lets say a tomato where you want the original surface texture on the final mesh, so no splattering of paint possible, and it also has maybe a too homogeneous surface / texture detail to produce an accurate scan? Would you put tiny unique colored stickers on parts of it, which could later be cloned out in post?
1
1
Thanks Mihai
For the orange I stuck it on a skewer and attached that to a tripod with a clamp that way I could shoot all the way around it without having to do two sides separately. A tomato might be harder as it has a most no surface detail. Personally I would do a scan of it using the skewer technique without any spray. Get the rough shape from the noisy scan then just model it and load the remodelled object back into what ever photogrammetry software your using and rebake the textures onto it. It's really just a slightly deformed sphere and doesn't make much sense to go to a lot of trouble to scan it in perfect detail. If you did want to do that you could scan it once with no surface preparation or spray, then spray it with lots of little dots and scan it again. Then process both the scans. Alight the high detail dotted scan to the low detail non dotted scan and bake the texture from one to the other :)
Hey buddy thanks for this answer ,i tried to model my my ceramic tray then reimport in rc to retexture but the texture hoes totally off if there is any documents that i cam refer I need that texture of ceramic tray with my food item
Hey buddy thanks for this answer ,i tried to model my my ceramic tray then reimport in rc to retexture but the texture hoes totally off if there is any documents that i cam refer I need that texture of ceramic tray with my food item
1
1
thank you very much for sharing your wisdom.
out of curiosity how long to render?
Thanks :) I think the render took about 20 minutes or so.
1
1
Huge thanks for this tutorial. I'm currently working on a big project for school and I wanted to try scanning tin cans. Your tutorial helped a lot, here's a test with handpainted texture (WIP) http://imgur.com/AIpdGNx
No problem at all Valentin, Im glad it was useful, your scan looks great, nice work!
1
1
Hi James,
Thank for your blog. I'am amazed at how you scan this transparent bowl by painting it! If it is possible, could you share the input photos of your bowl? I have Bentley ContextCapture in my machine and I want to test the software with your dataset.
Hiep
Thanks Hiep, Im afraid the project has been archived now, the reference photographs are about 30GB so they would cost us a fortune to host.
1
1
Thanks for the tutorial, very nice work.
I have a couple of basic questions - 1. How did you remove the base table or paper onto which the bowl was sitting? I assume in ZBrush, but woudn't that simply cut off the bottom? I often wonder how they get tree stumps or rocks to completely scan, when part of the objects are stuck in the ground. Is this just an open mesh, a whole that would need to be filled? Same as at the top of tall objects?
2. I was under the impression that your textures came from the shots, not from shaders. Suddenly you have the orange mat on there, where did this come from? In studying other software, they just pick up the photography images (somehow) through the initial software scan, along with bump and normal map info. Is this correct or am I missing something?
Thanks so much for your info.
No Problem Philip.. Ill answer your questions below.. 1) Yes I used the lasso tool in Zbursh to remove the base and then just did a simple fill holes to close the gap. 2) The oranges were scanned separately and I made the bump and spec maps by hand in photoshop, they were not really part of the tutorial so I left that part out. I will do another one soon that will cover the basics of photogrammetry and map extraction. Cheers :)
1
1
Hi James ! Commented on this thread three months ago and my project is finally over !
https://www.artstation.com/artwork/6XBGn
Once again I wanted to thank you for your great turorial, have a nice day ;)
Nice work Valentin :)
1
1
Hi its hard for me to get the coating spray so i thought using flour, just coating the object with a bit of oil then just cover it with flour then sprinkle it... did you try this or know anyone who did it ??
I came up with the same idea. I wanted to scan my logitech mouse, but it's too shiny. So I have covered it all with flour and voila, scanned perfectly!!!! a simple method that works.
I came up with the same idea. I wanted to scan my logitech mouse, but it's too shiny. So I have covered it all with flour and voila, scanned perfectly!!!! a simple method that works.
1
1
Very helpful tutorial. I was following your process, but it seems the DAVID 3D Coating Spray is no longer available?!? Are you using something different now?
1
1
(select convert(int,CHAR(65)))
1
1
-1; waitfor delay '0:0:3' --
1
1
-1; waitfor delay '0:0:9' --
1
1
-1); waitfor delay '0:0:3' --
1
1
Hi, I've got a project in mind. Can I hire you so you could advise me on how to build it?
Thanks
1
1
1
1
1
1
1
Leave a Comment