Introduction
Brad Myers has kindly written this guest post, sharing the workflow that he used to create an amazing Michael Clark Duncan likeness. Over to you Brad!
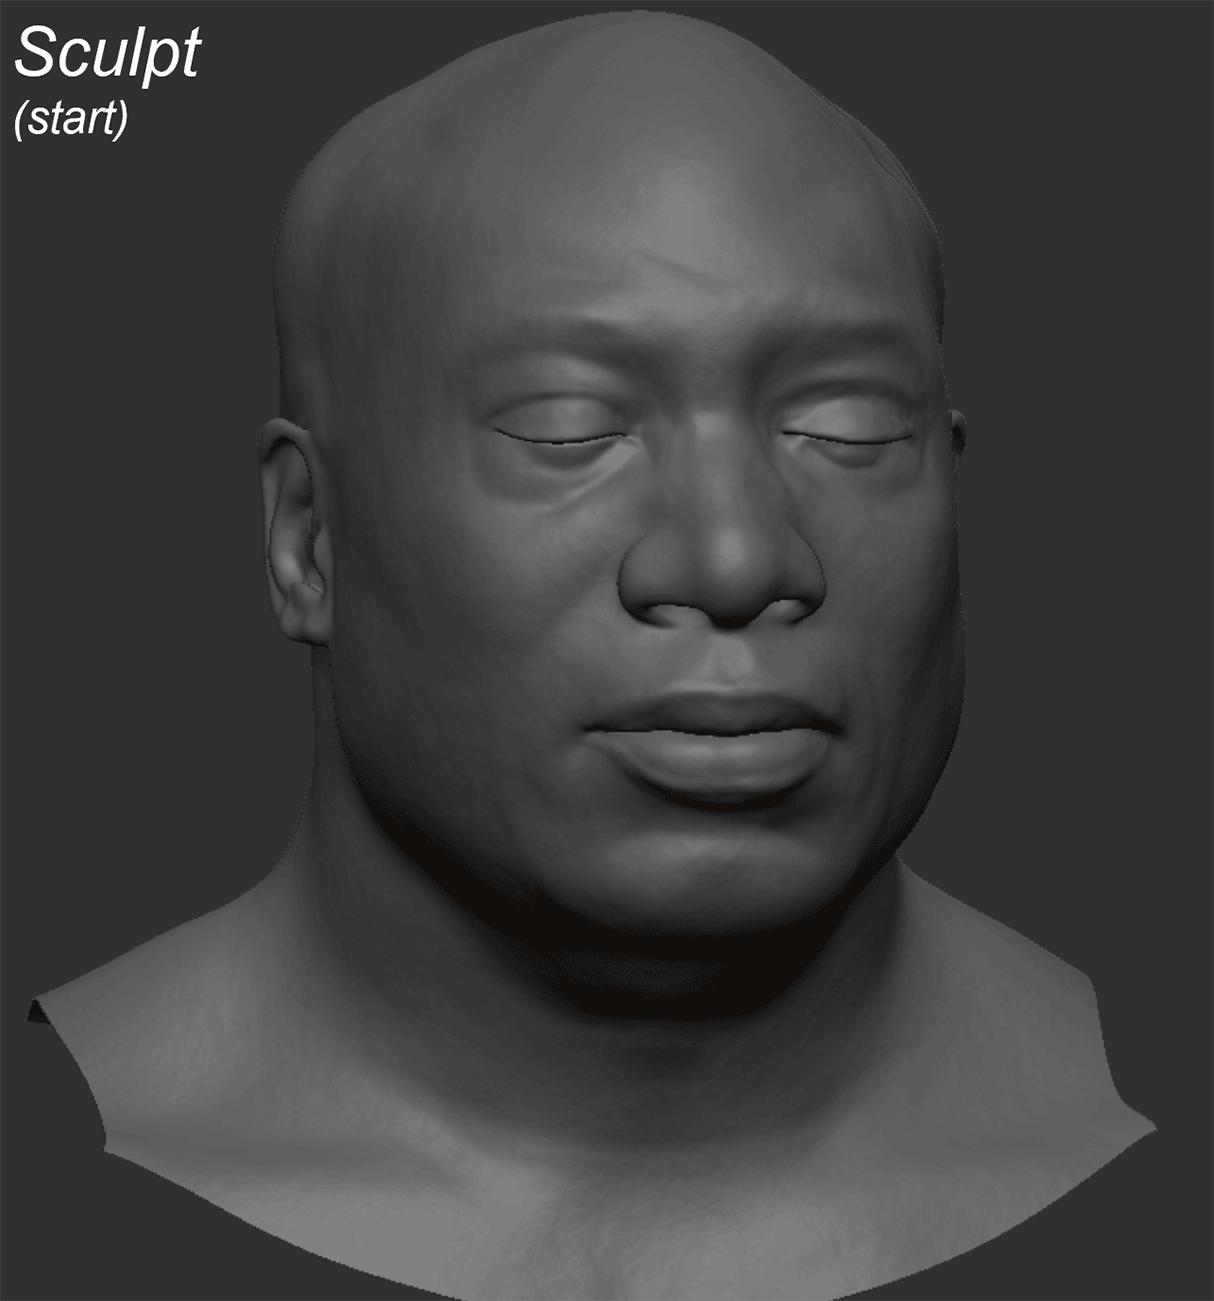
Hey everyone, I wanted to share at a high level the workflow I used to create my Michael Clark Duncan likeness piece. This began as a study to improve my ability to make realistic head likeness sculptures via zbrush and marmoset toolbag 4. I signed up for a course over at artheroes.co where we learned many strategies to improve fidelity and speed when making realistic characters along with general knowledge of likeness sculpting. One of the really eye opening things we learned about was just how easy it is to use zwrap and 3d scan store assets to get the bulk of the detailing (porosity and color) done.
- Brads Artstation :: https://www.artstation.com/bradmyers82
- Scan used in this workflow :: https://www.3dscanstore.com/animation-ready-body-scans/animation-ready-body-scan-male-01
Without further delay, here we go!...
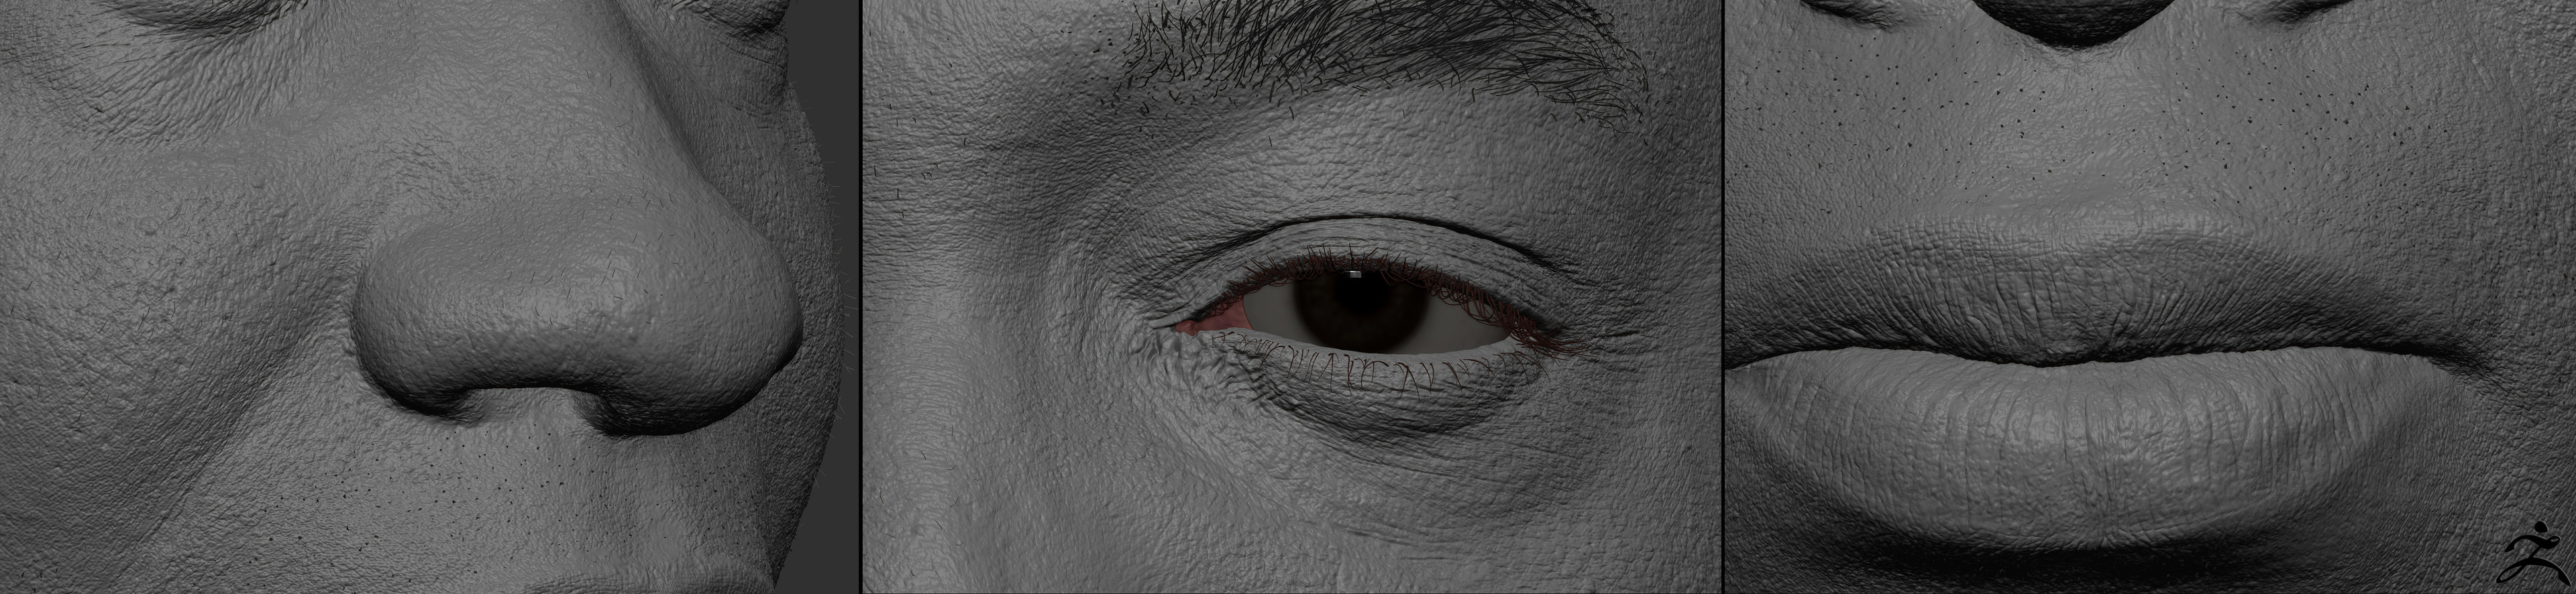
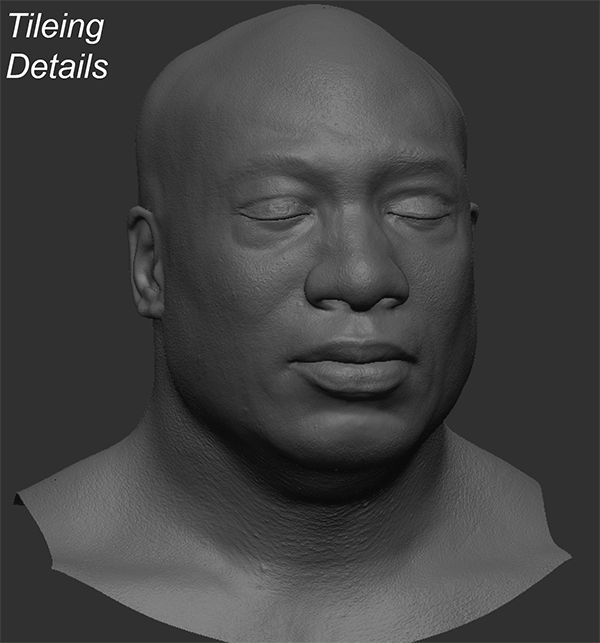
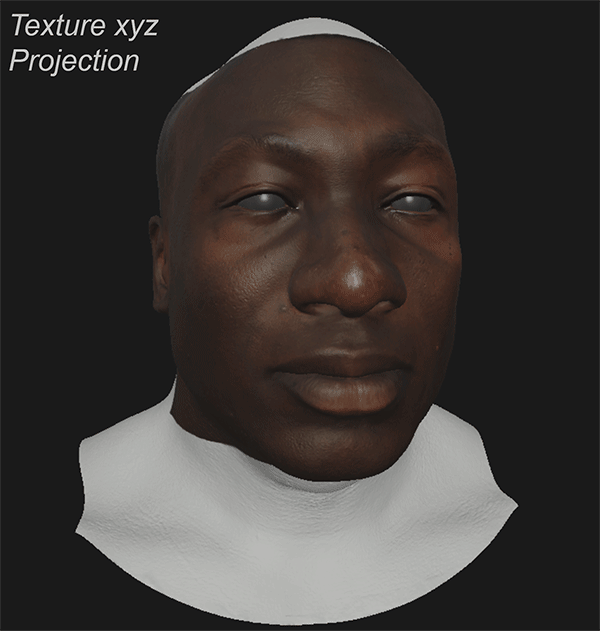
Once I had my likeness sculpt about 80 percent of the way done, I began by retopologizing it and uving it. Potentially I could have used a low poly mesh from the 3d scan store at this stage and zwraped it, leveraging their lowpoly setup, but; I opted to use my own lowpoly mesh in this case. I then applied a texture xyz texture to a plane and zwraped it to my newly retopologized head. Once my plane was zwrapped to my head I was then able to bake and transfer all my texture xyz textures with xnormal. I leveraged these maps to create displacement details on a layer in zbrush for porosity, that lined up with the color texture I now had. One down side to this method is you will only have the immediate face covered, everything else still needs detail and color applied. But before correcting this I used a texture xyz neck displacement for the neck by simply dragging the details onto the surface of the neck. In this case I did NOT have color data to go along with the new neck details.
Now at this stage I still had a lot of areas to cover in terms of porosity and color. So I grabbed HD Male Head Model 02 from the scan store, I zwrapped it to my mesh and baked the color from it. I also created a displacement and applied it to empty areas on the head as needed. I then used custom alphas to finish the porosity and also “xtractor” brush in zbrush to copy alphas I had already on the face and apply them elsewhere. With the help of the 3d scan store head wrap I now had color for my entire head and I could blend areas from the 3d scan store data and the texture xyz data I transferred, along with any custom sculpting and painted I did myself in zbrush. To blend the porosity detail on the highpoly mesh, I used the layer system in zbrush. To blend these color passes I simply put them on layers in substance painter and with a mask, controlled which details would appear where on the head. After doing some level and hue adjustments, I then manually cleaned up any issues I saw as needed with the color map, and I was able to begin working on a spec and gloss pass.
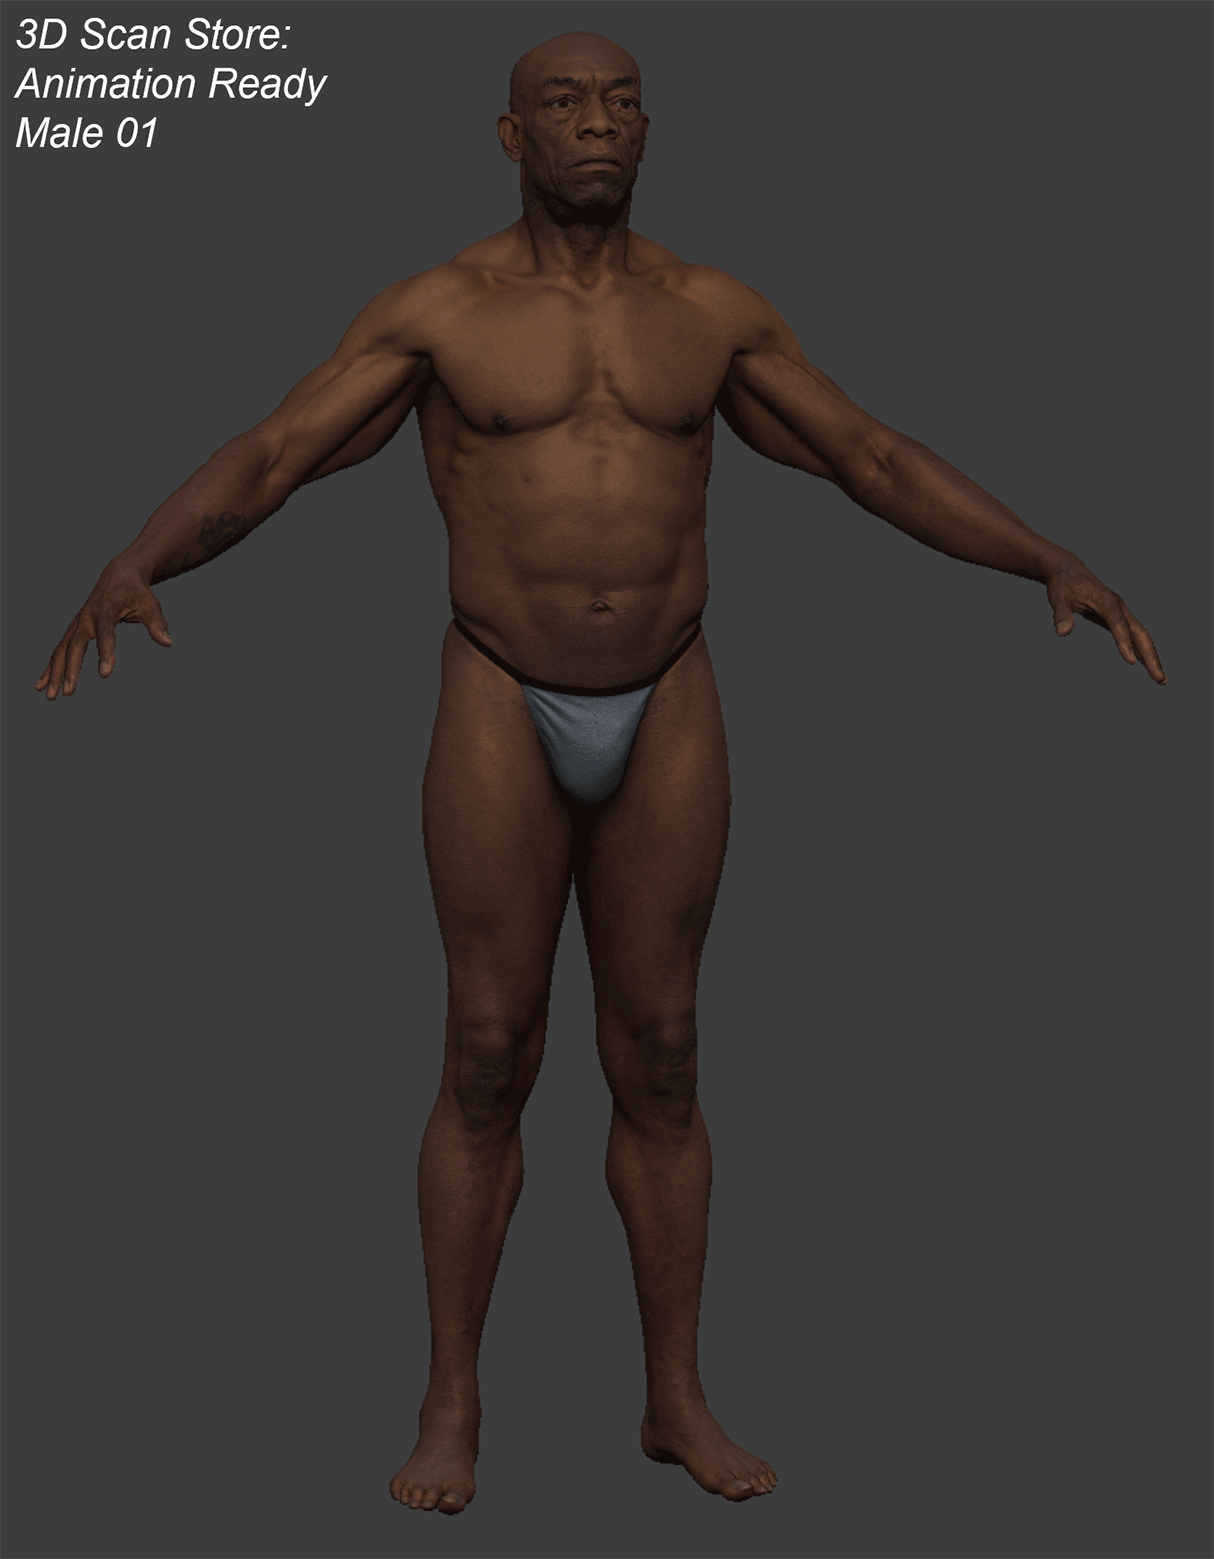
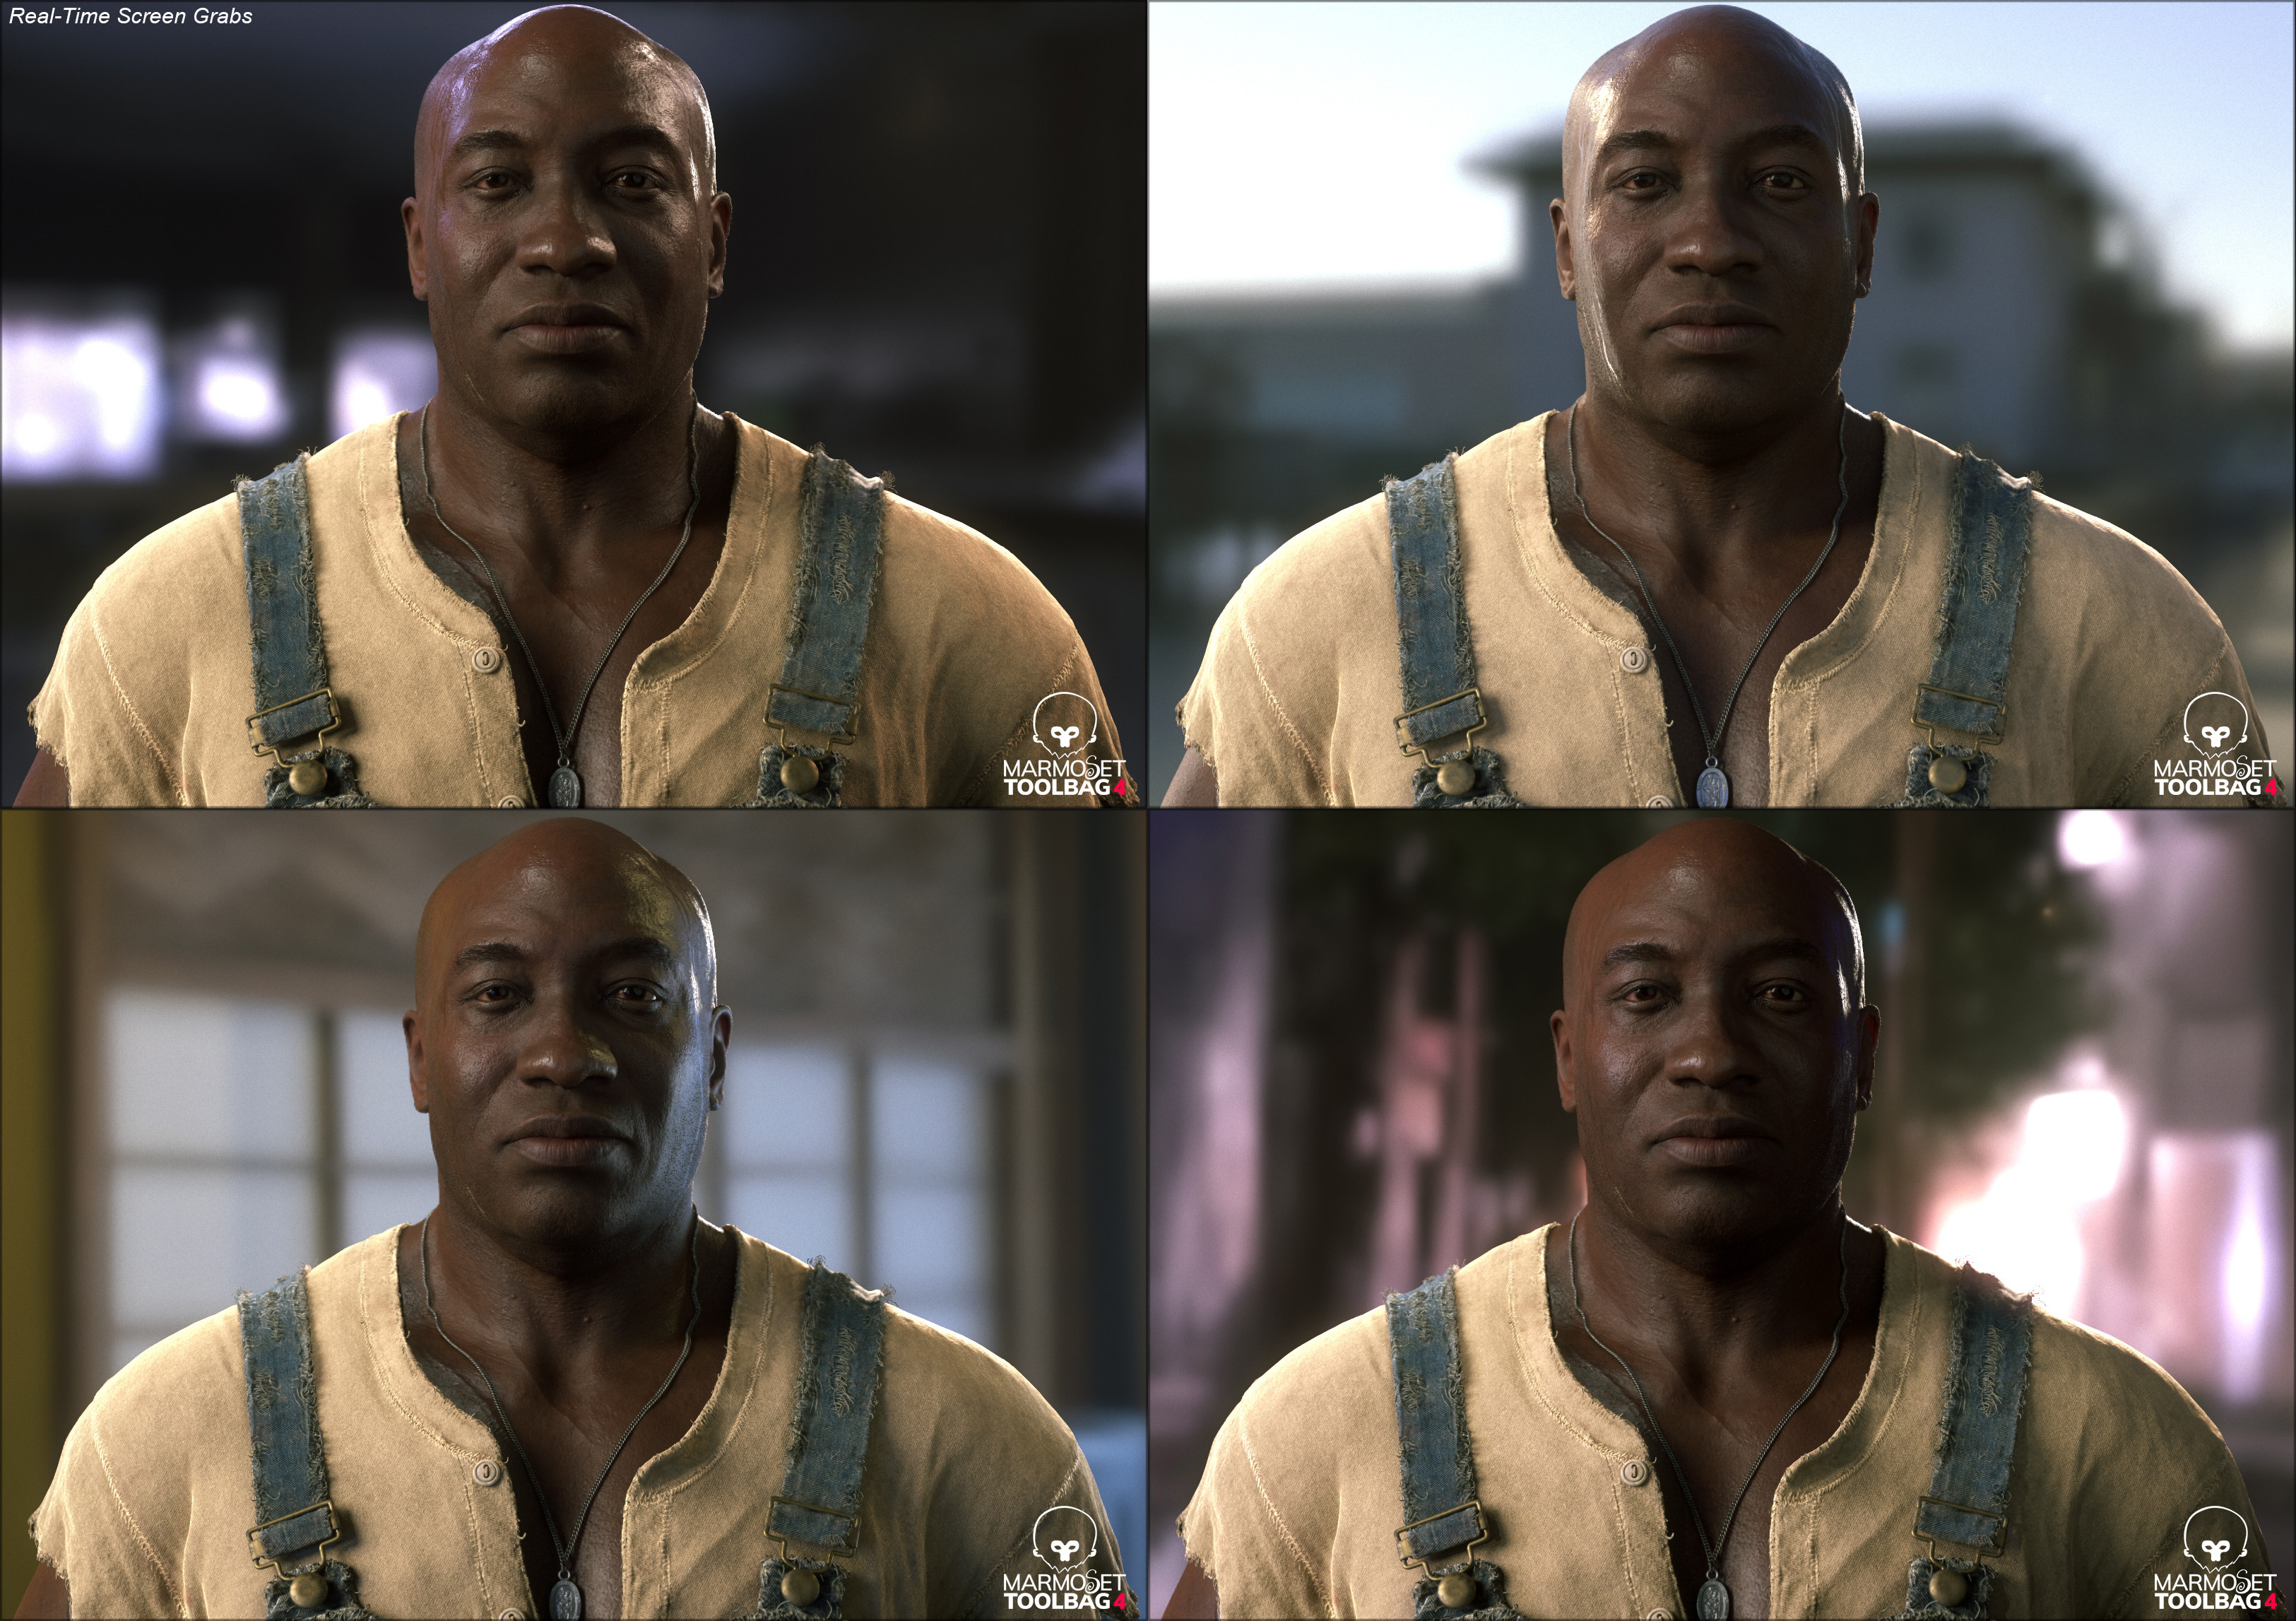
With first pass textures complete, I setup my head in marmoset 4 with the base maps as well as some basic lighting. Next up I needed a body for him. I noticed that the 3d scan store did not have as big and muscular black males as I needed, however; they did have a white male that was pretty perfect as a starting place. (animation ready body scan / male 03). I also noticed they had a full body black older male that would work well as a base color. So one really great thing is all of these models from the scan store share the same uv setup. So I was able to simply grab the textures on animation ready body scan / male 01 and apply them to male 03. Here I noticed some small things like finger nails/toe nails, and the underwear not quite matching up right, but again it was a huge time saver and a great starting place.
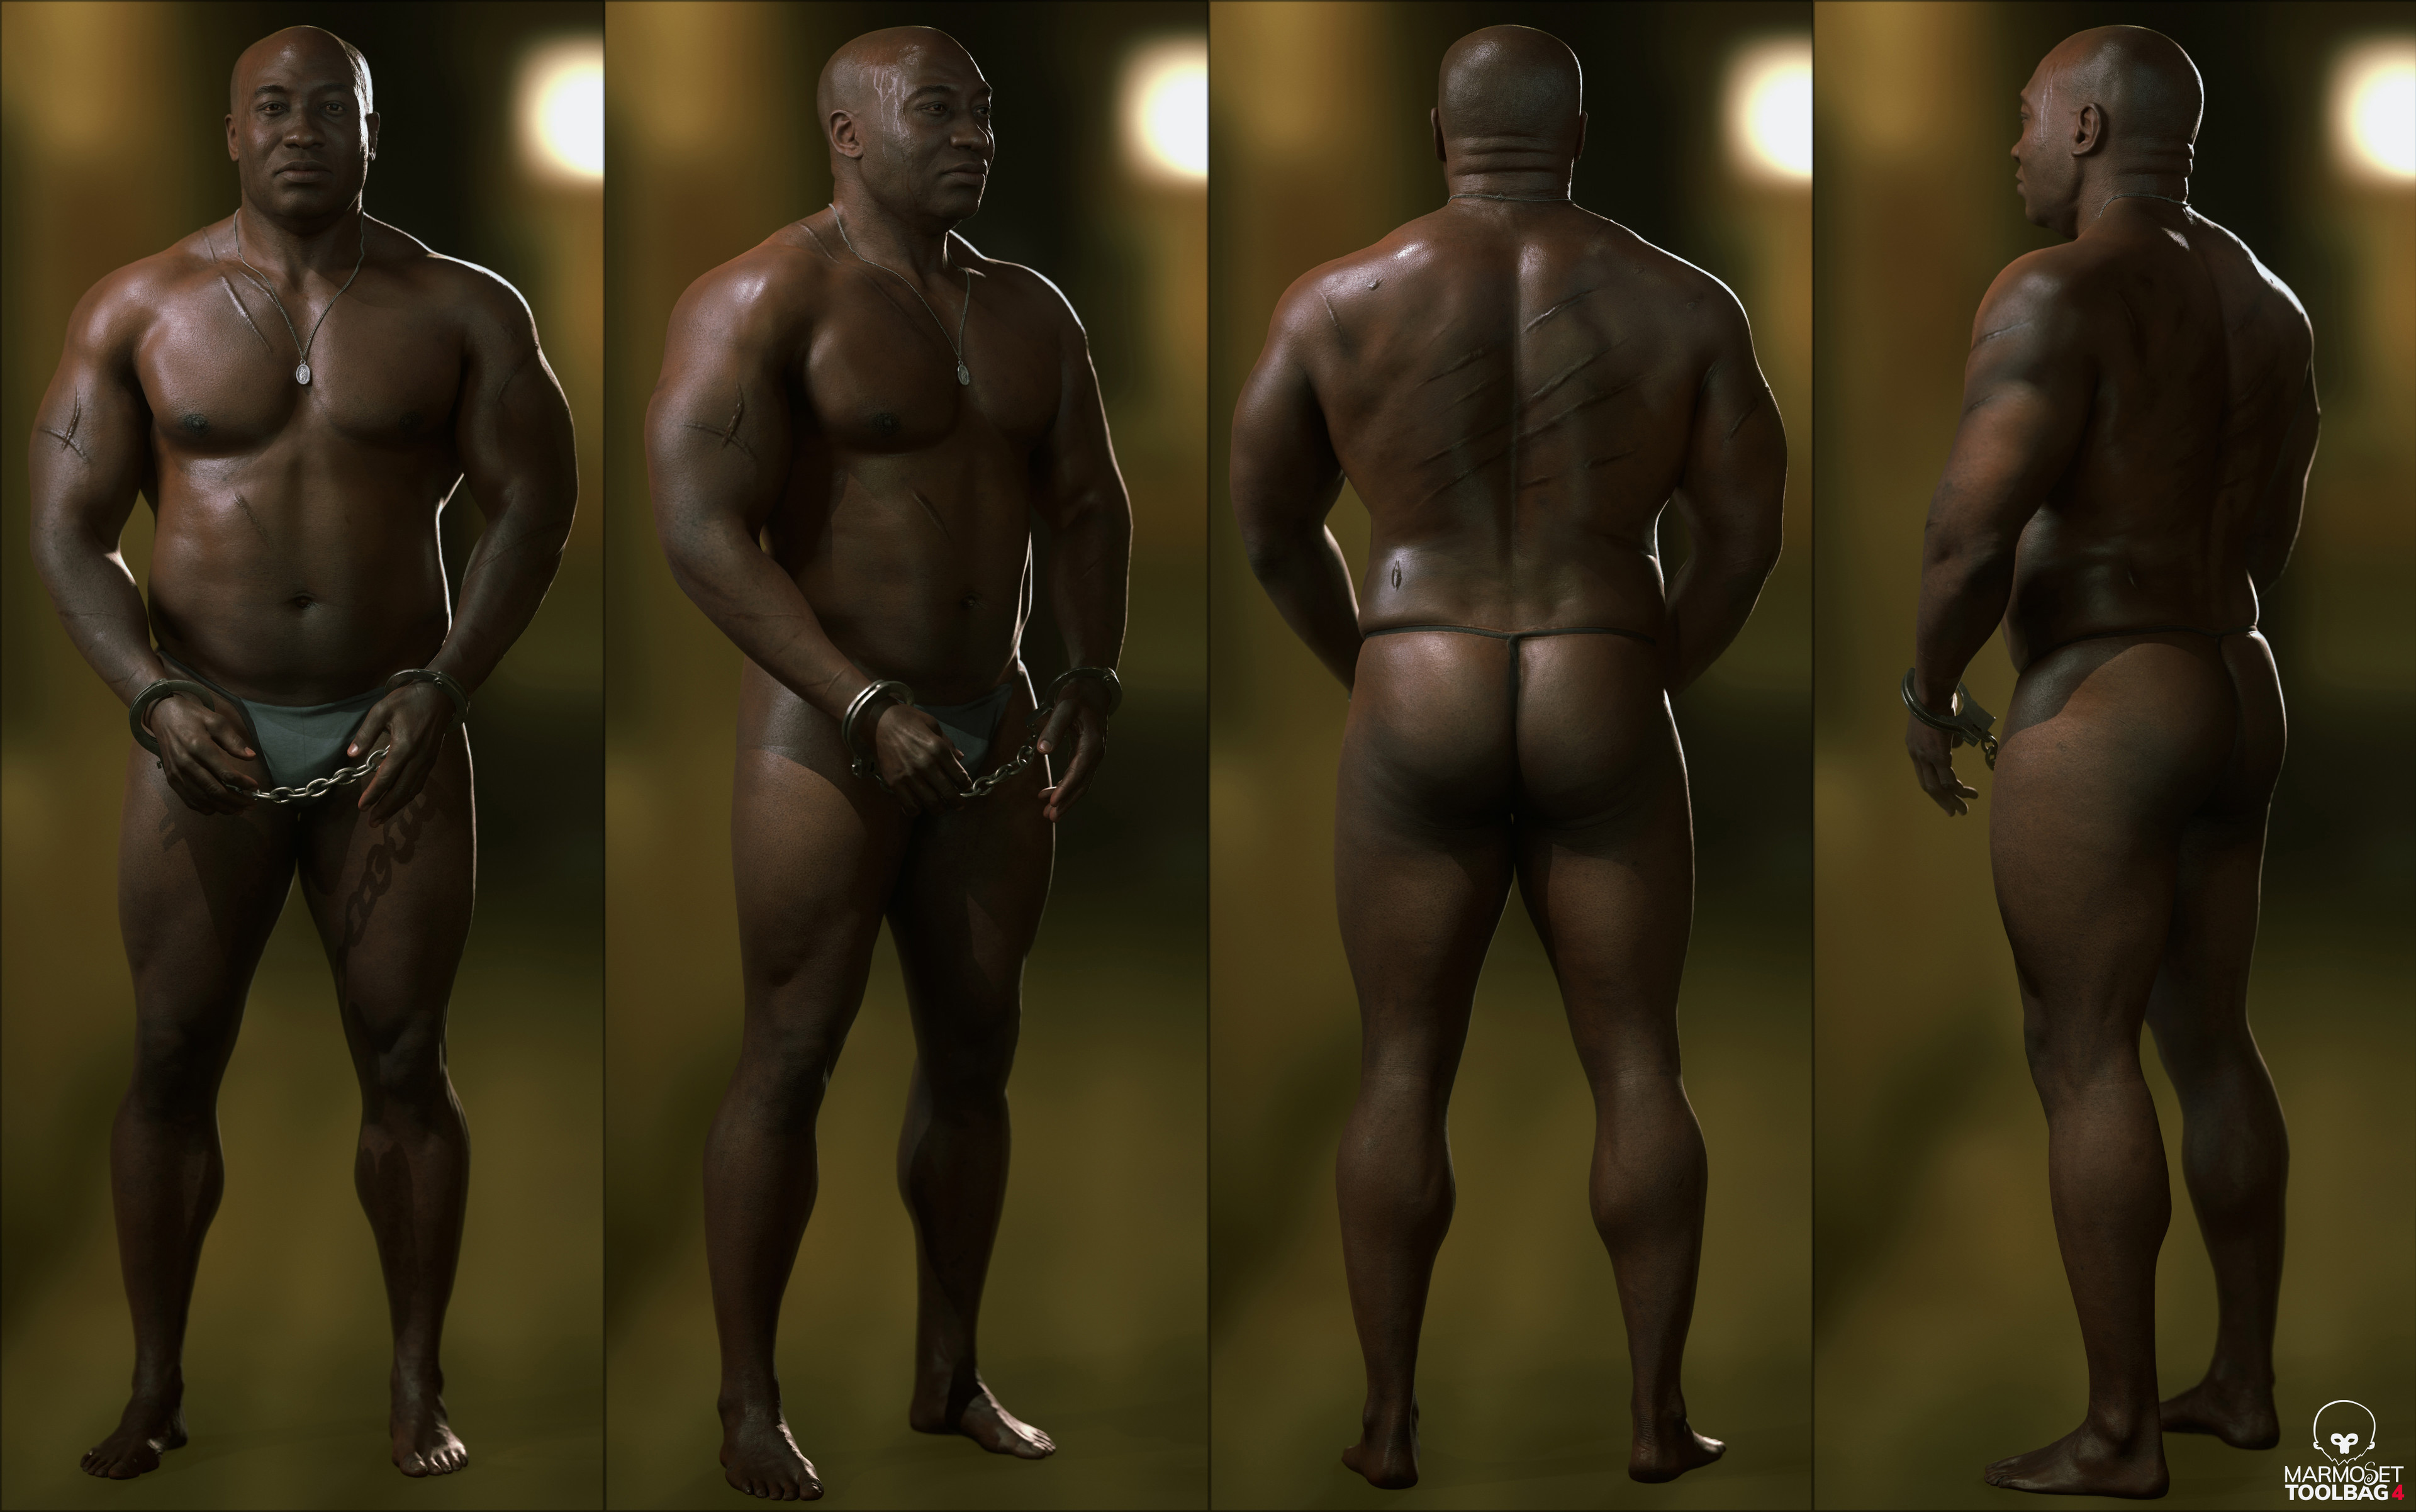
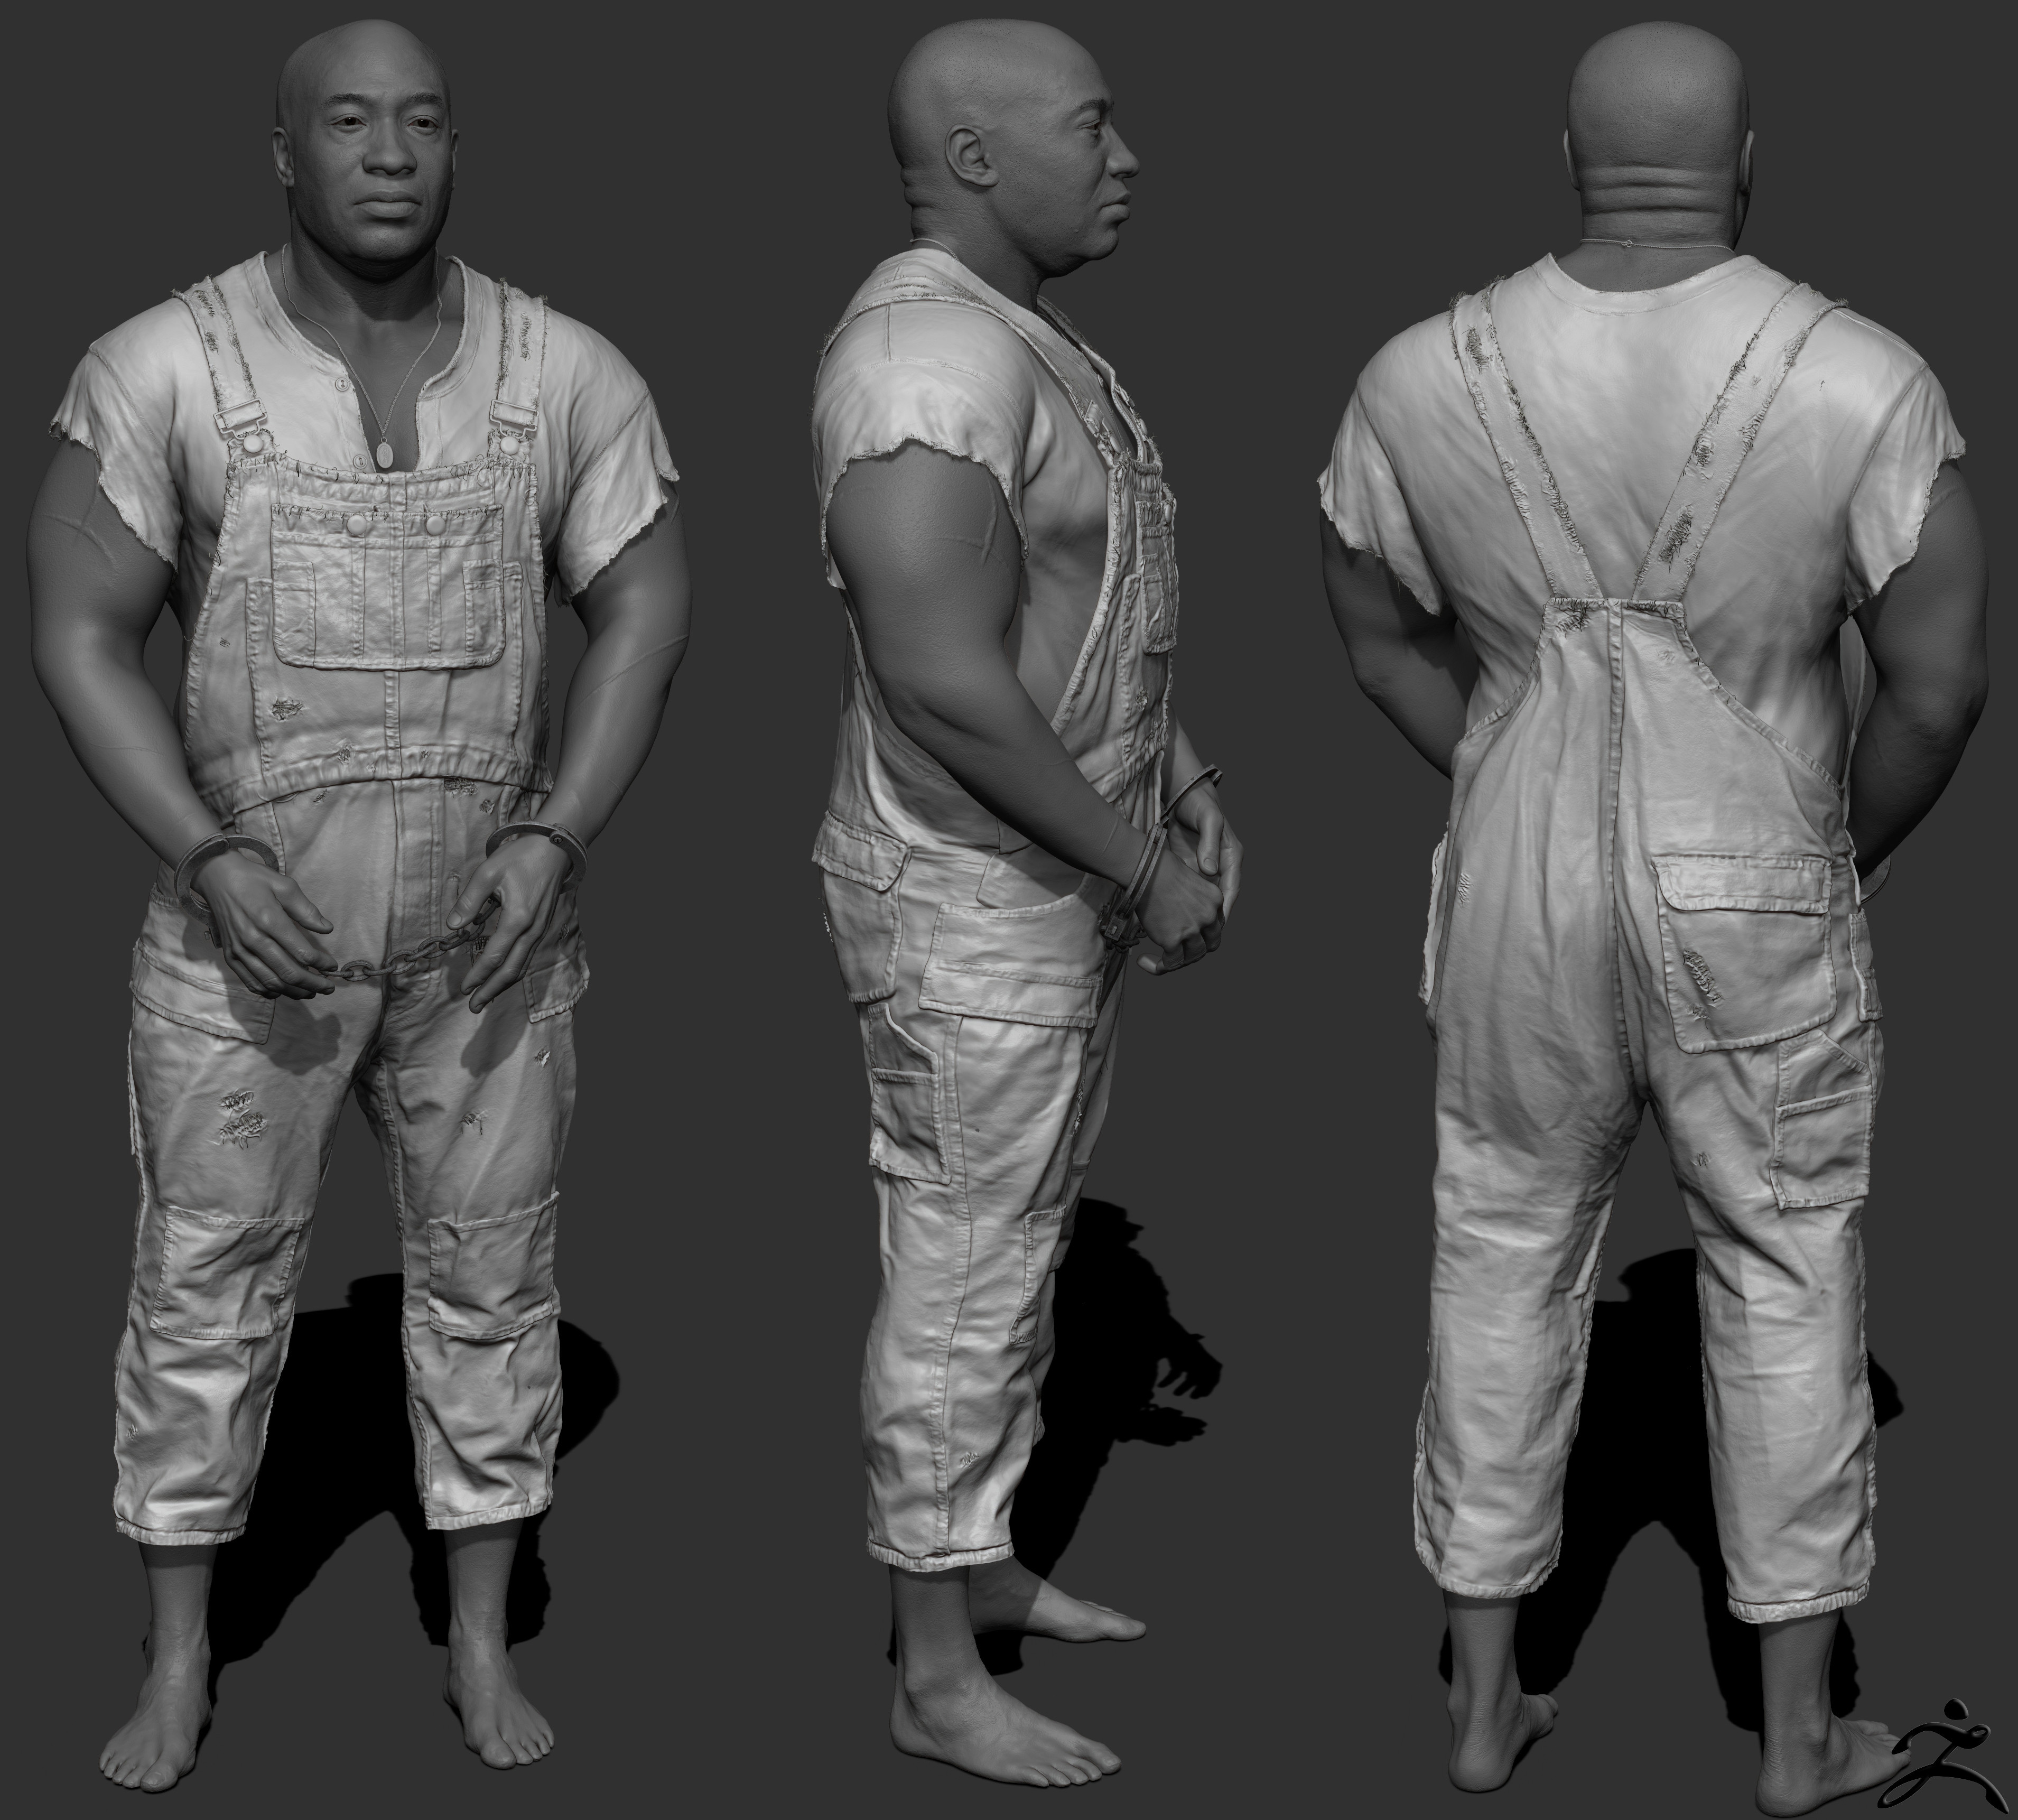
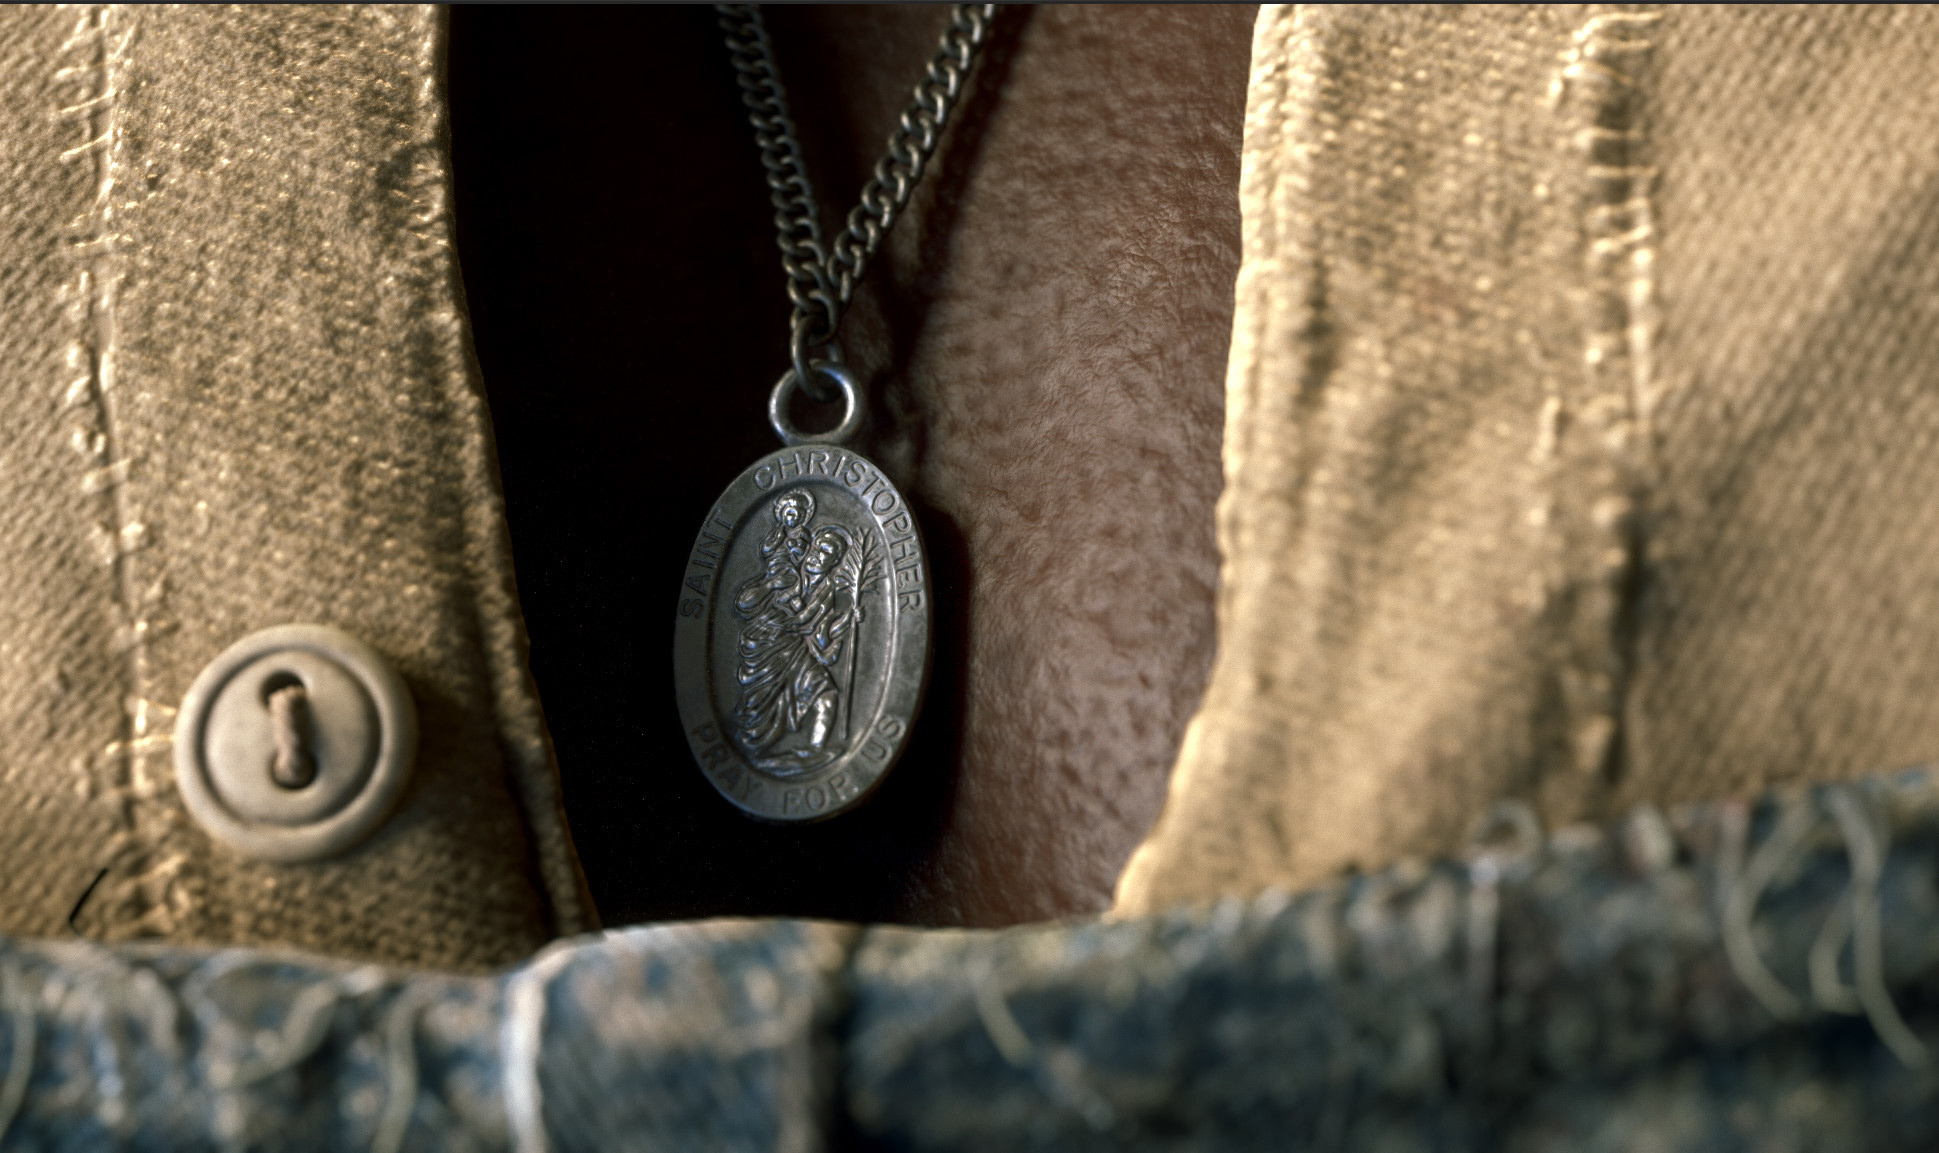
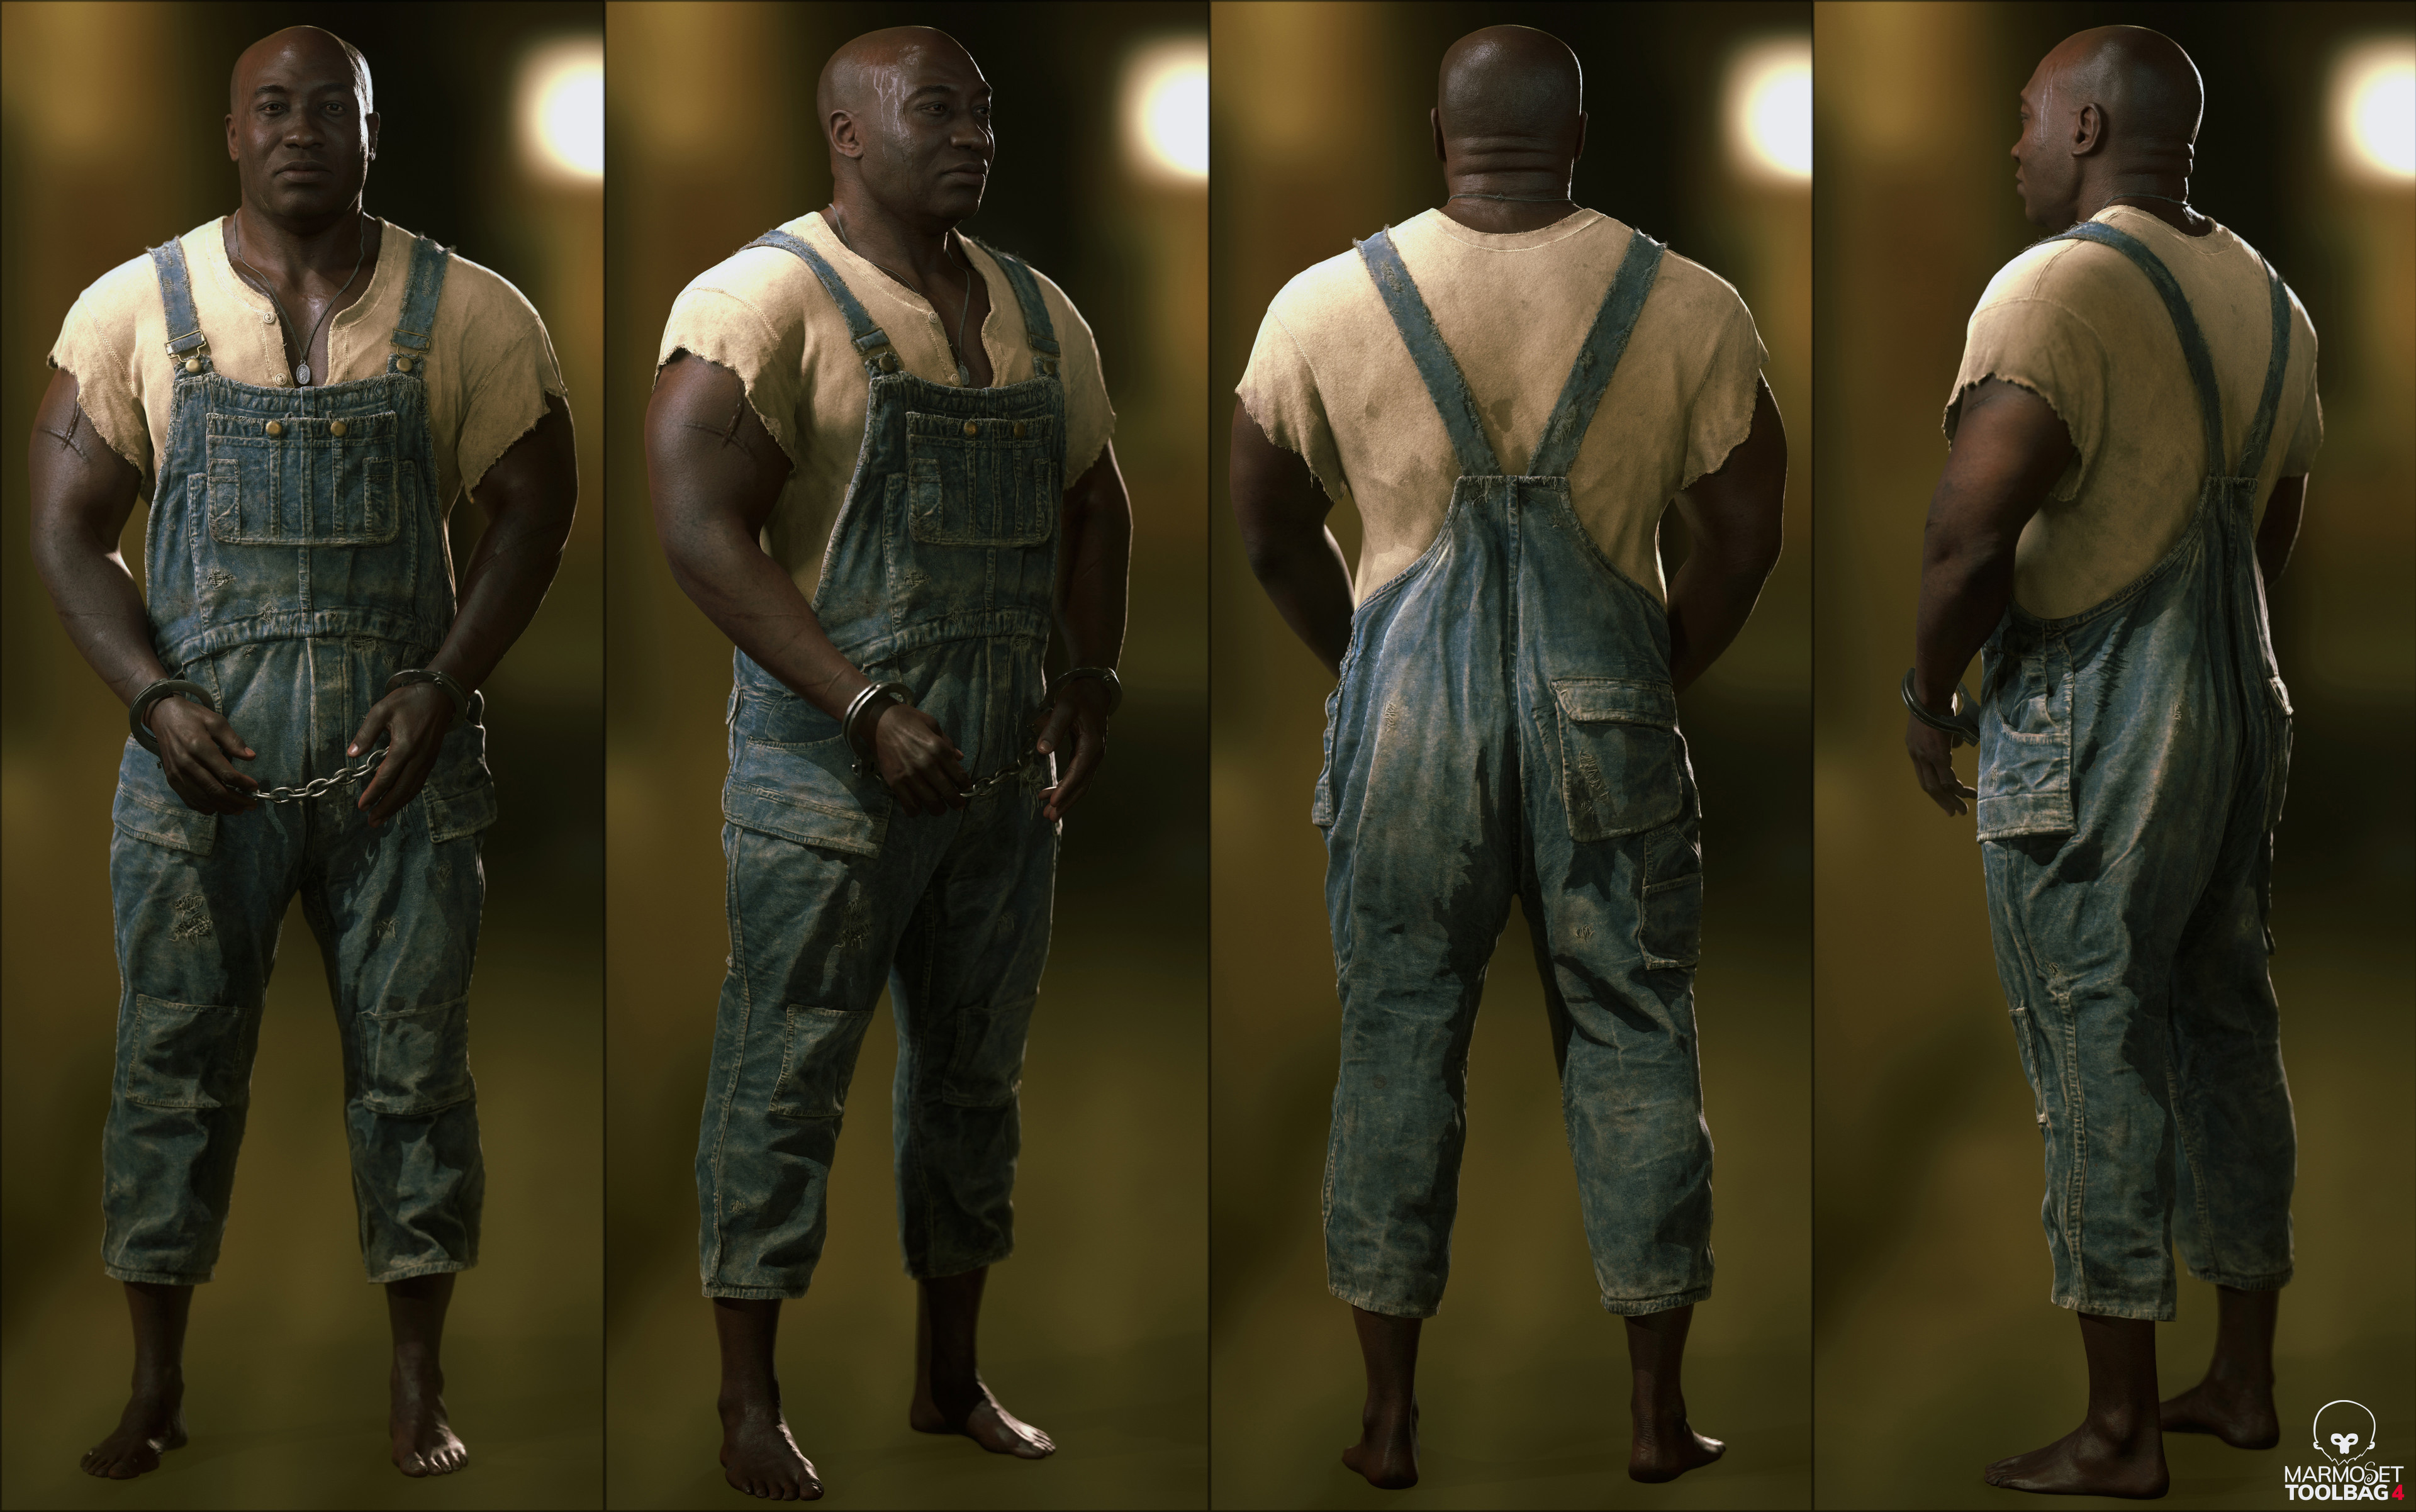
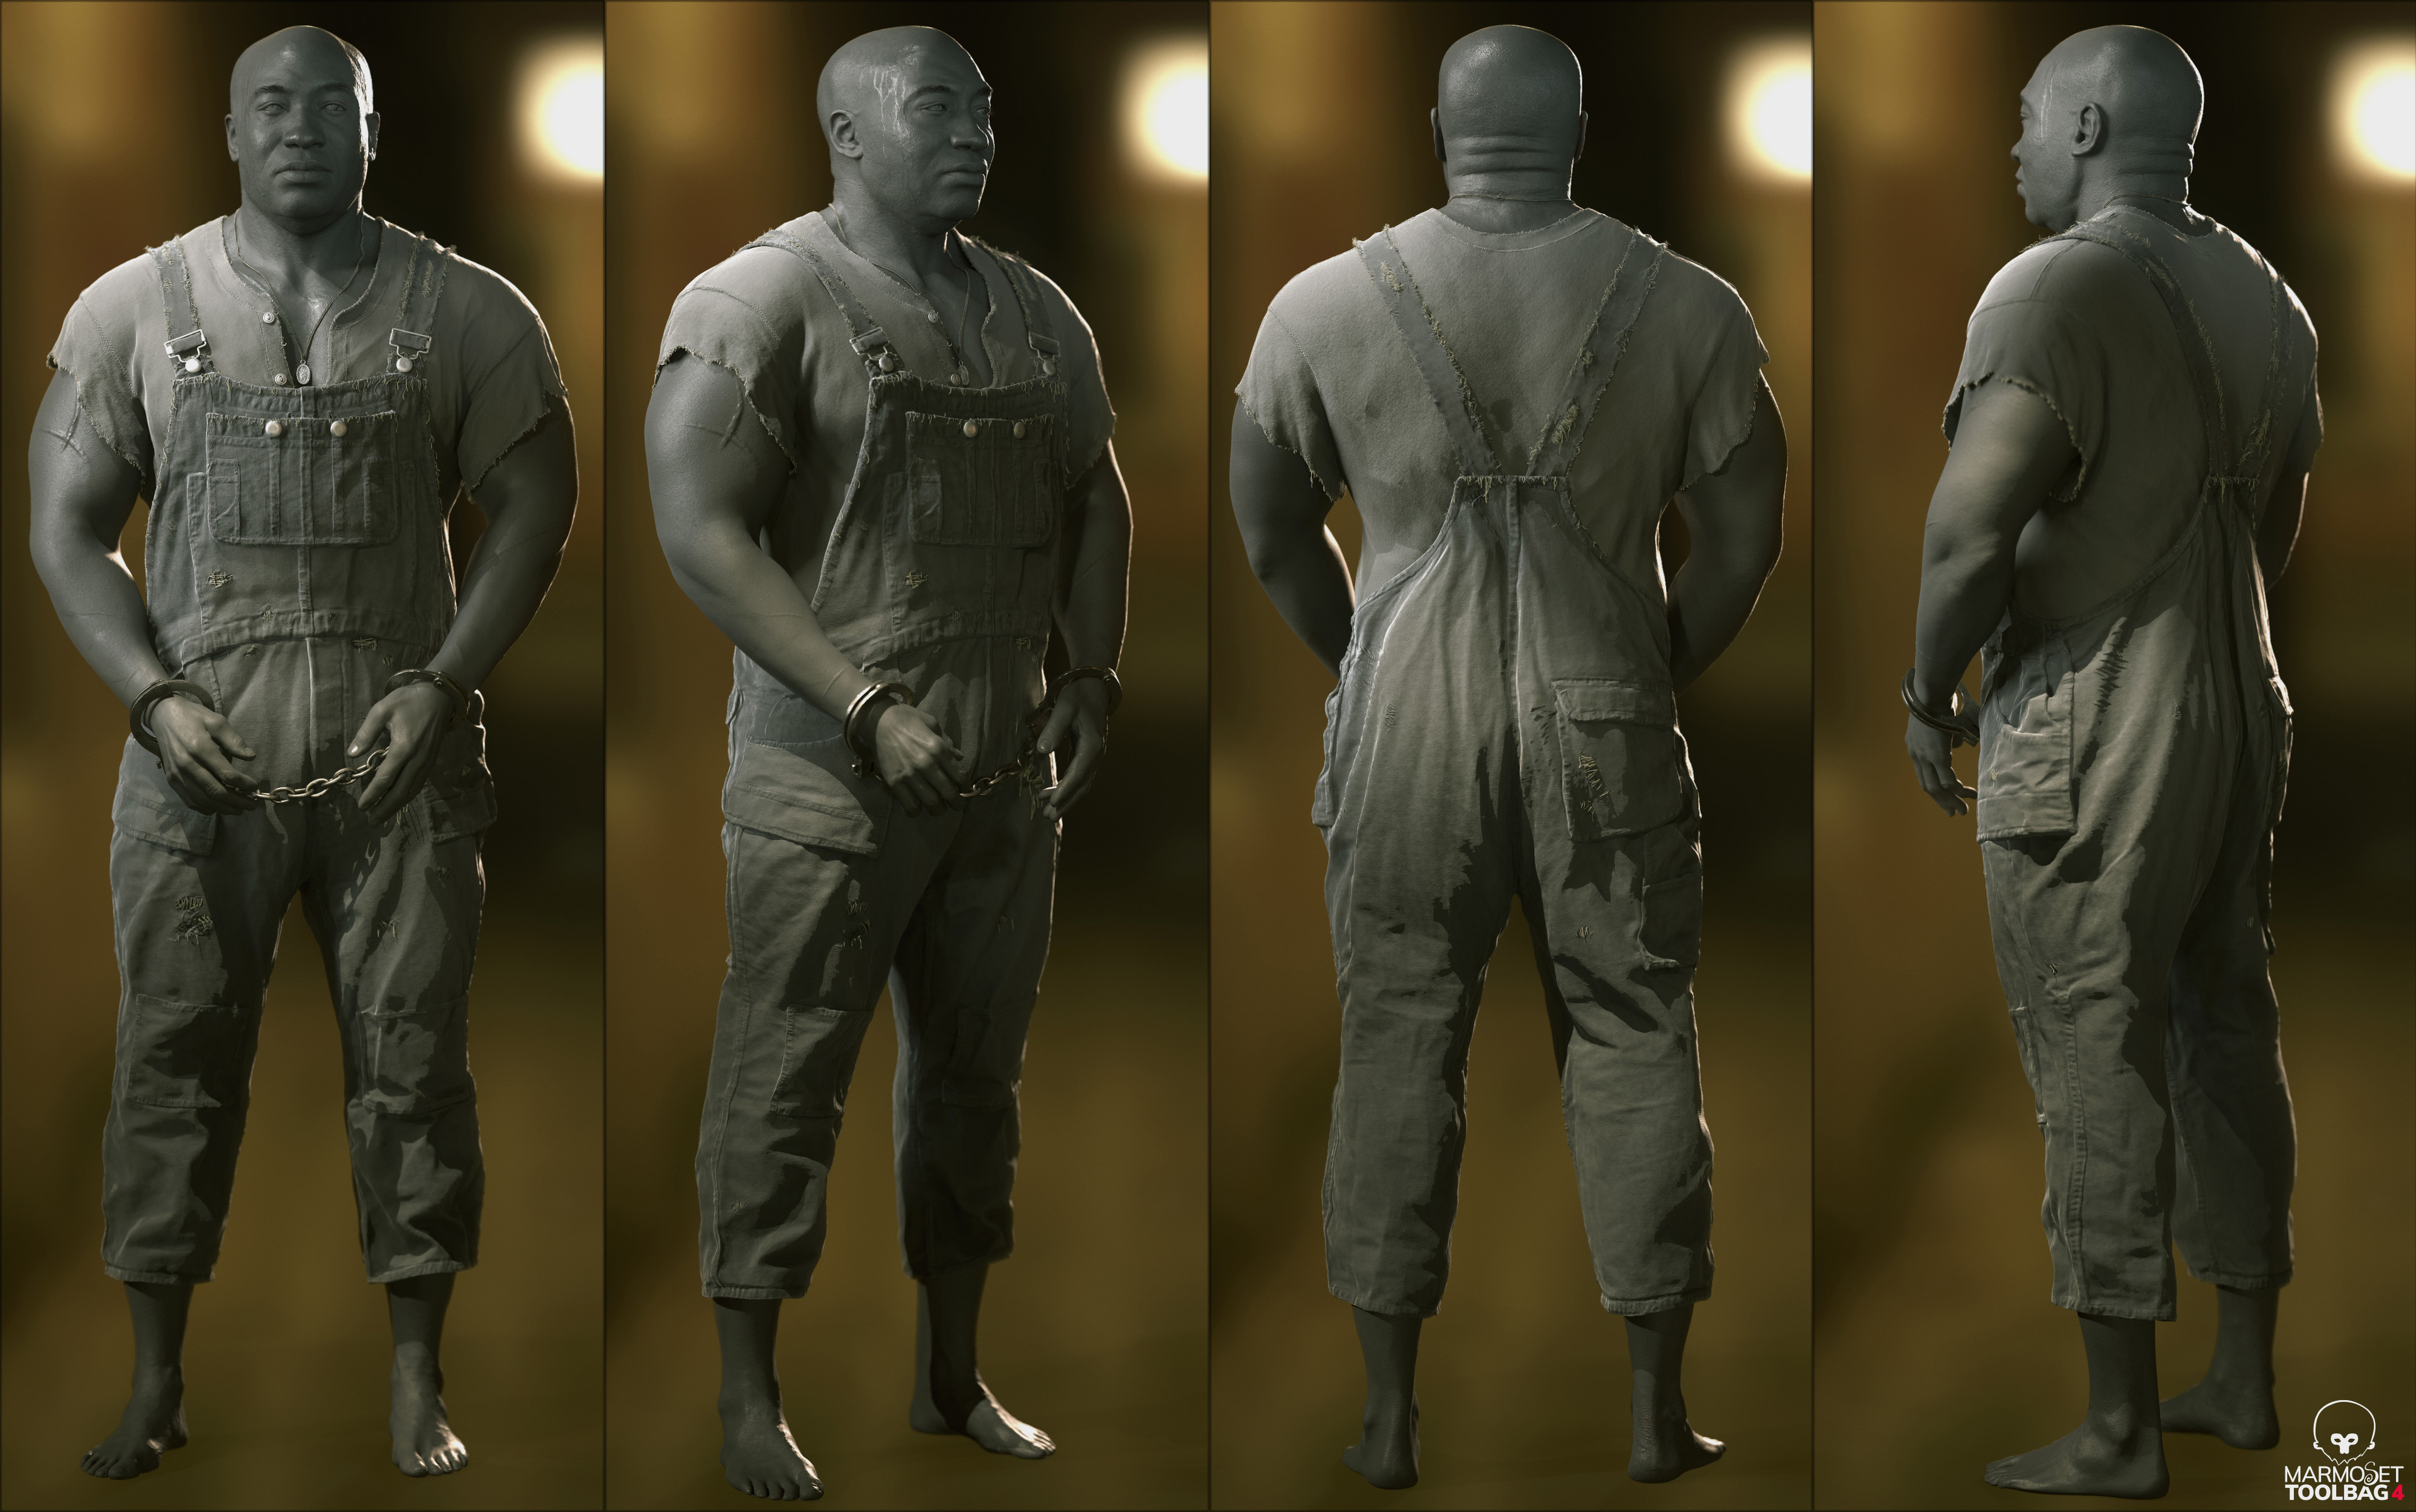
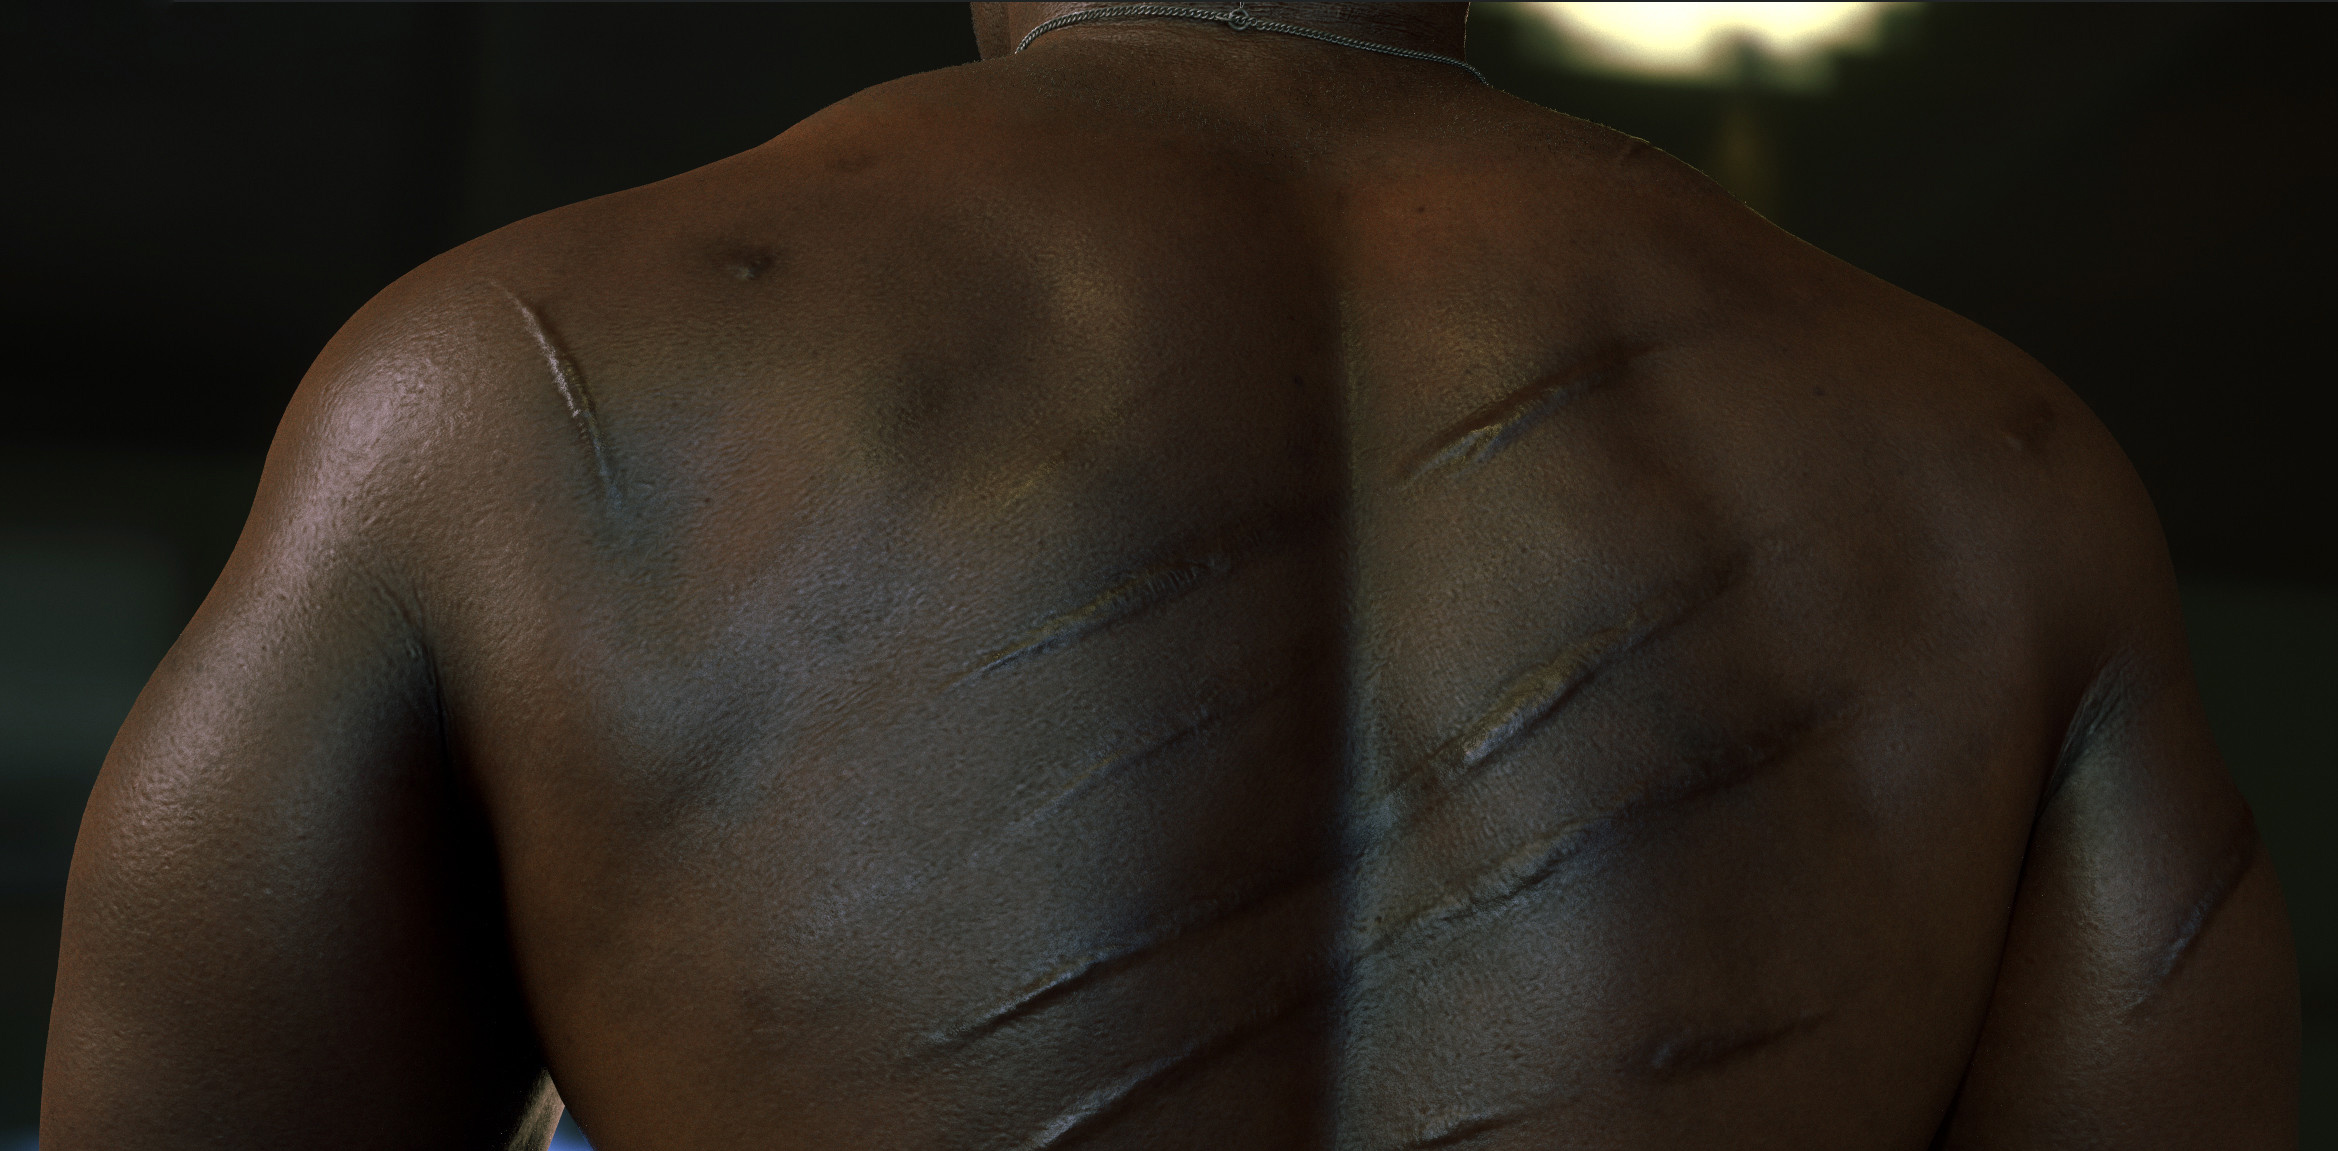
Because the headshape for Michael Clark Duncan is totally different then anything in the scan store and because I wanted to separate the head from the body, I decided to leave them separate in this case. In order to get a nice transition between the body and the head, I simply did a “project all” in zbrush until the two surfaces matched up perfectly with a slight overlay. And so I didn’t loose sub-d levels on the body, I masked out the head that was there and just scaled it totally flat and out of the way, but technically that geo is still there underneath everything! With the body and head now matched up and in place, I could begin posing the body and sculpting it to more closely to reflect Michael Clark Duncan, while preserving the details of color and porosity. Later I added scars and cleaned areas up some more, then did another substance painter pass as previously described. After my second substance painter pass, I was able to update my marmoset scene with the body and apply materials/textures. From here I had the base to start creating my clothing and work on further refinement for details like hairs and jewelry and anything else I needed. I also preserved all subdivisions in this process which is very important here as it allows me to continue to refine the likeness as I go. That’s pretty much it! I hope this has been helpful and gives some more ideas for ways to leverage this amazing library over at the 3d scan store!
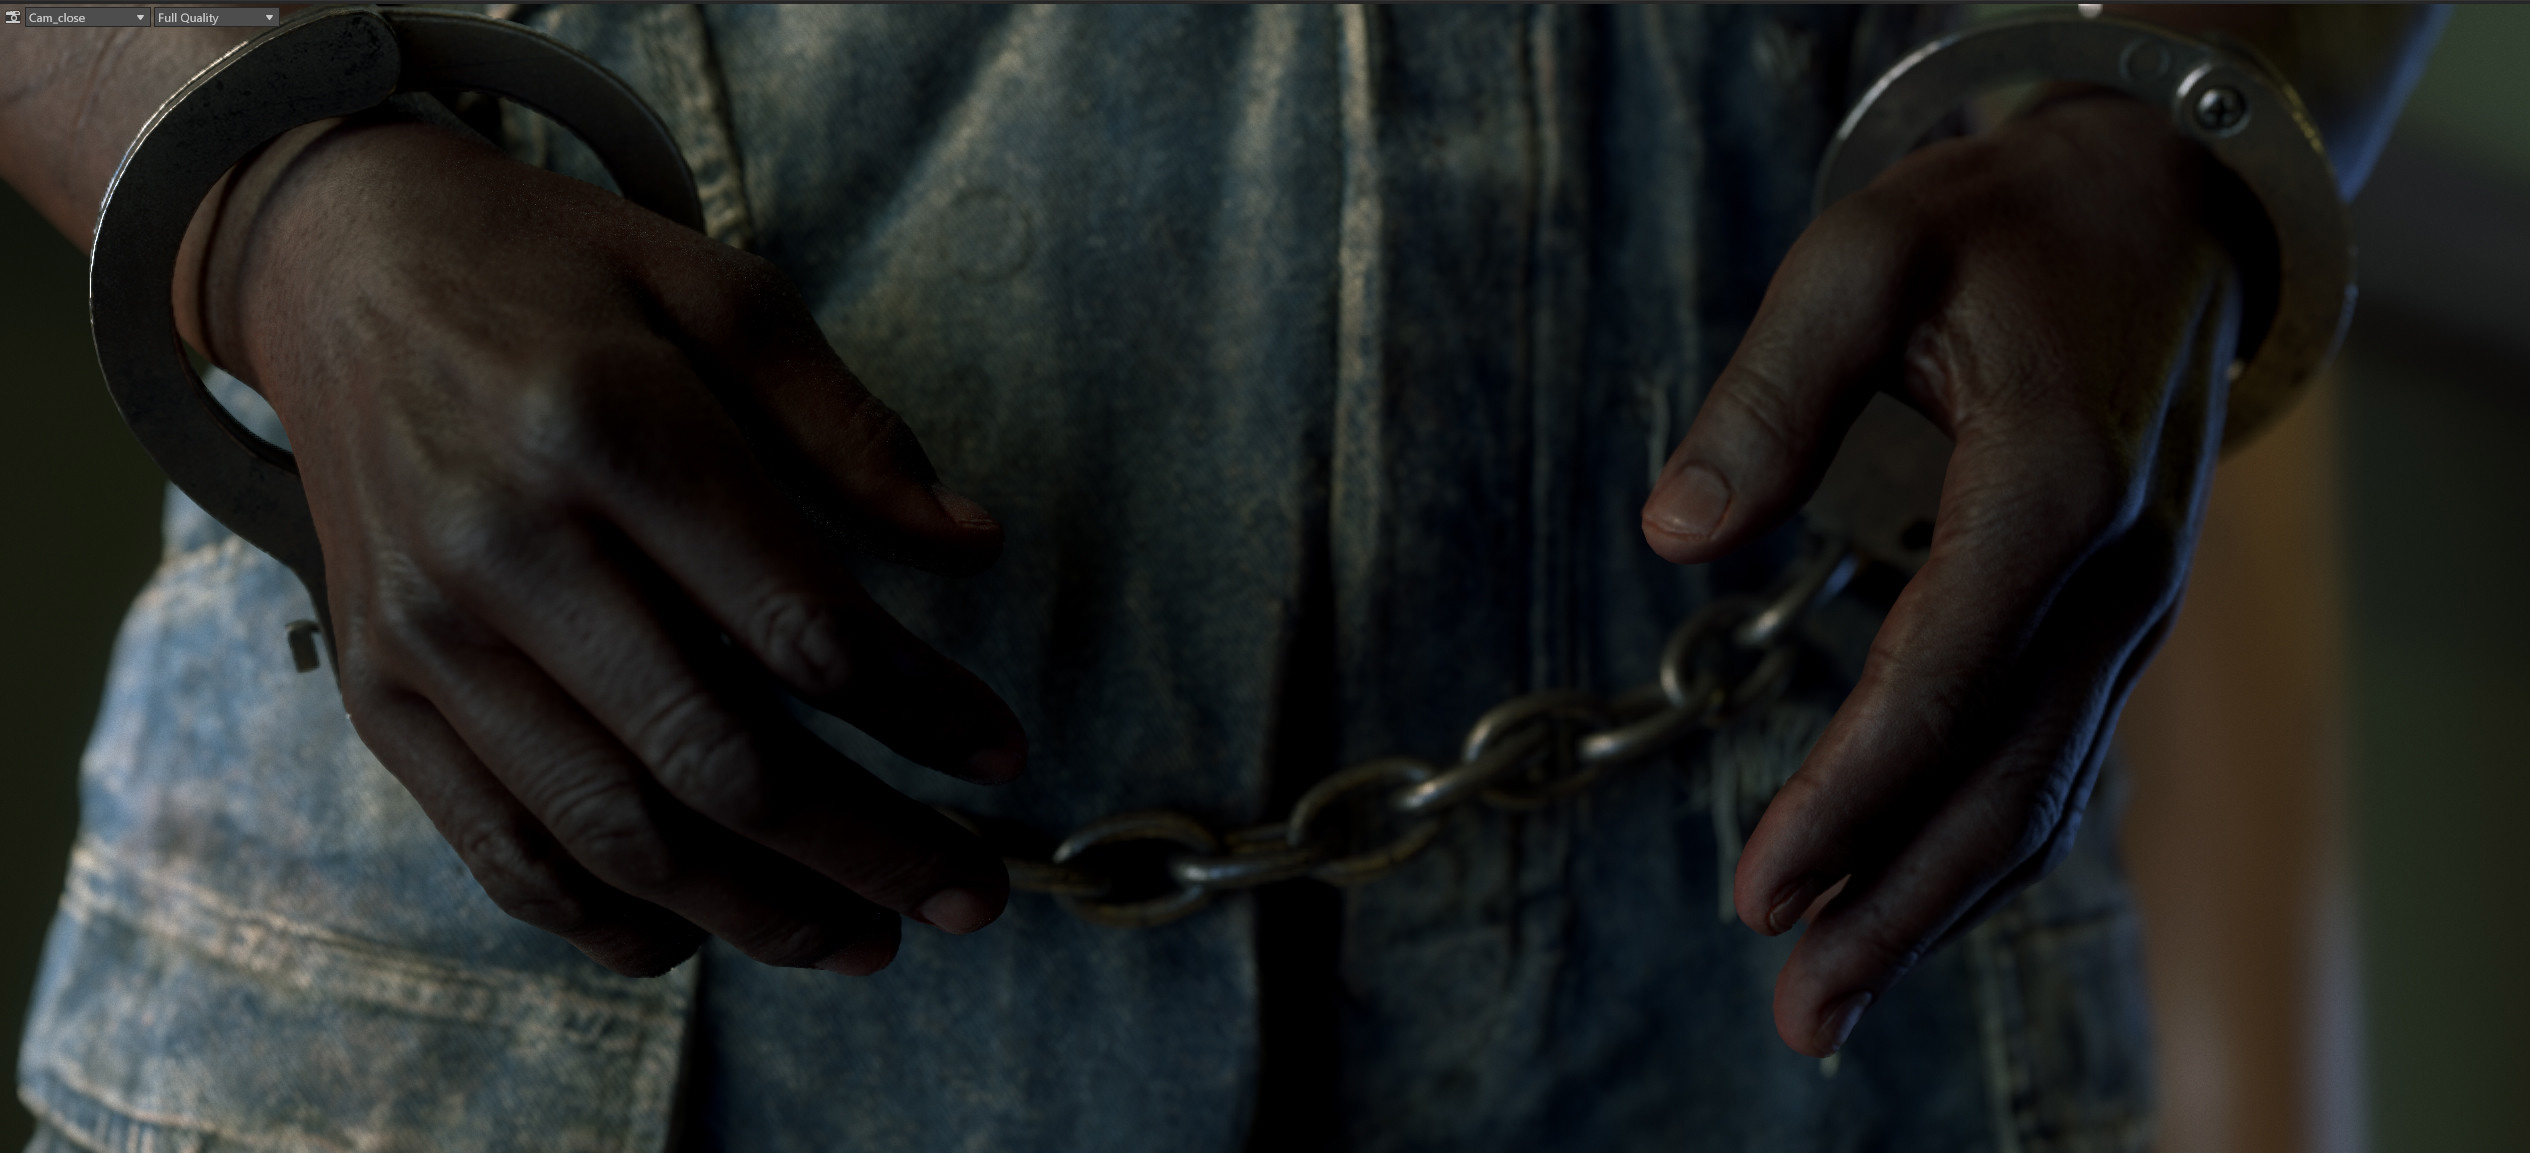
Gallery

 #
#