Introduction
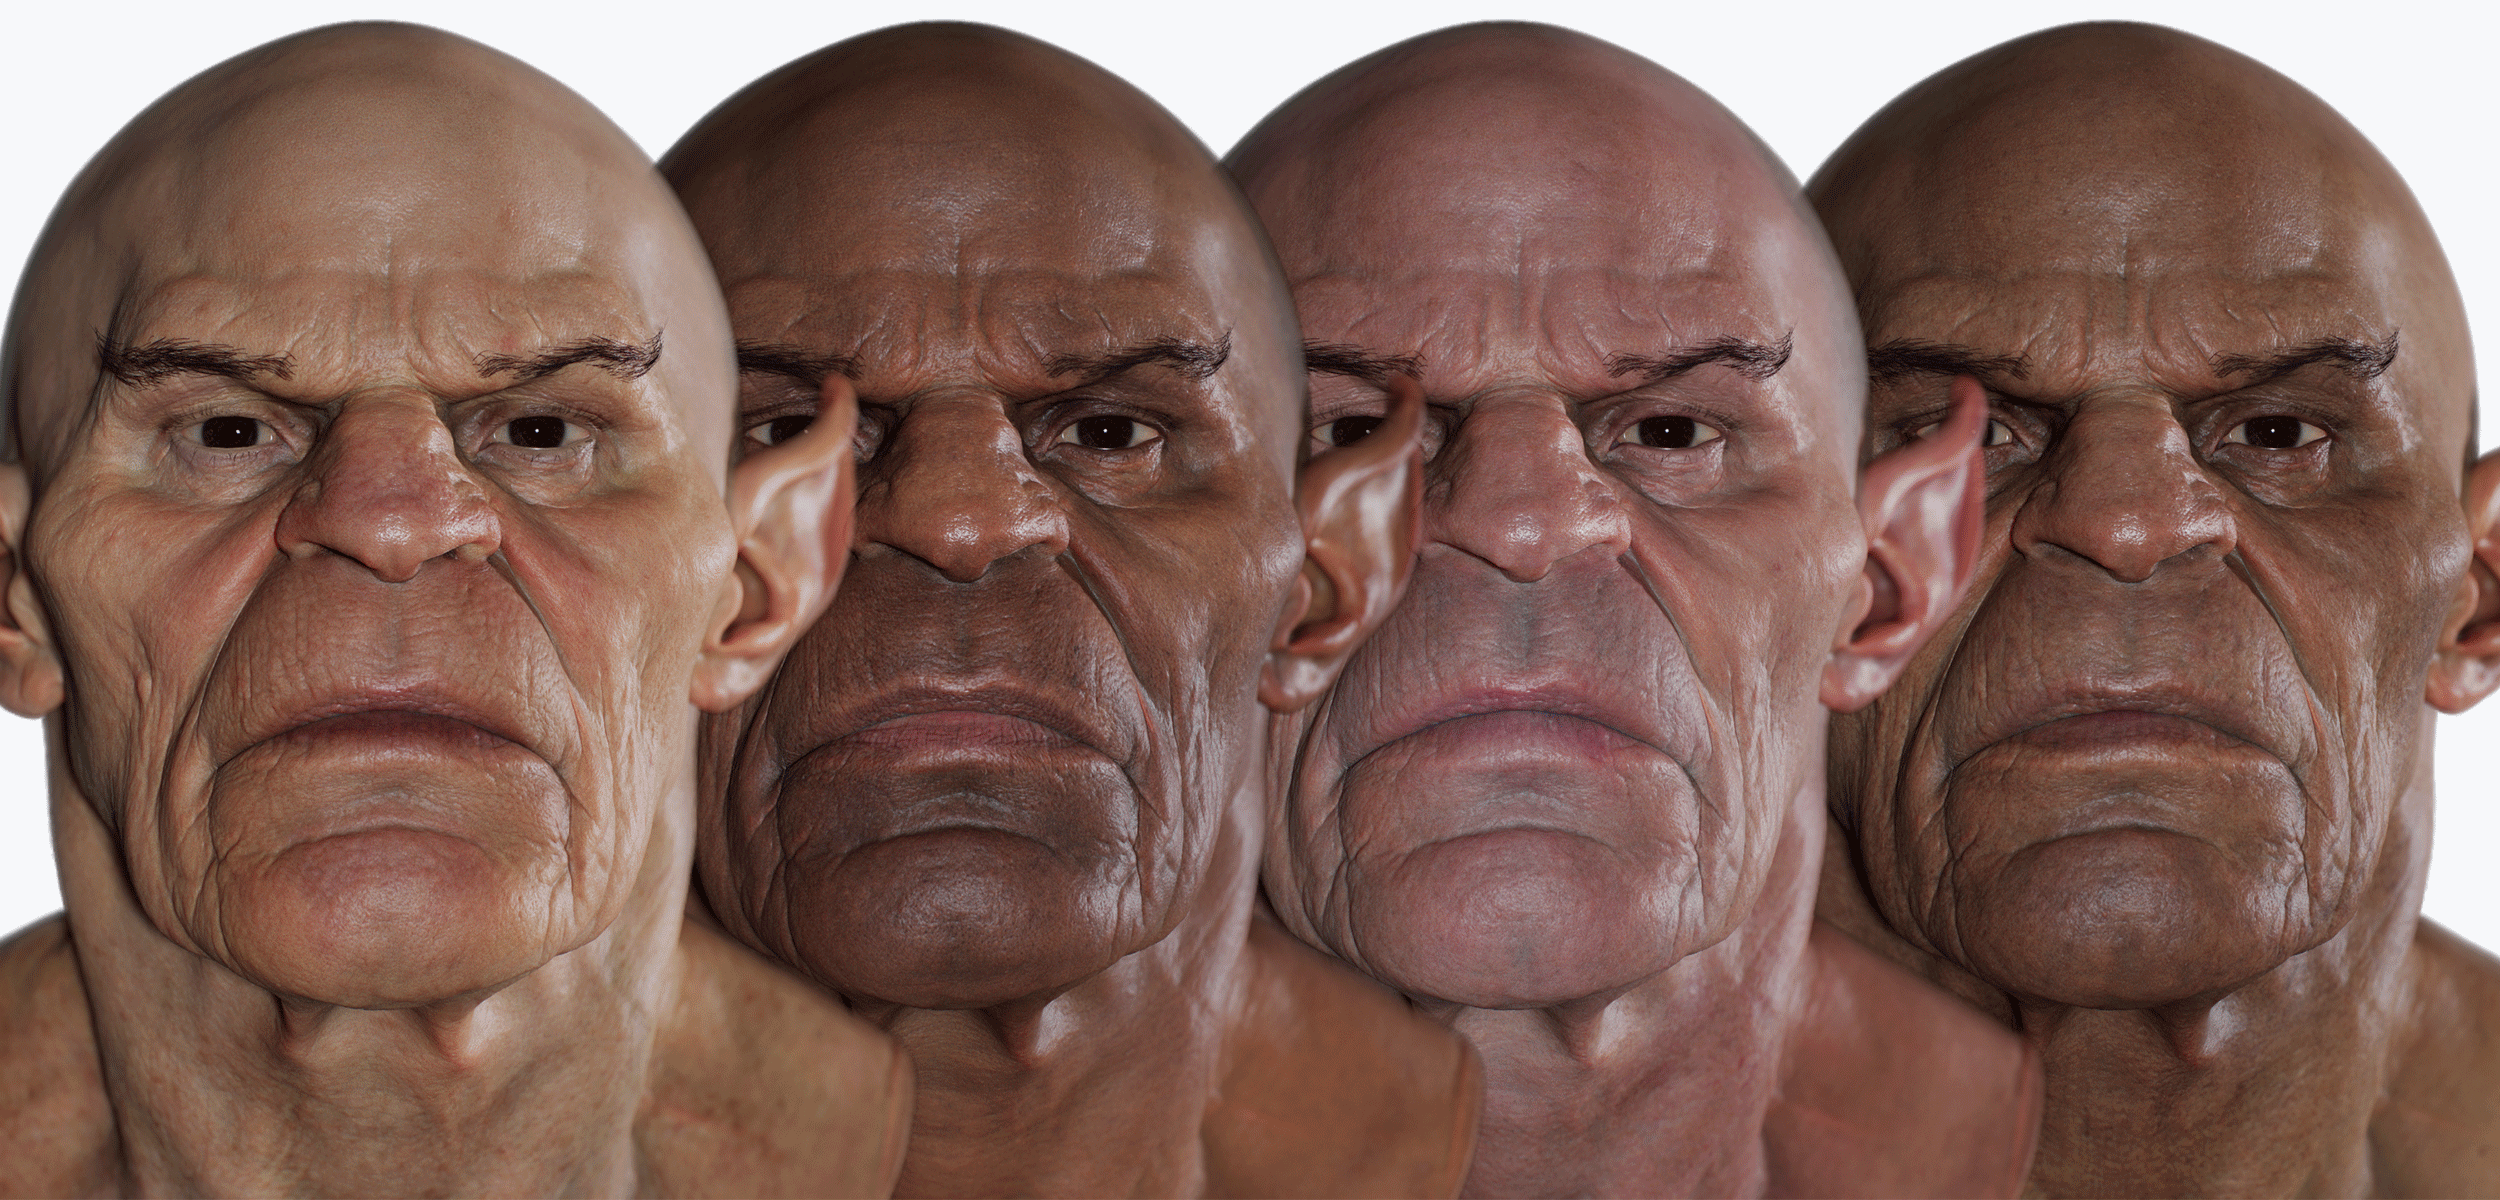
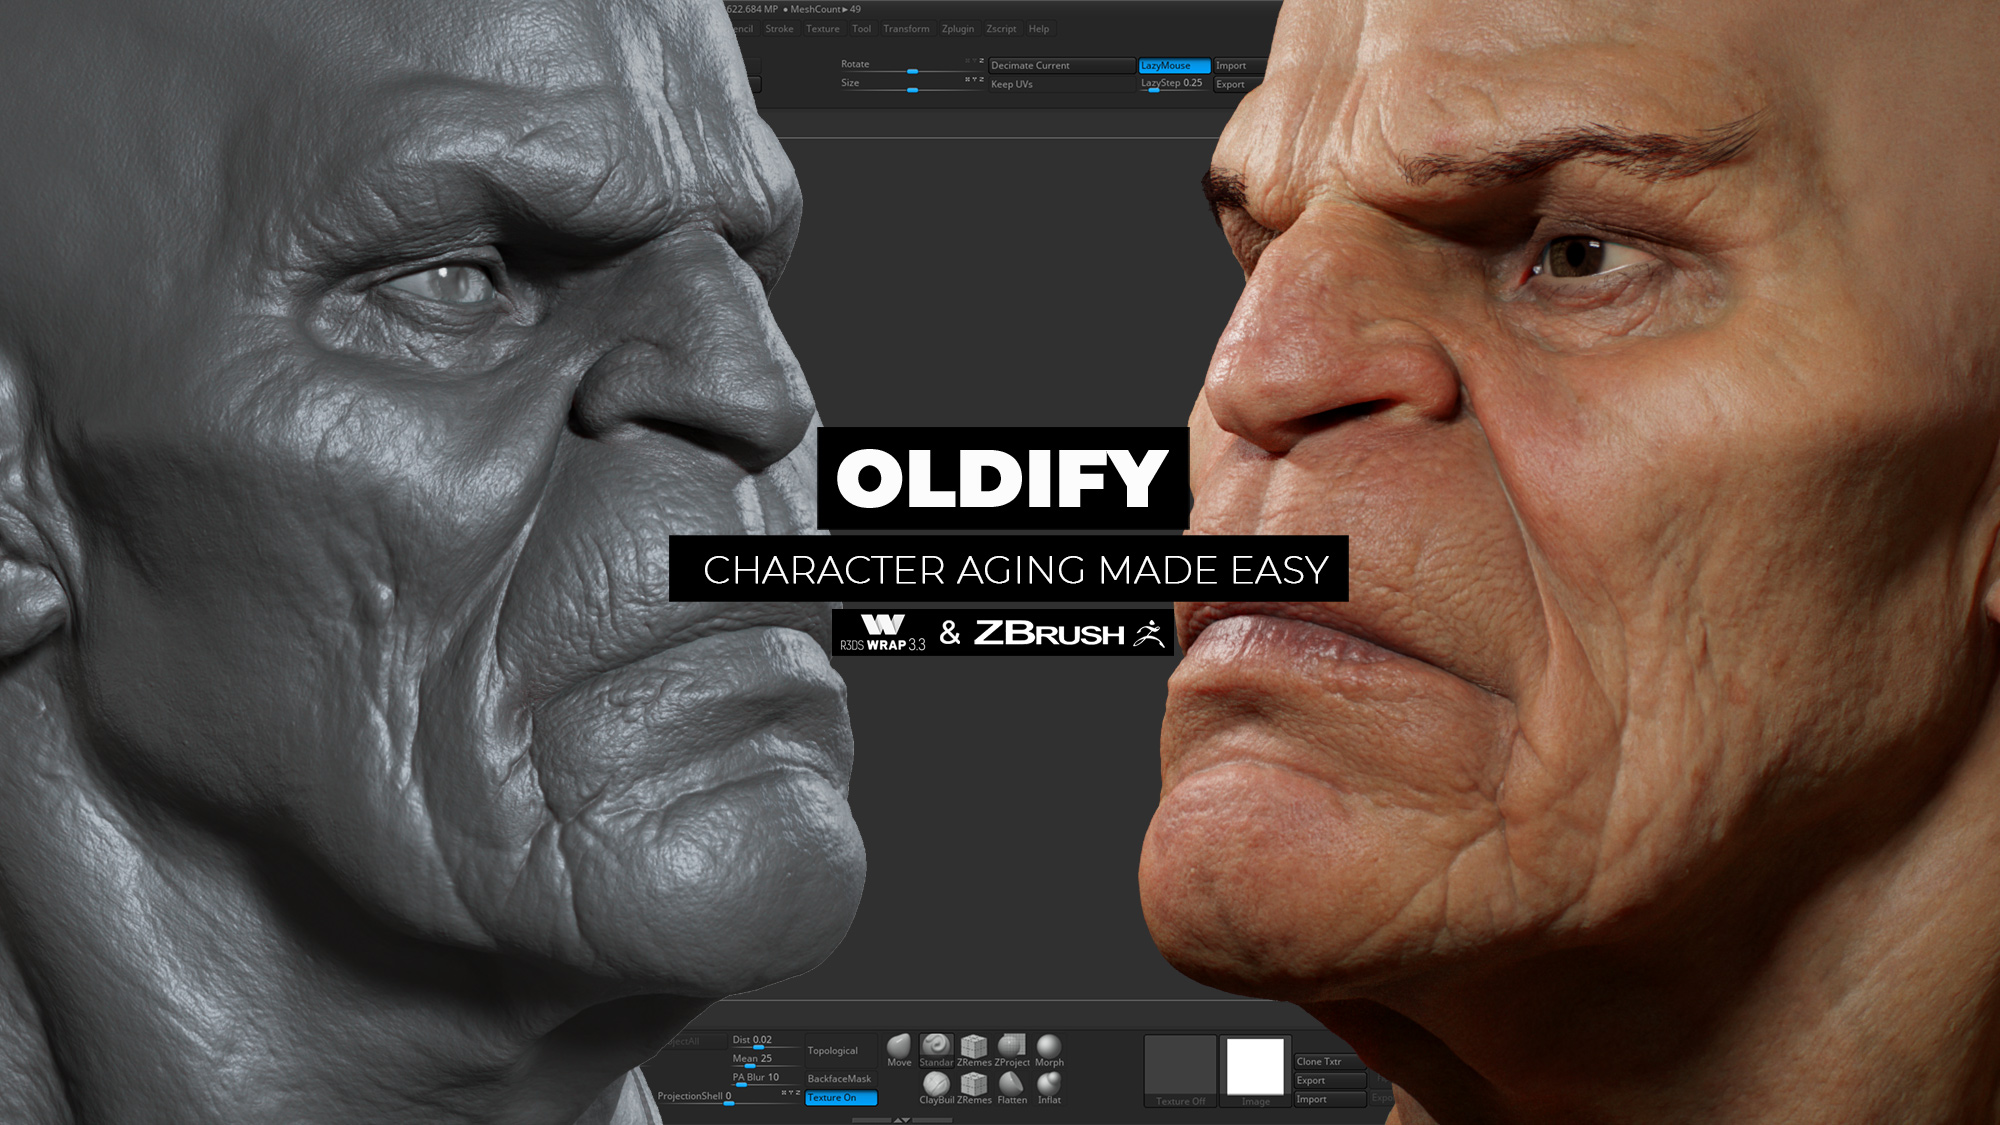
Our latest artist tool "oldify" allows you to quickly and easily age your character using our Zbrush tool. we have put together a selection of full face wrinkle layers extracted from our extensive selection of scanned heads. Assuming you have used our free base mesh applying them to your sculpt is as simple as importing your model and enabling the layer. Wrinkles can be blended and mixed with ease using the morph brush to create unique faces. As well as the medium frequency wrinkles layers we have also included 3 high detail skin pore layers which will perfectly compliment the wrinkles and take your model the the next level of detail.
Special thanks to Niyazi Selimoğlu for providing the example model used in these tutorials :: https://www.artstation.com/niyoo
Purchase Oldify Here
Data set includes
- 1 x Oldify ZTL
- 1 x Cavity and Albedo map PSD
- 1 x Wrapping / Sculpting Guide map
1. Working with oldify
In this video I will show you how to wrap our base mesh to your sculpt and apply the oldify wrinkles and skin pore details to your model.
If you have sculpted your model using our base mesh and guide image from scratch you do not need to follow the wrapping instructions in the video simply import your model into the oldify ZTL as shown and start working with the wrinkle layers.
Workflow outline
- Wrap supplied base mesh to your sculpt or scan using Wrap 3 or Zwrap
- Project wrapped mesh onto your sculpt in Zbrush
- Apply oldify wrinkles using layers
2. Blending wrinkles
In this video I will show you how to blend wrinkle layers in the oldify Ztool using a simple morphing technique
Workflow outline
- Select desired wrinkle layer and store morph target
- Disable wrinkle layer and create a new Mix layer and enable recording
- Use morph brush to paint wrinkles
- Disable mix layer and enable second wrinkle layer and store a morph target
- Disable wrinkle layer and enable mix layer and use morph brush to paint wrinkles
Texturing
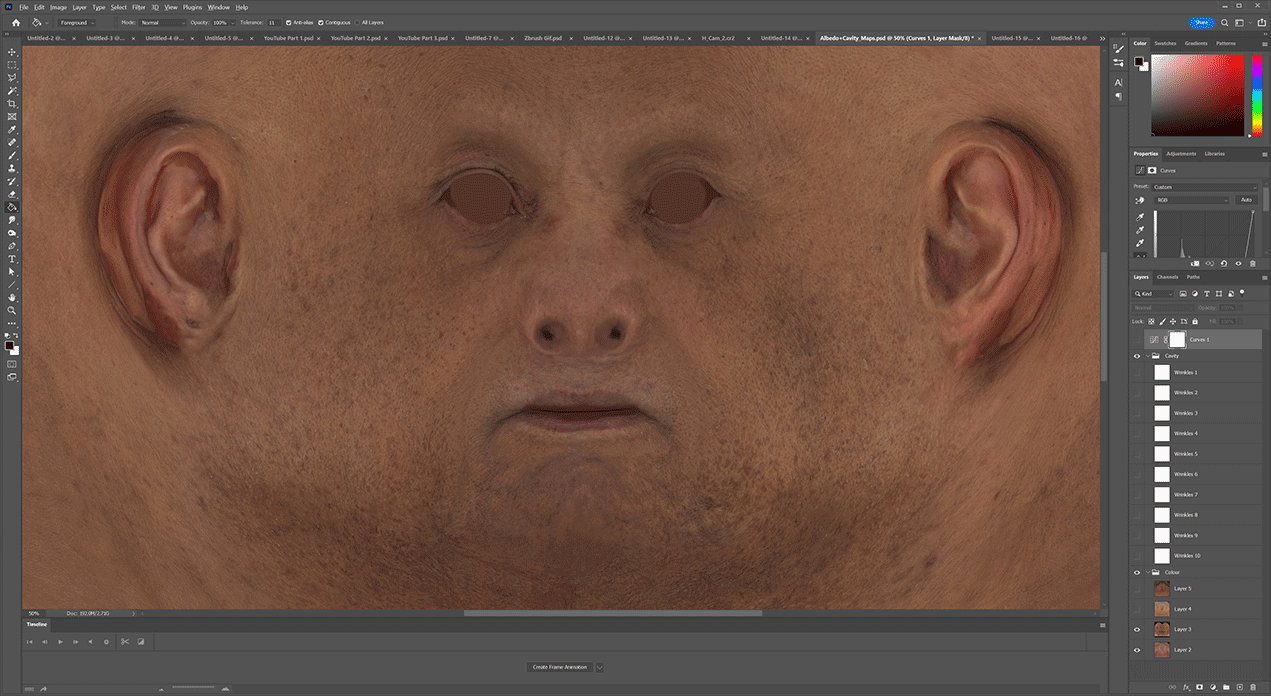
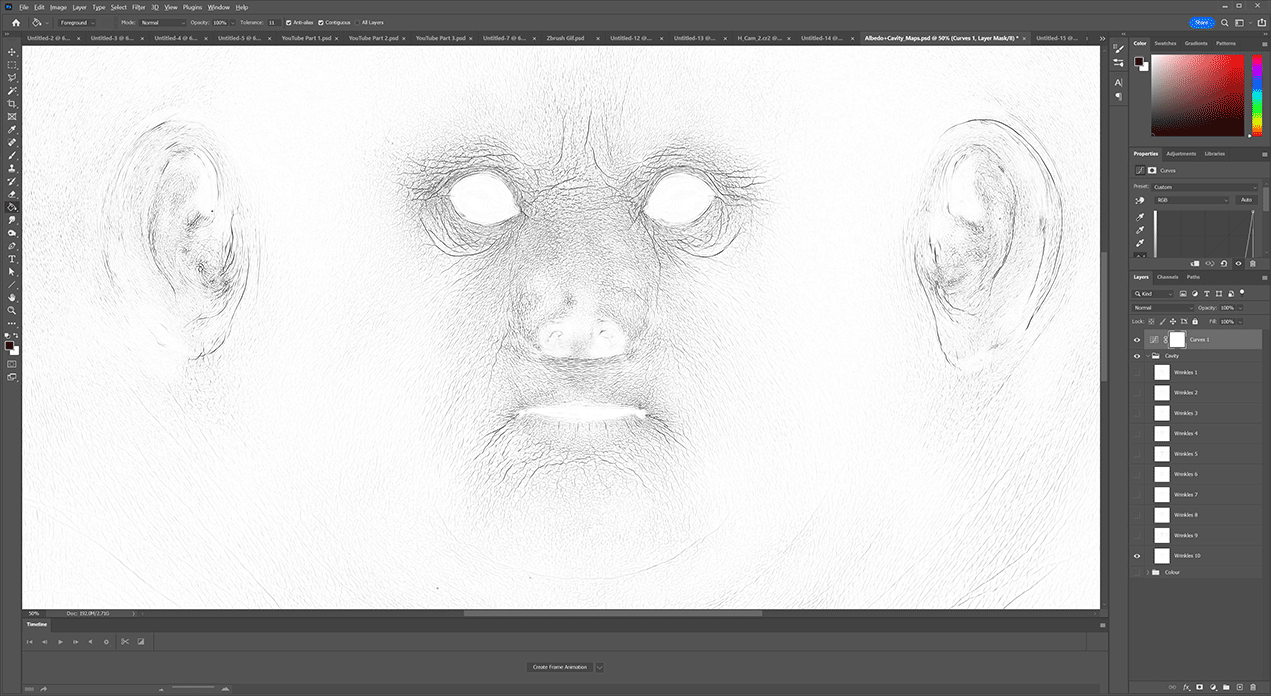
Here I will show you how to use the supplied cavity and albedo maps to create a texture that will match your new oldifyed geometry.
For more information on rendering in Marmoset Toolbag please see our full tutorial on the subject here :: https://youtu.be/mVbj23RvF80
Workflow outline
- Select cavity map layer corresponding to wrinkle layer
- Duplicate cavity layer 3 - 4 times and apply gaussian blur of 2.2
- Multiply all blurred cavity layers together and merge layers.
- Set merged cavity layers to multiply
- Adjust HSV to blend cavity map with albedo map
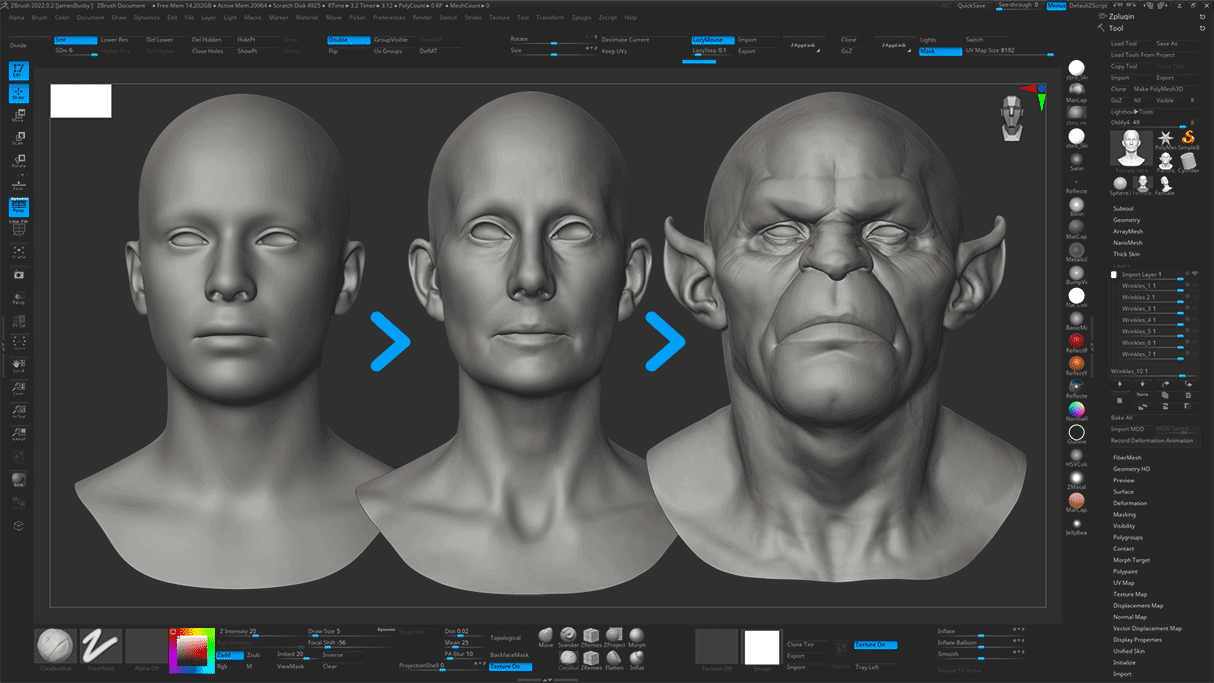
ZTL File with 10 wrinkle layers
Simply replace our base model shown here on the right with your sculpted / wrapped mesh and enable the layers to instantly transfer scanned wrinkles to your mesh
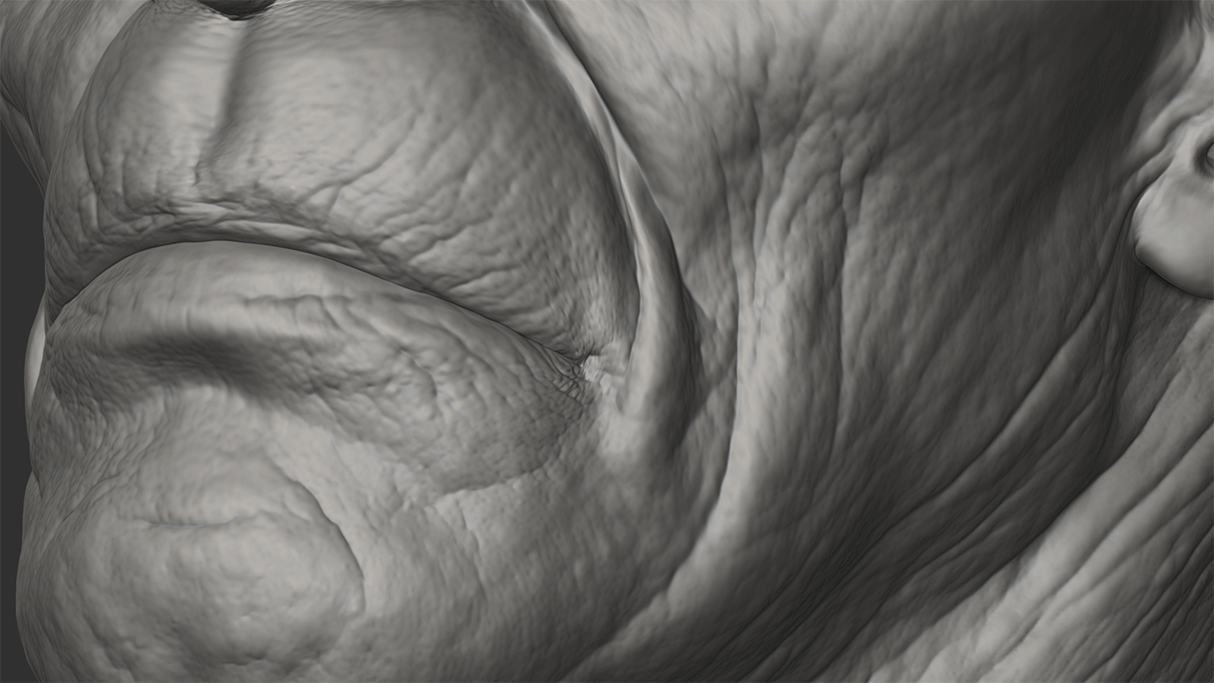
Fine details layer
We have included 3 high detail skin pore and file line layers to instantly add an extra level of detail to your model.
Cavity and Albedo Maps
We have included 10 x Cavity maps to compliment each of the wrinkle layers as well as 4 x Albedo Maps.