


Introduction
In this short article I want to show you how I quickly hacked together these scenes using a selection of anatomy reference scans from our library. The scans in question are from our Male 01 and Male 05 collections. Whilst these are relatively low resolution models intended primarily for anatomy reference there is still a lot of detail that can be extracted using Photoshop processing techniques on the textures and combined with some creative lighting and post effects you can create some convincing renders.
Example renders
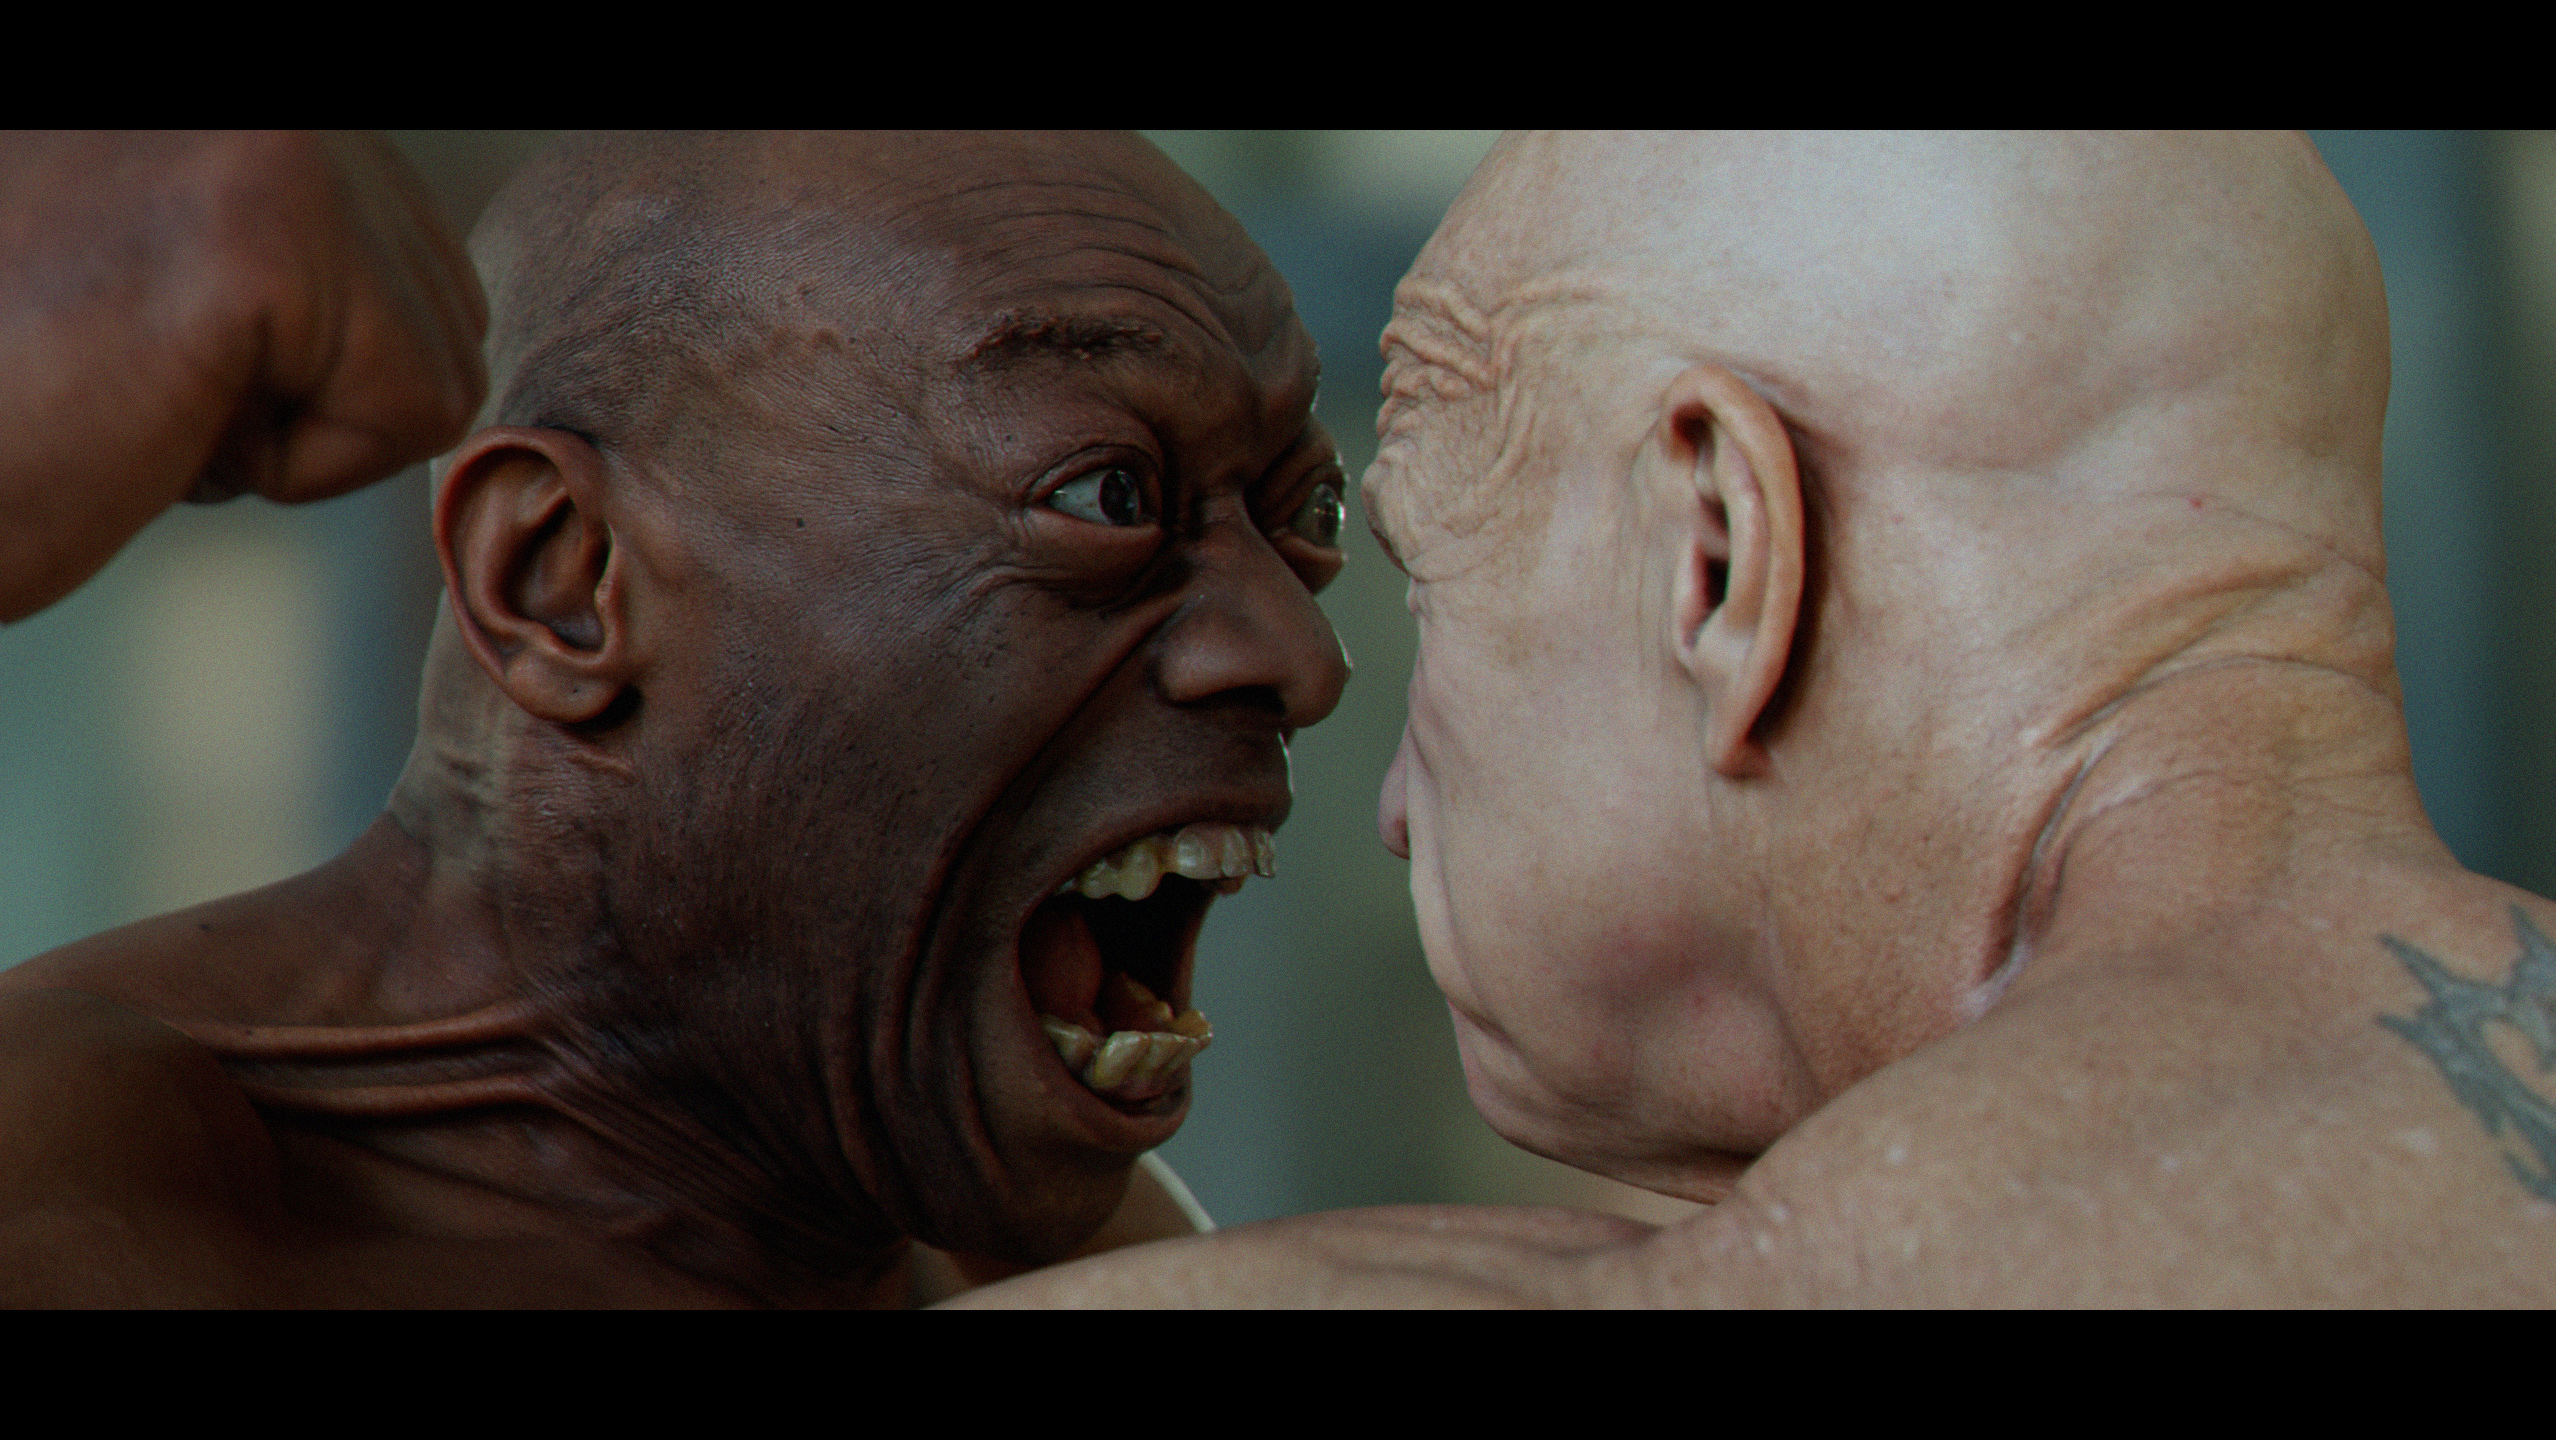
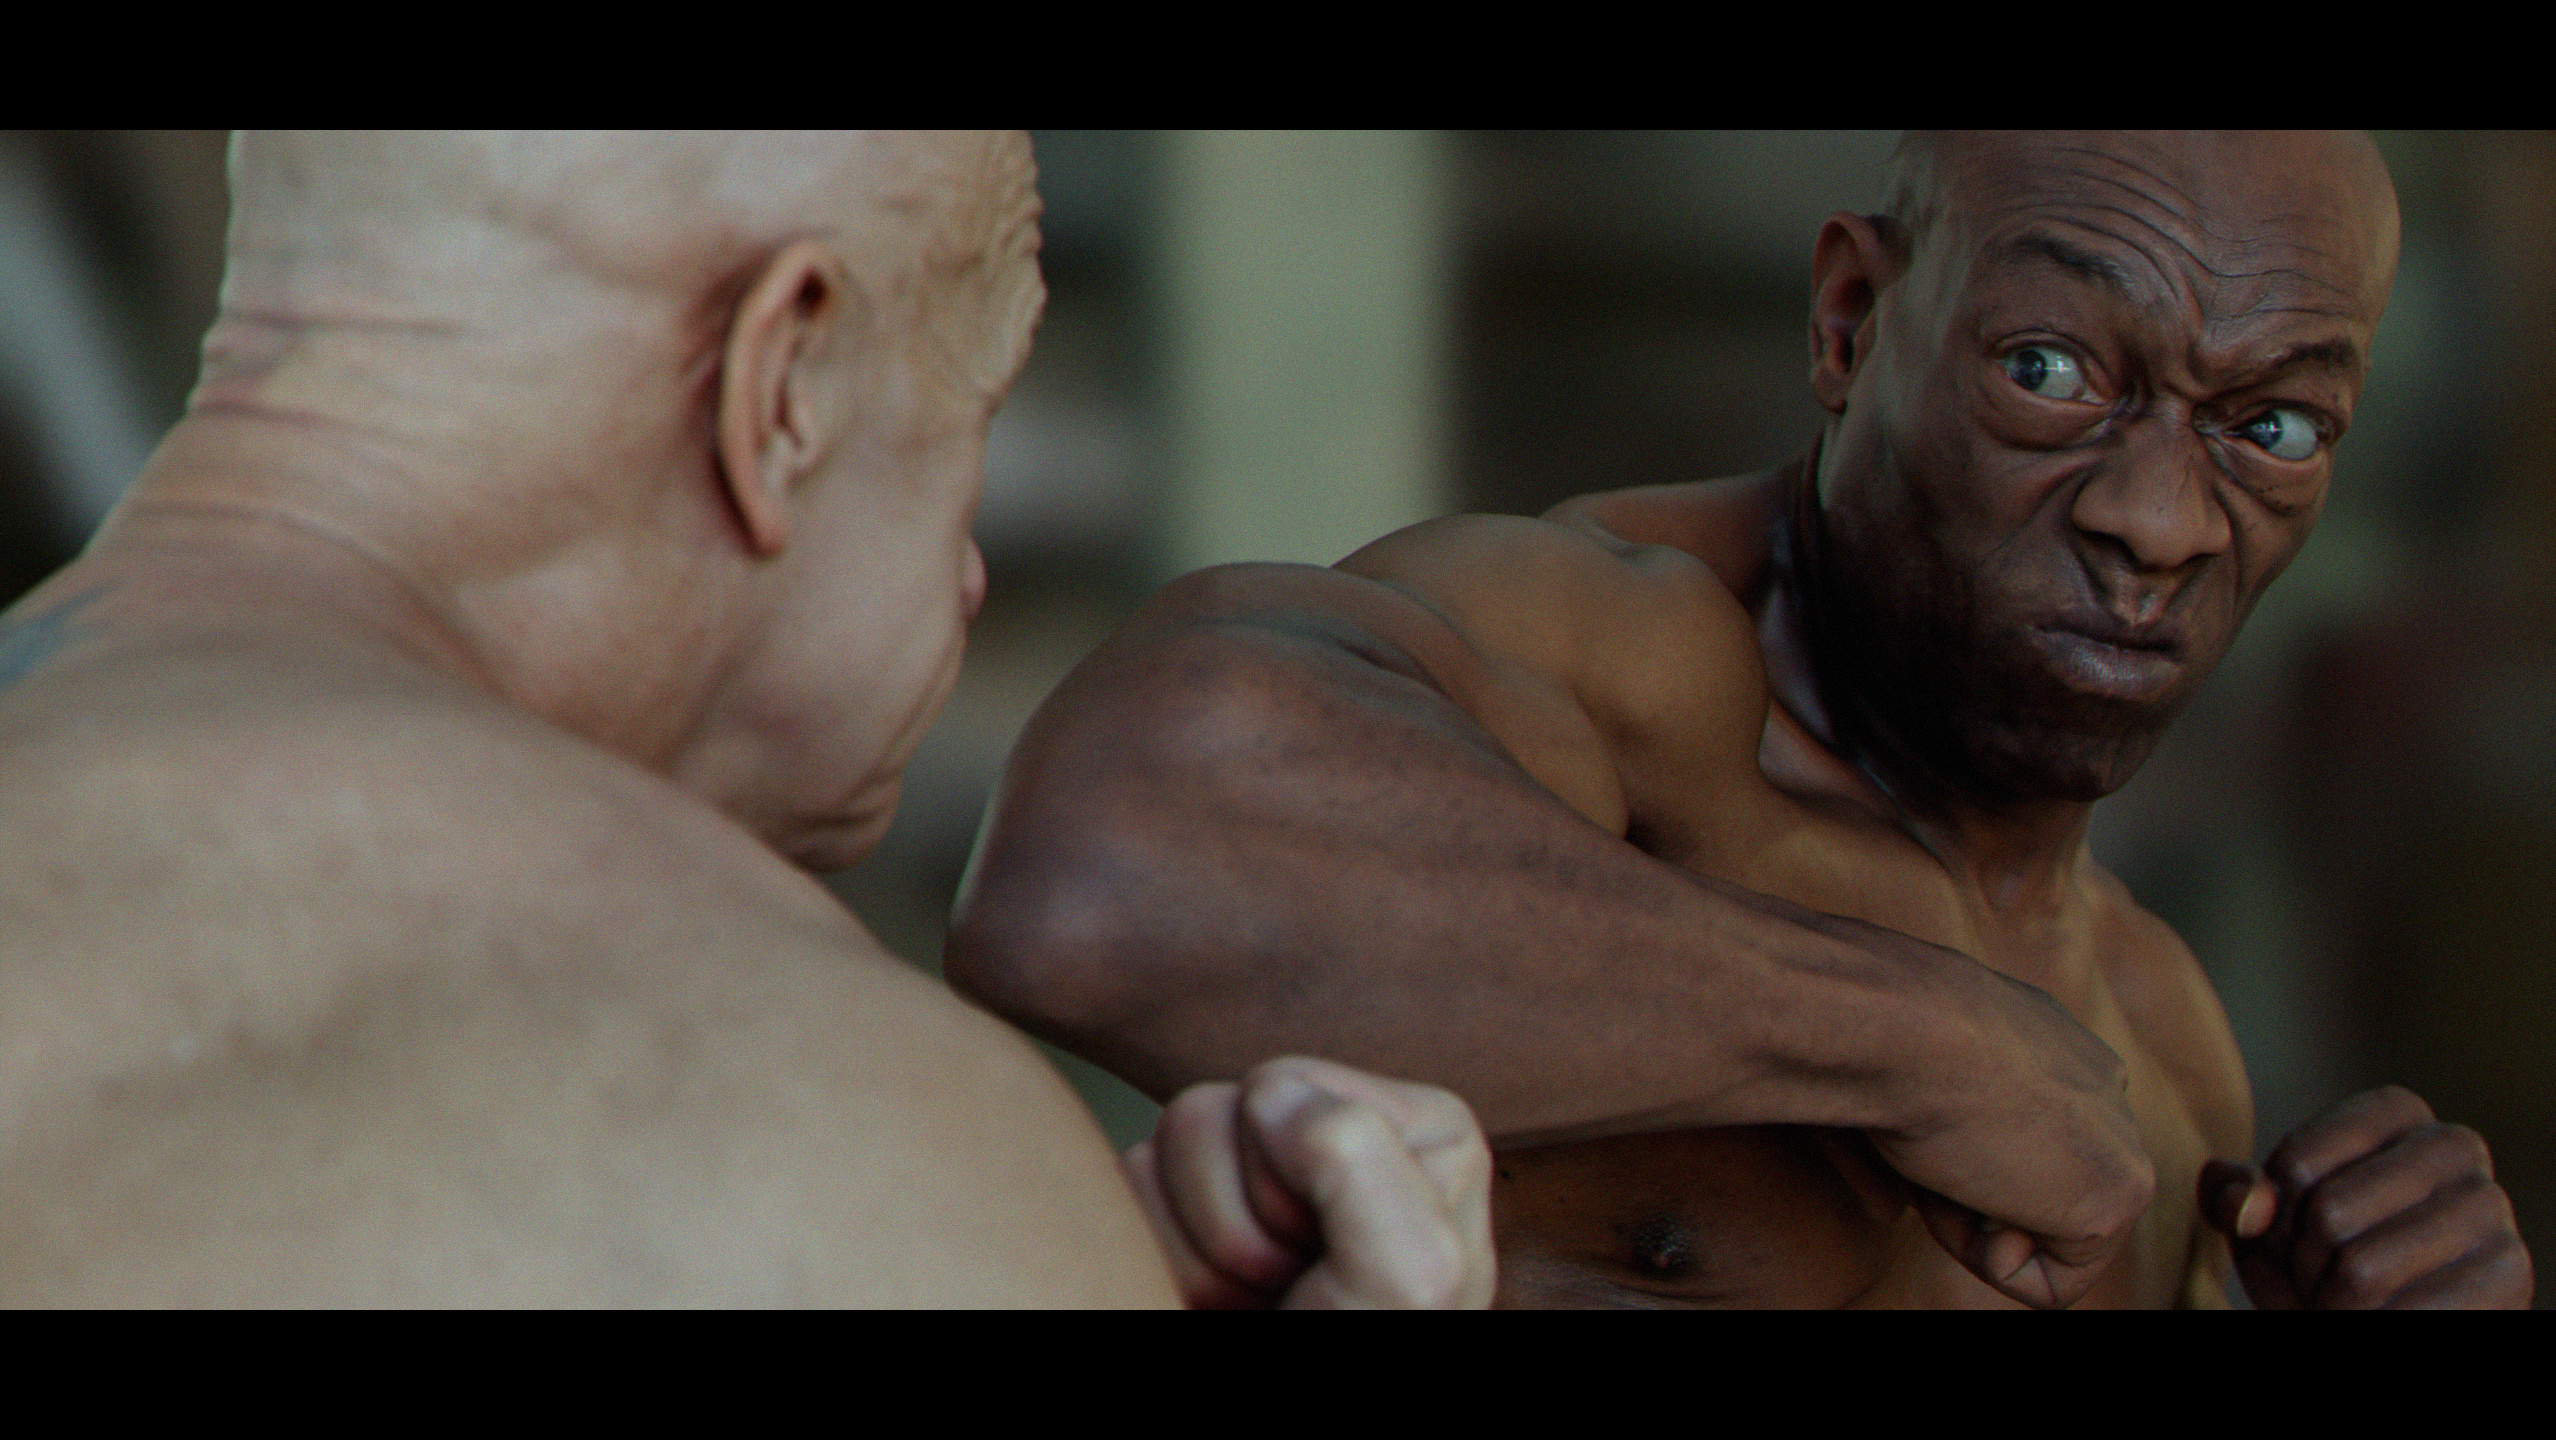
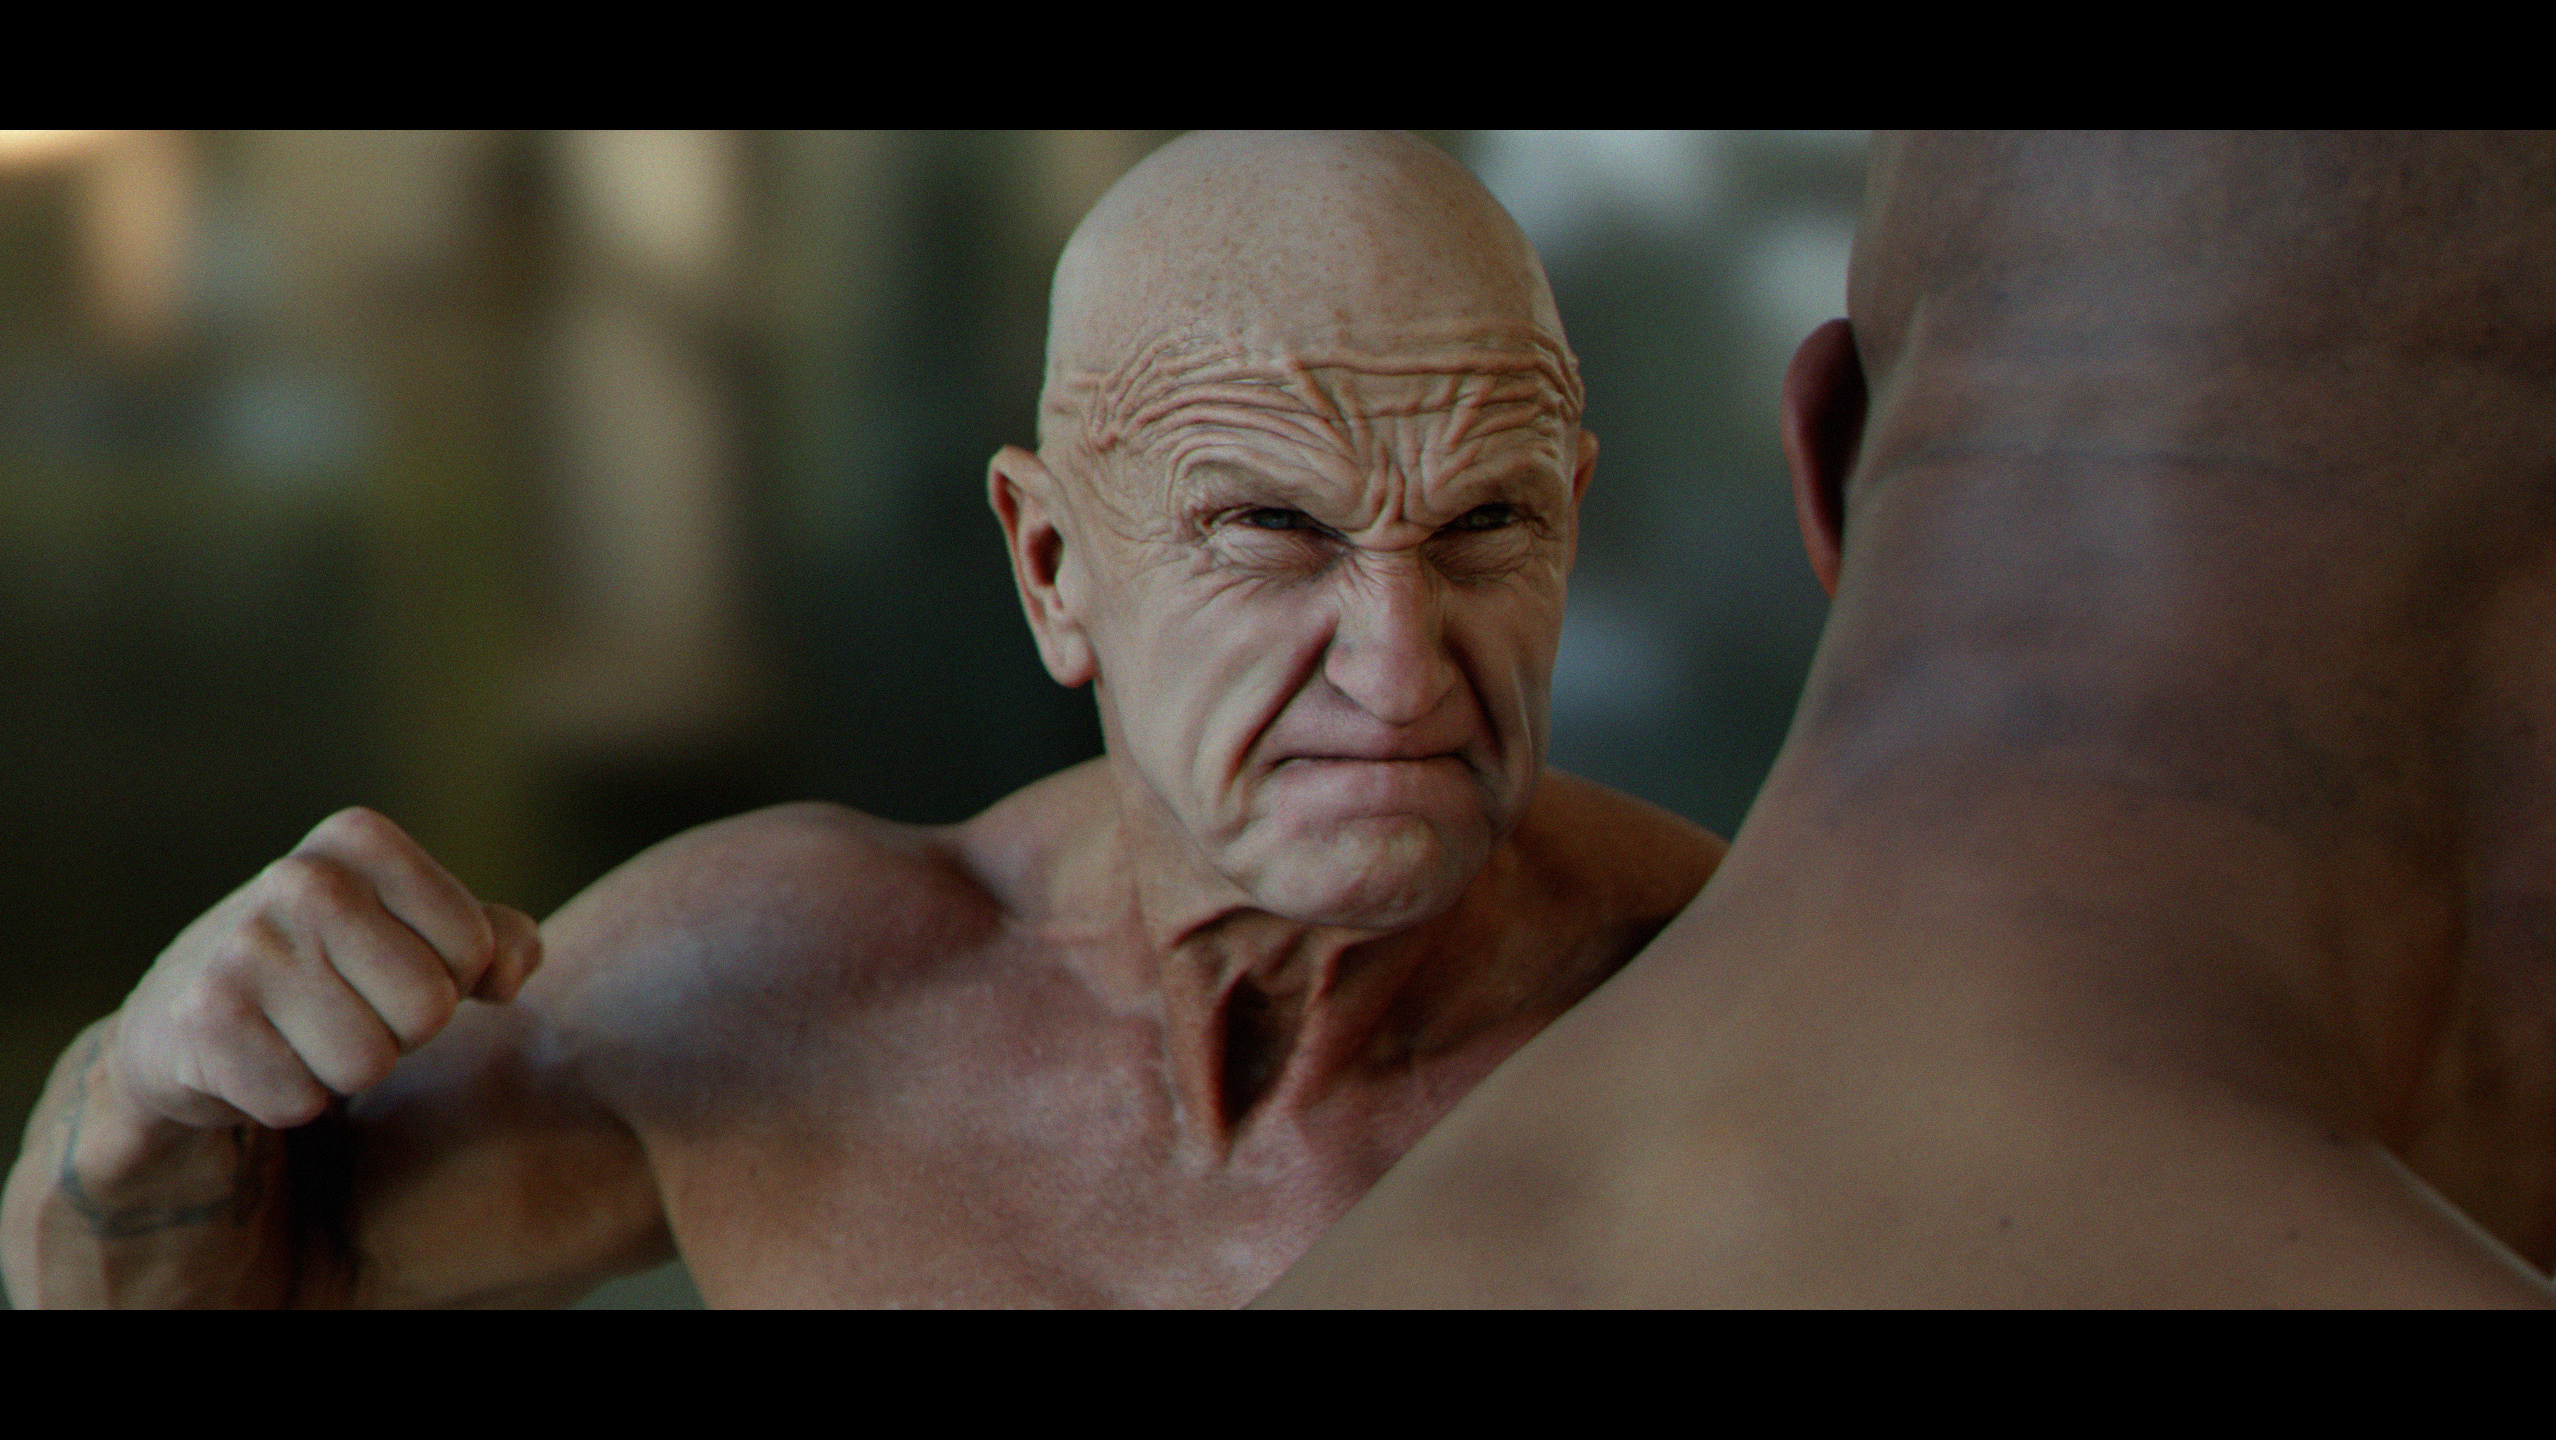
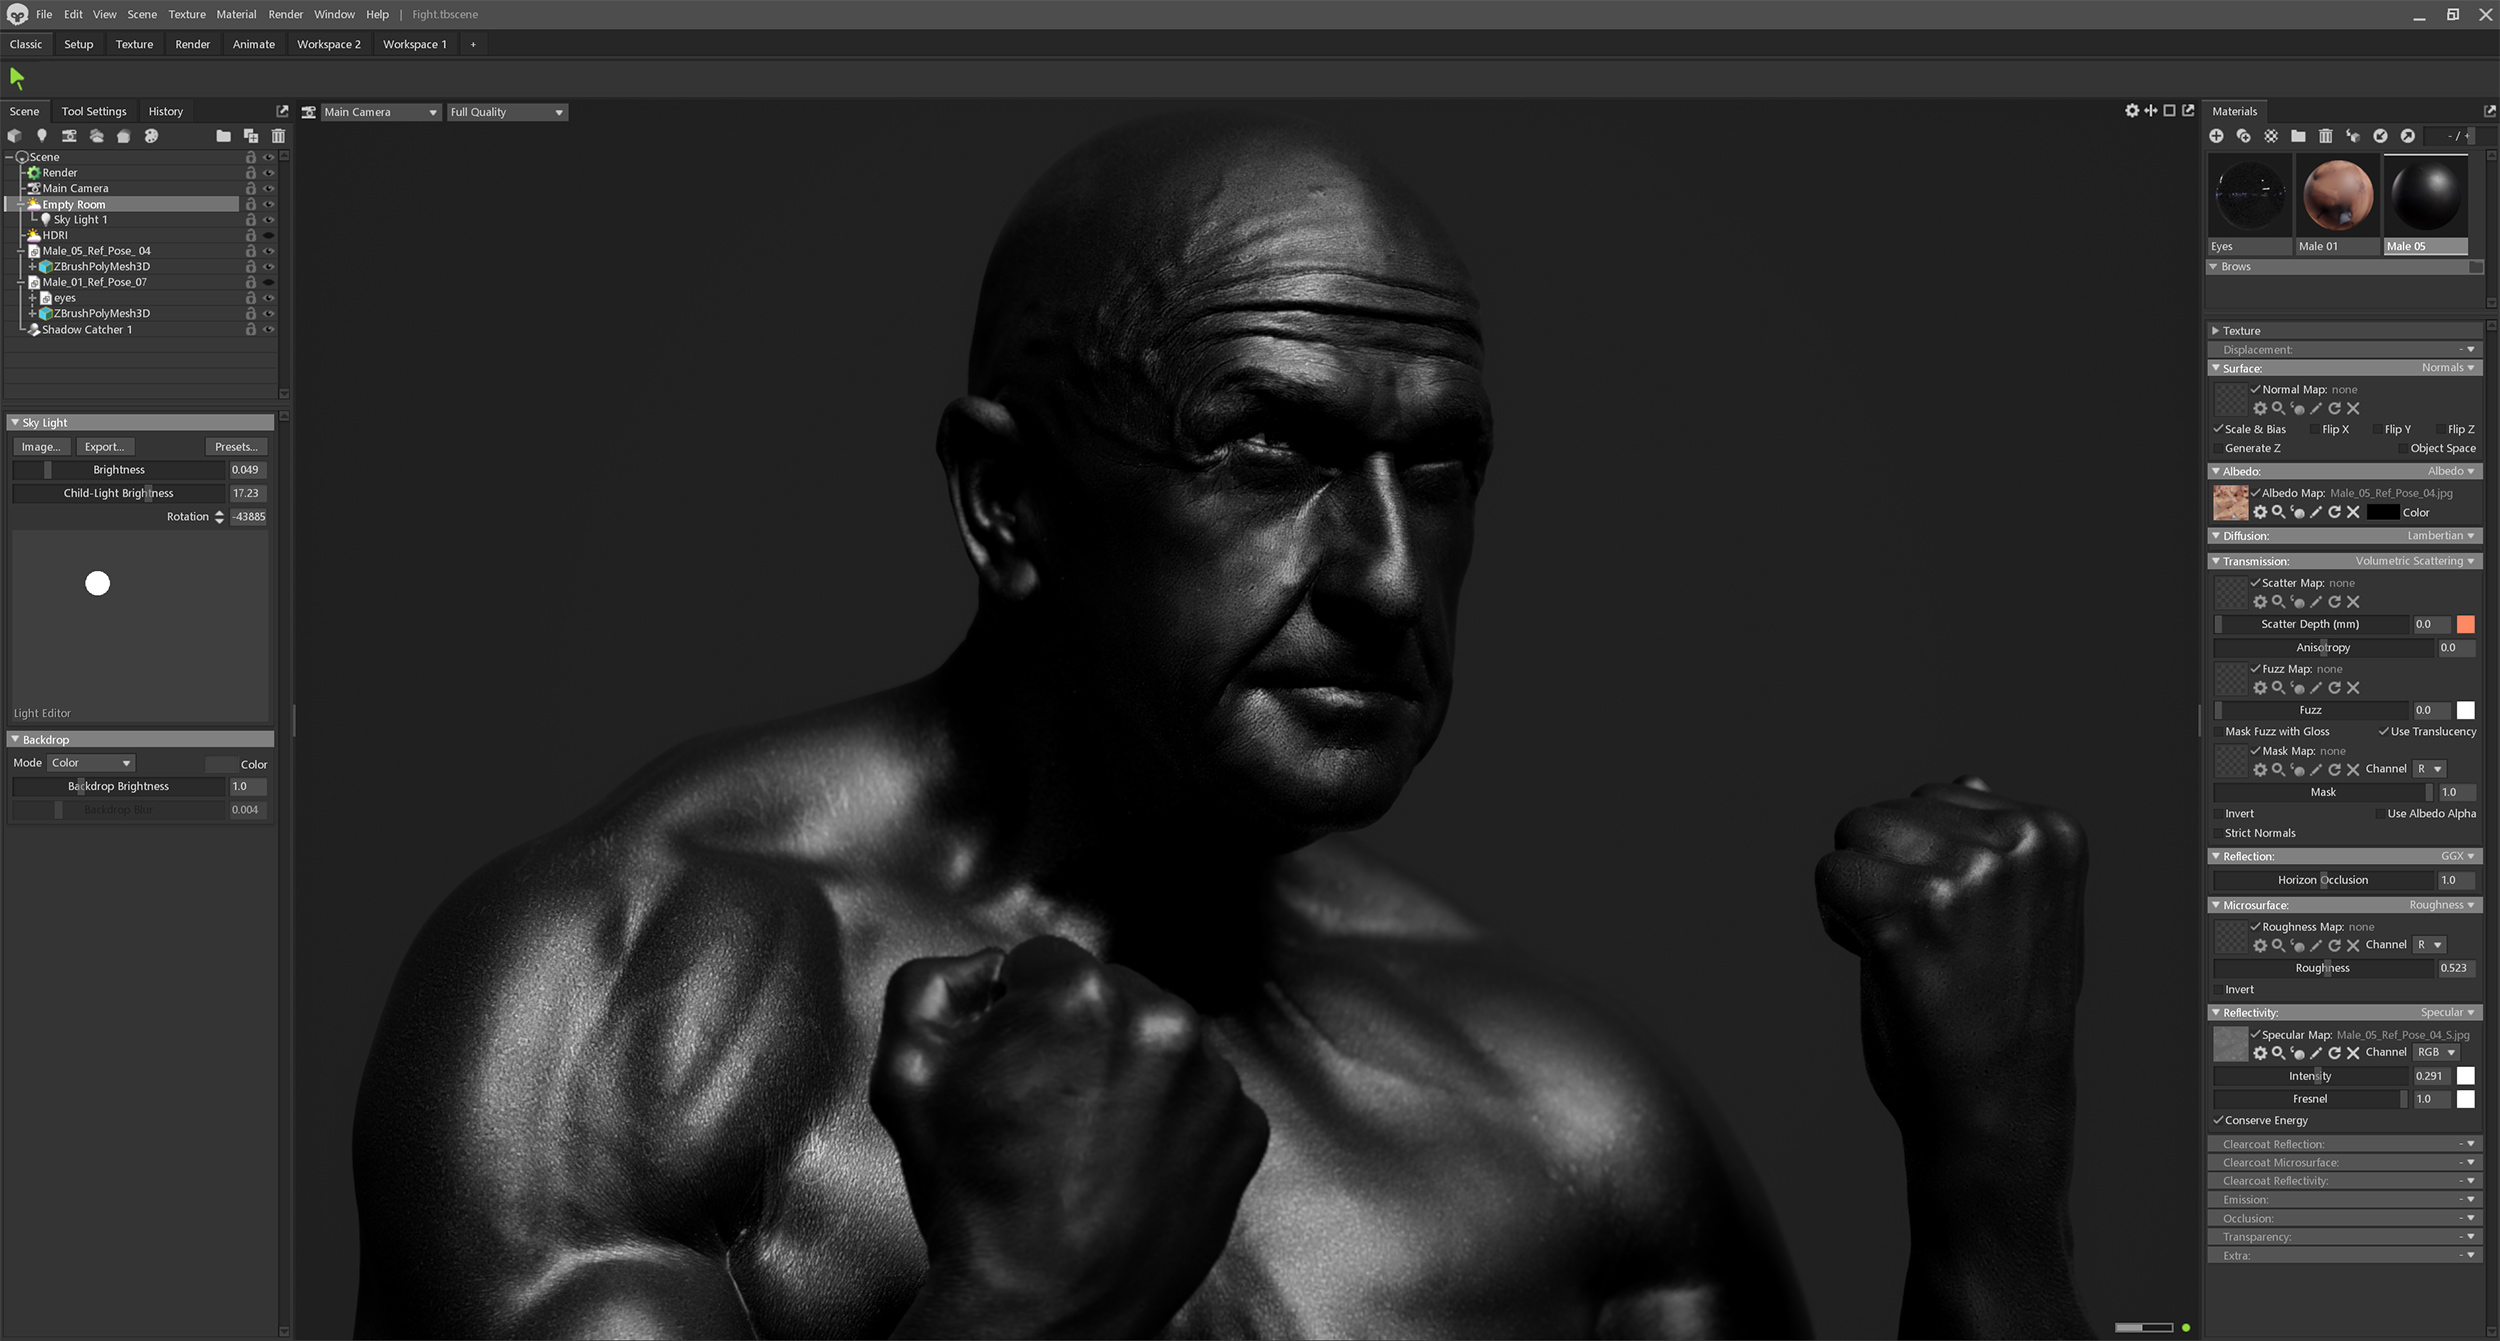
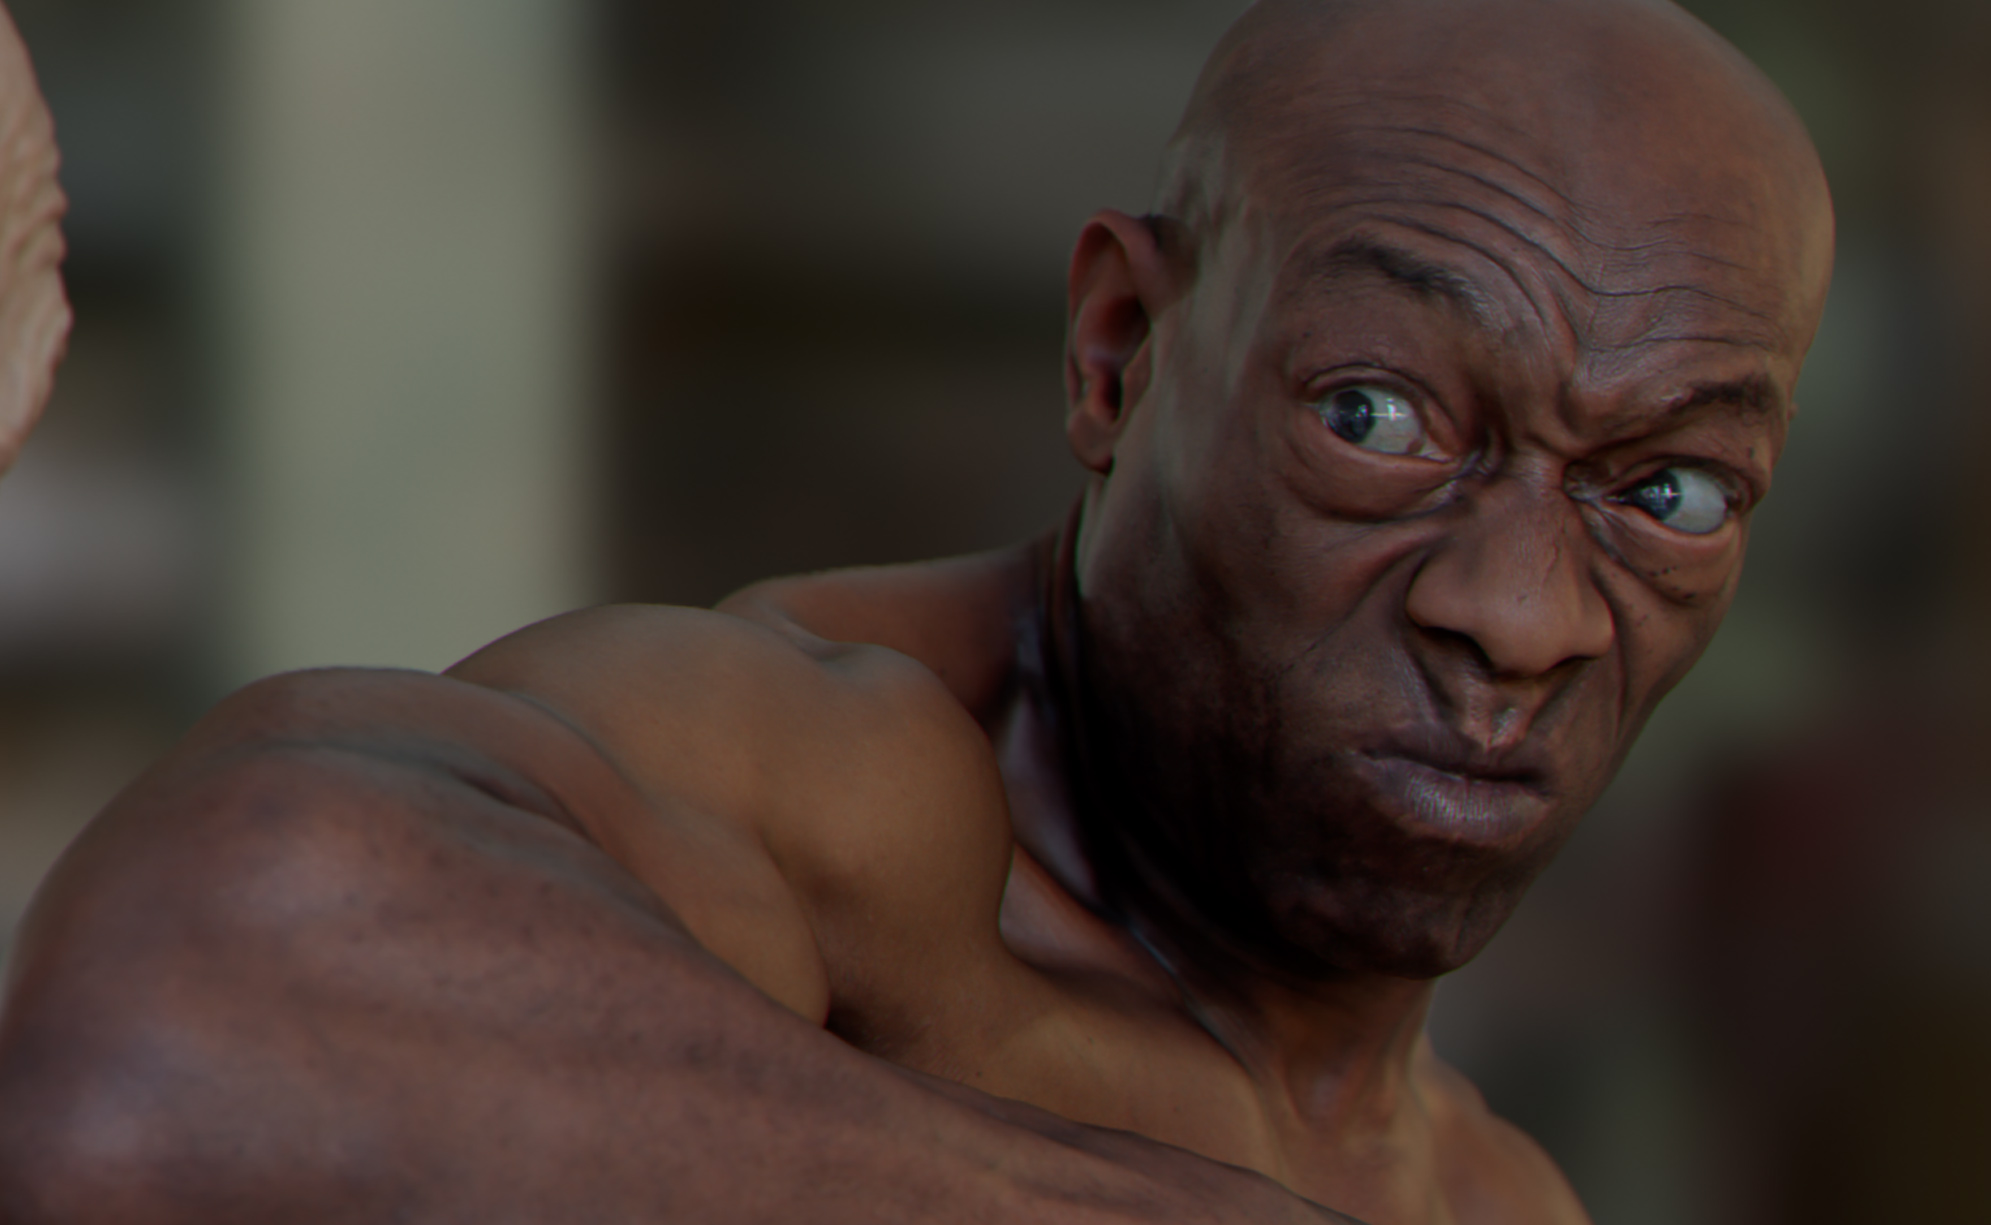
Here are a few renders that I created using the techniques described below
Scene Setup
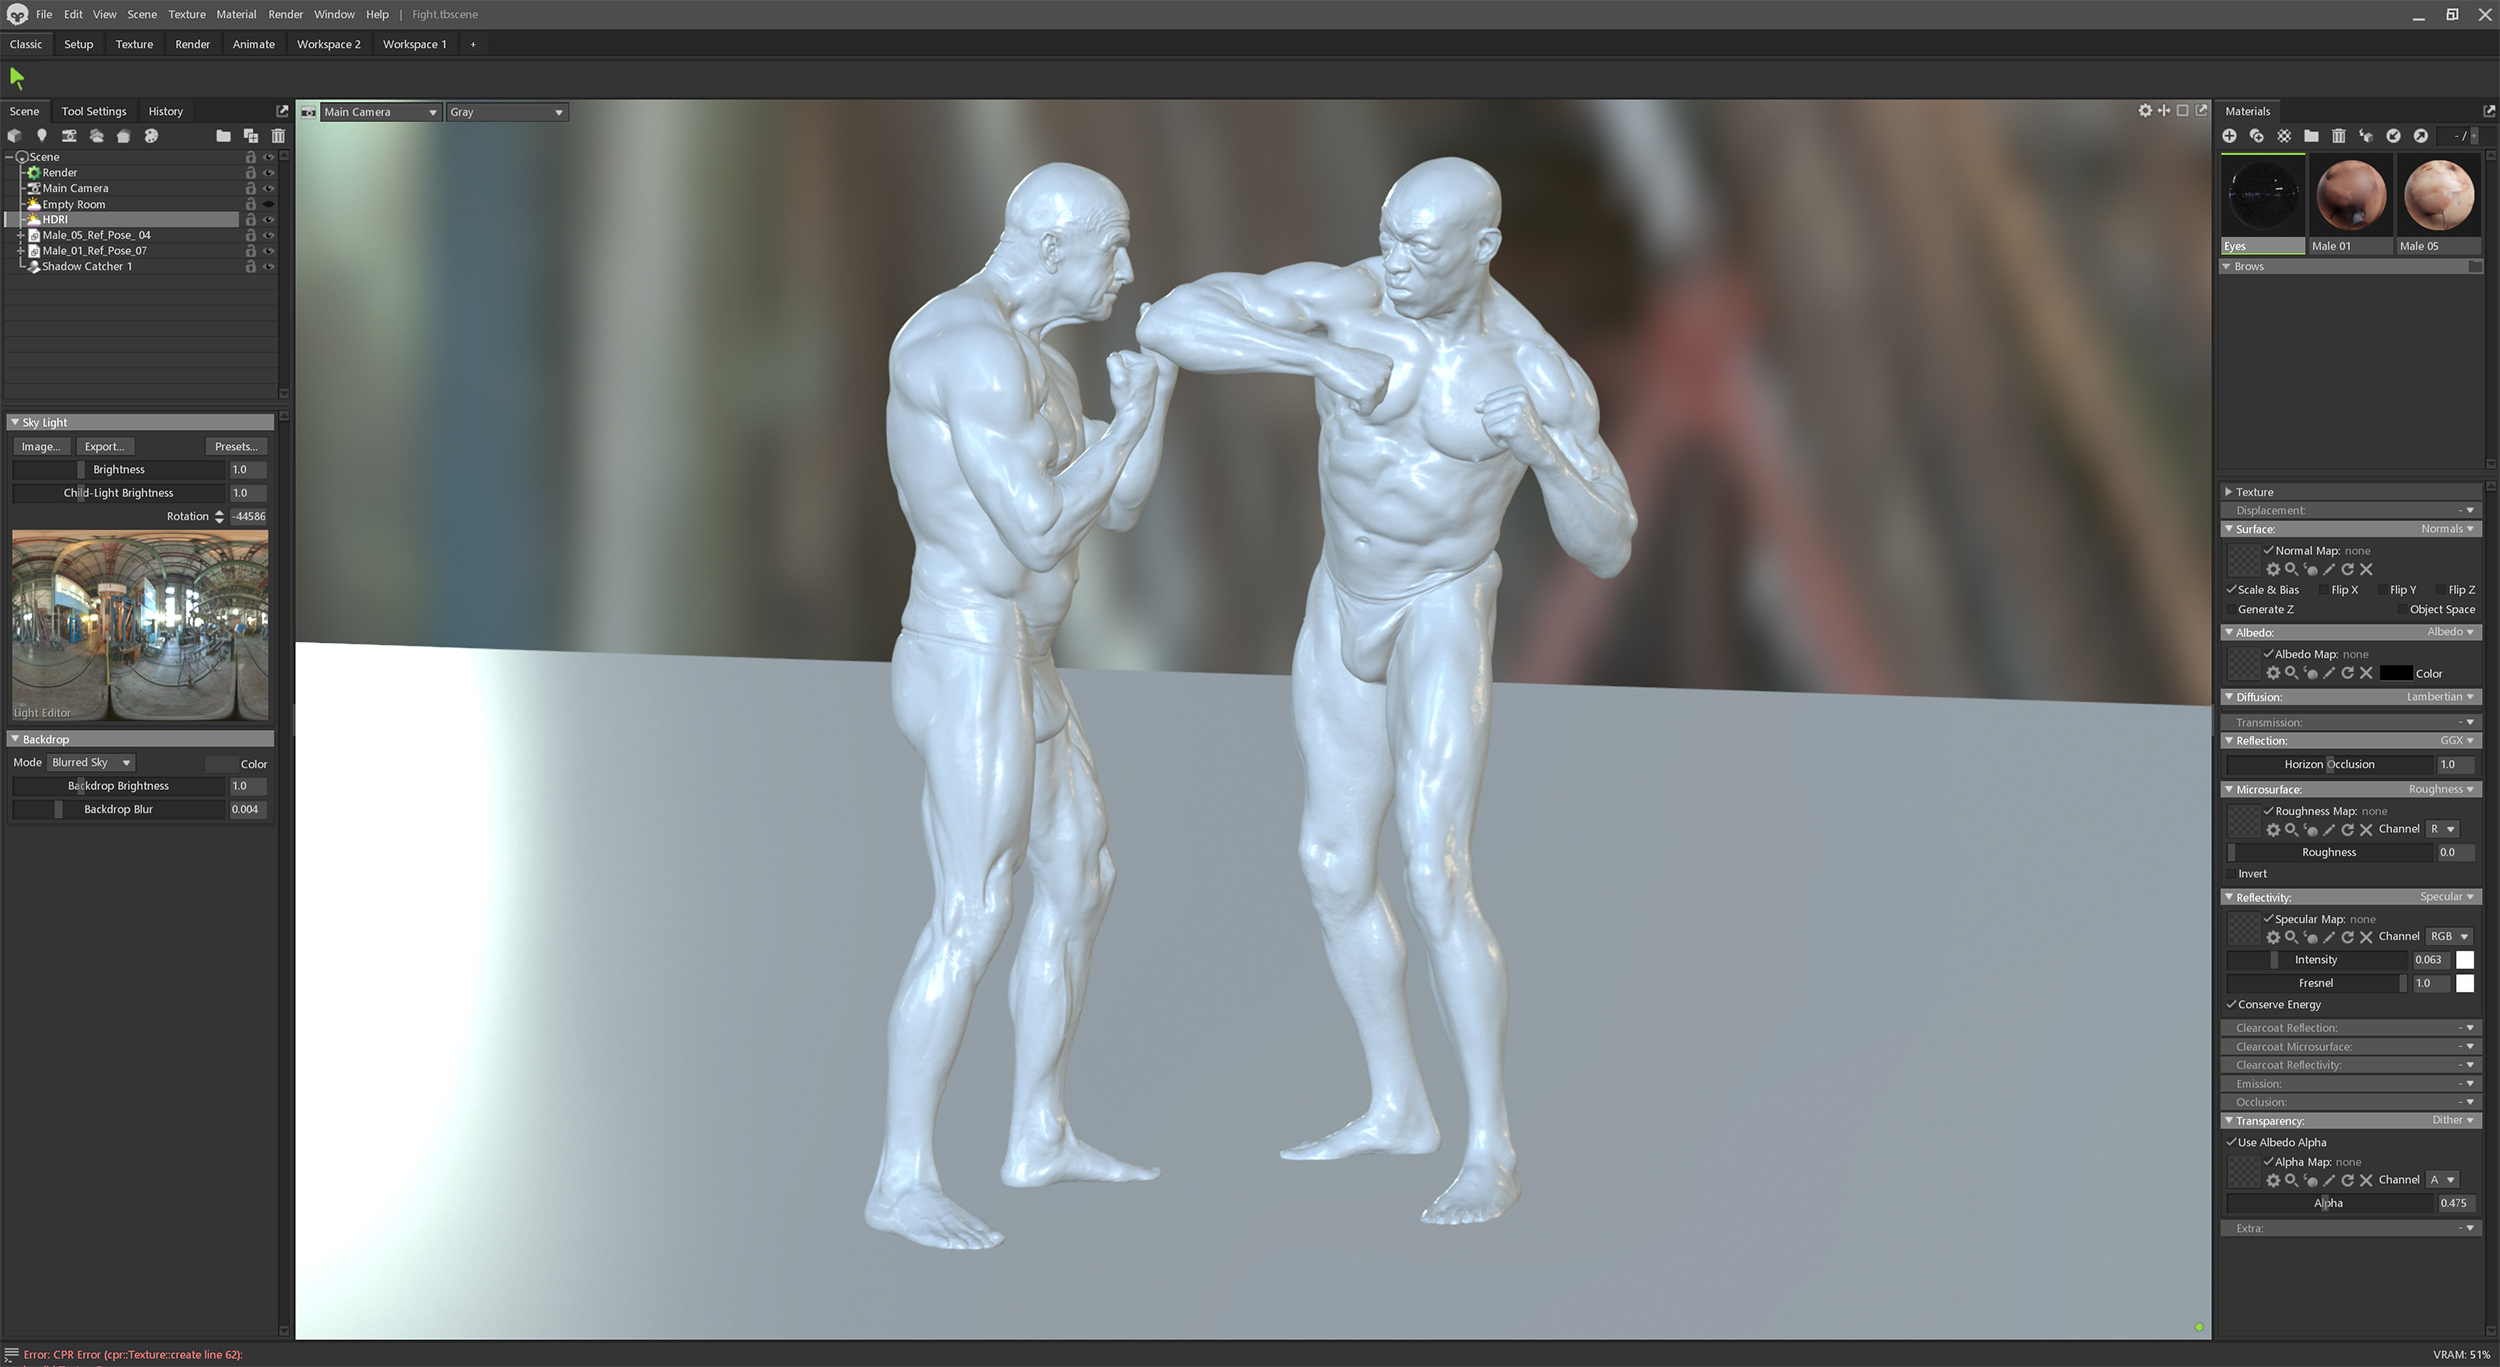
For this break down I'm going to use the second image as an example. I'm not going to modify the geometry of the scans at all other than to add some very quick and dirty eye lens models. The image below shows the two models I've selected, specifically Male 01 Anatomy Reference Pose 07 and Male 05 Anatomy Reference Pose 04 Reference poses are basically RAW scan data that we have retopologised and UV mapped using Zbrush, as such they don't have all the nice pore level details of the much higher resolution fully retopologised A pose models but there's still a lot we can do with them!
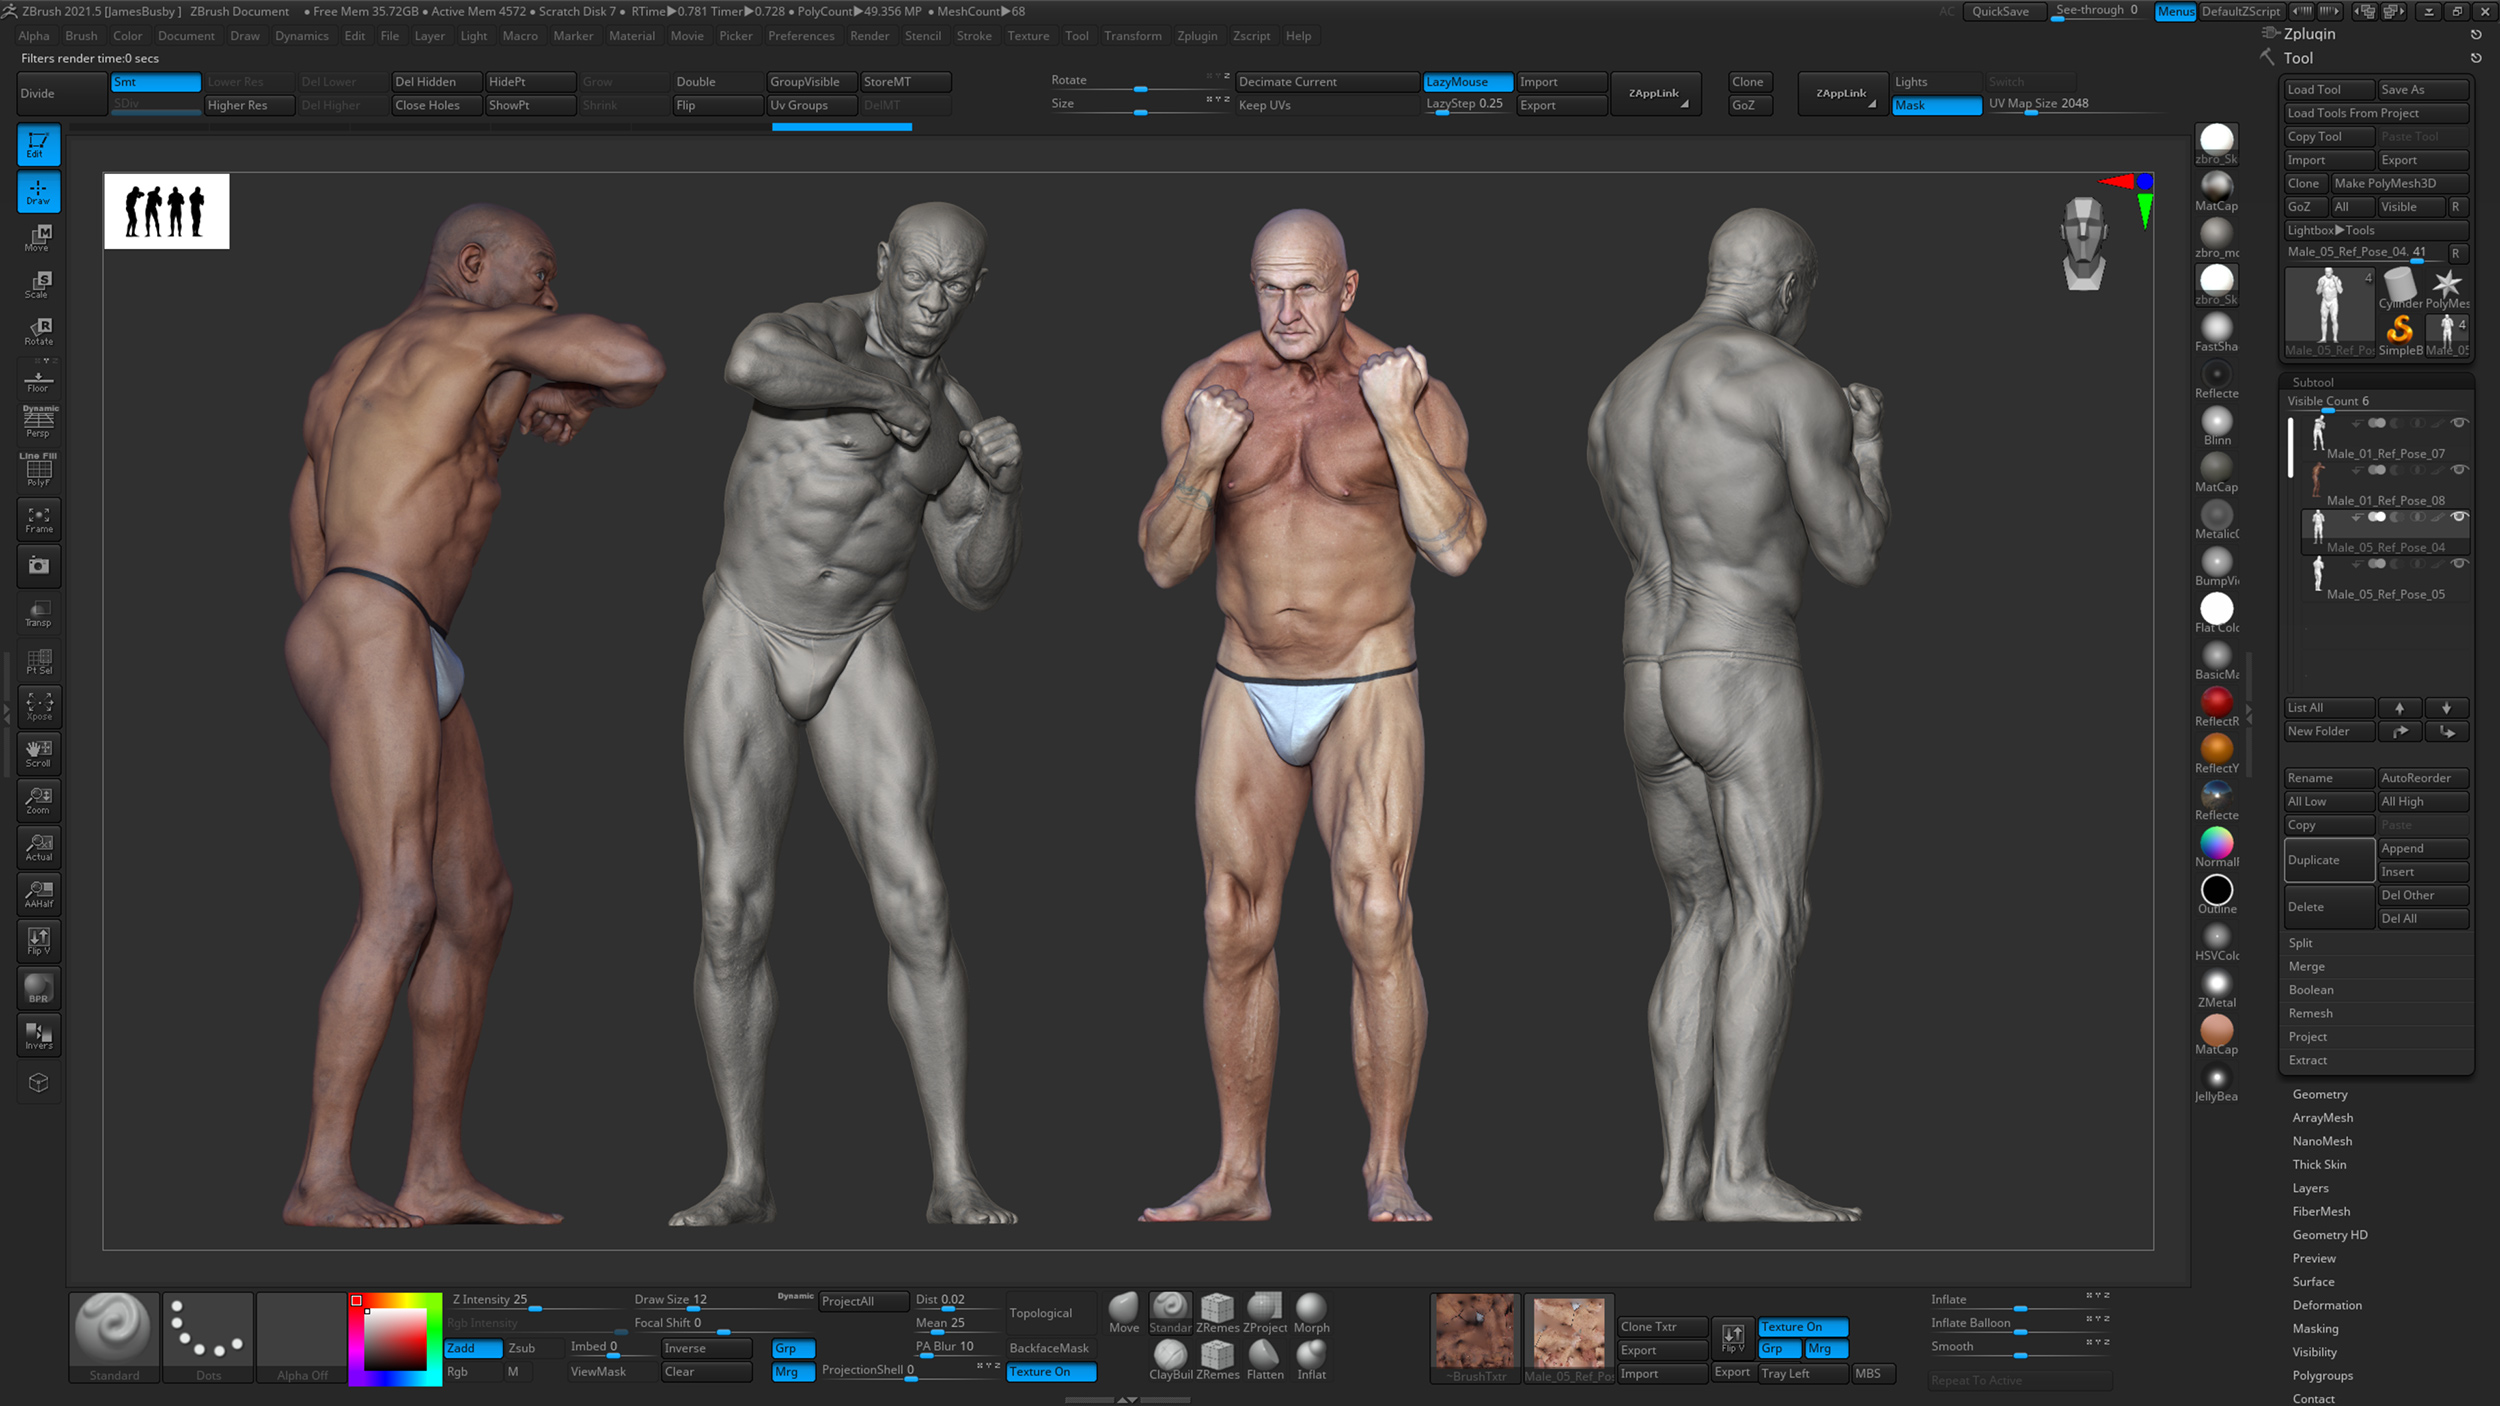
Setting up the scene in Marmoset is a very straightforward affair. I simply loaded the two reference scans into the scene and positioned them as shown below.
Shading
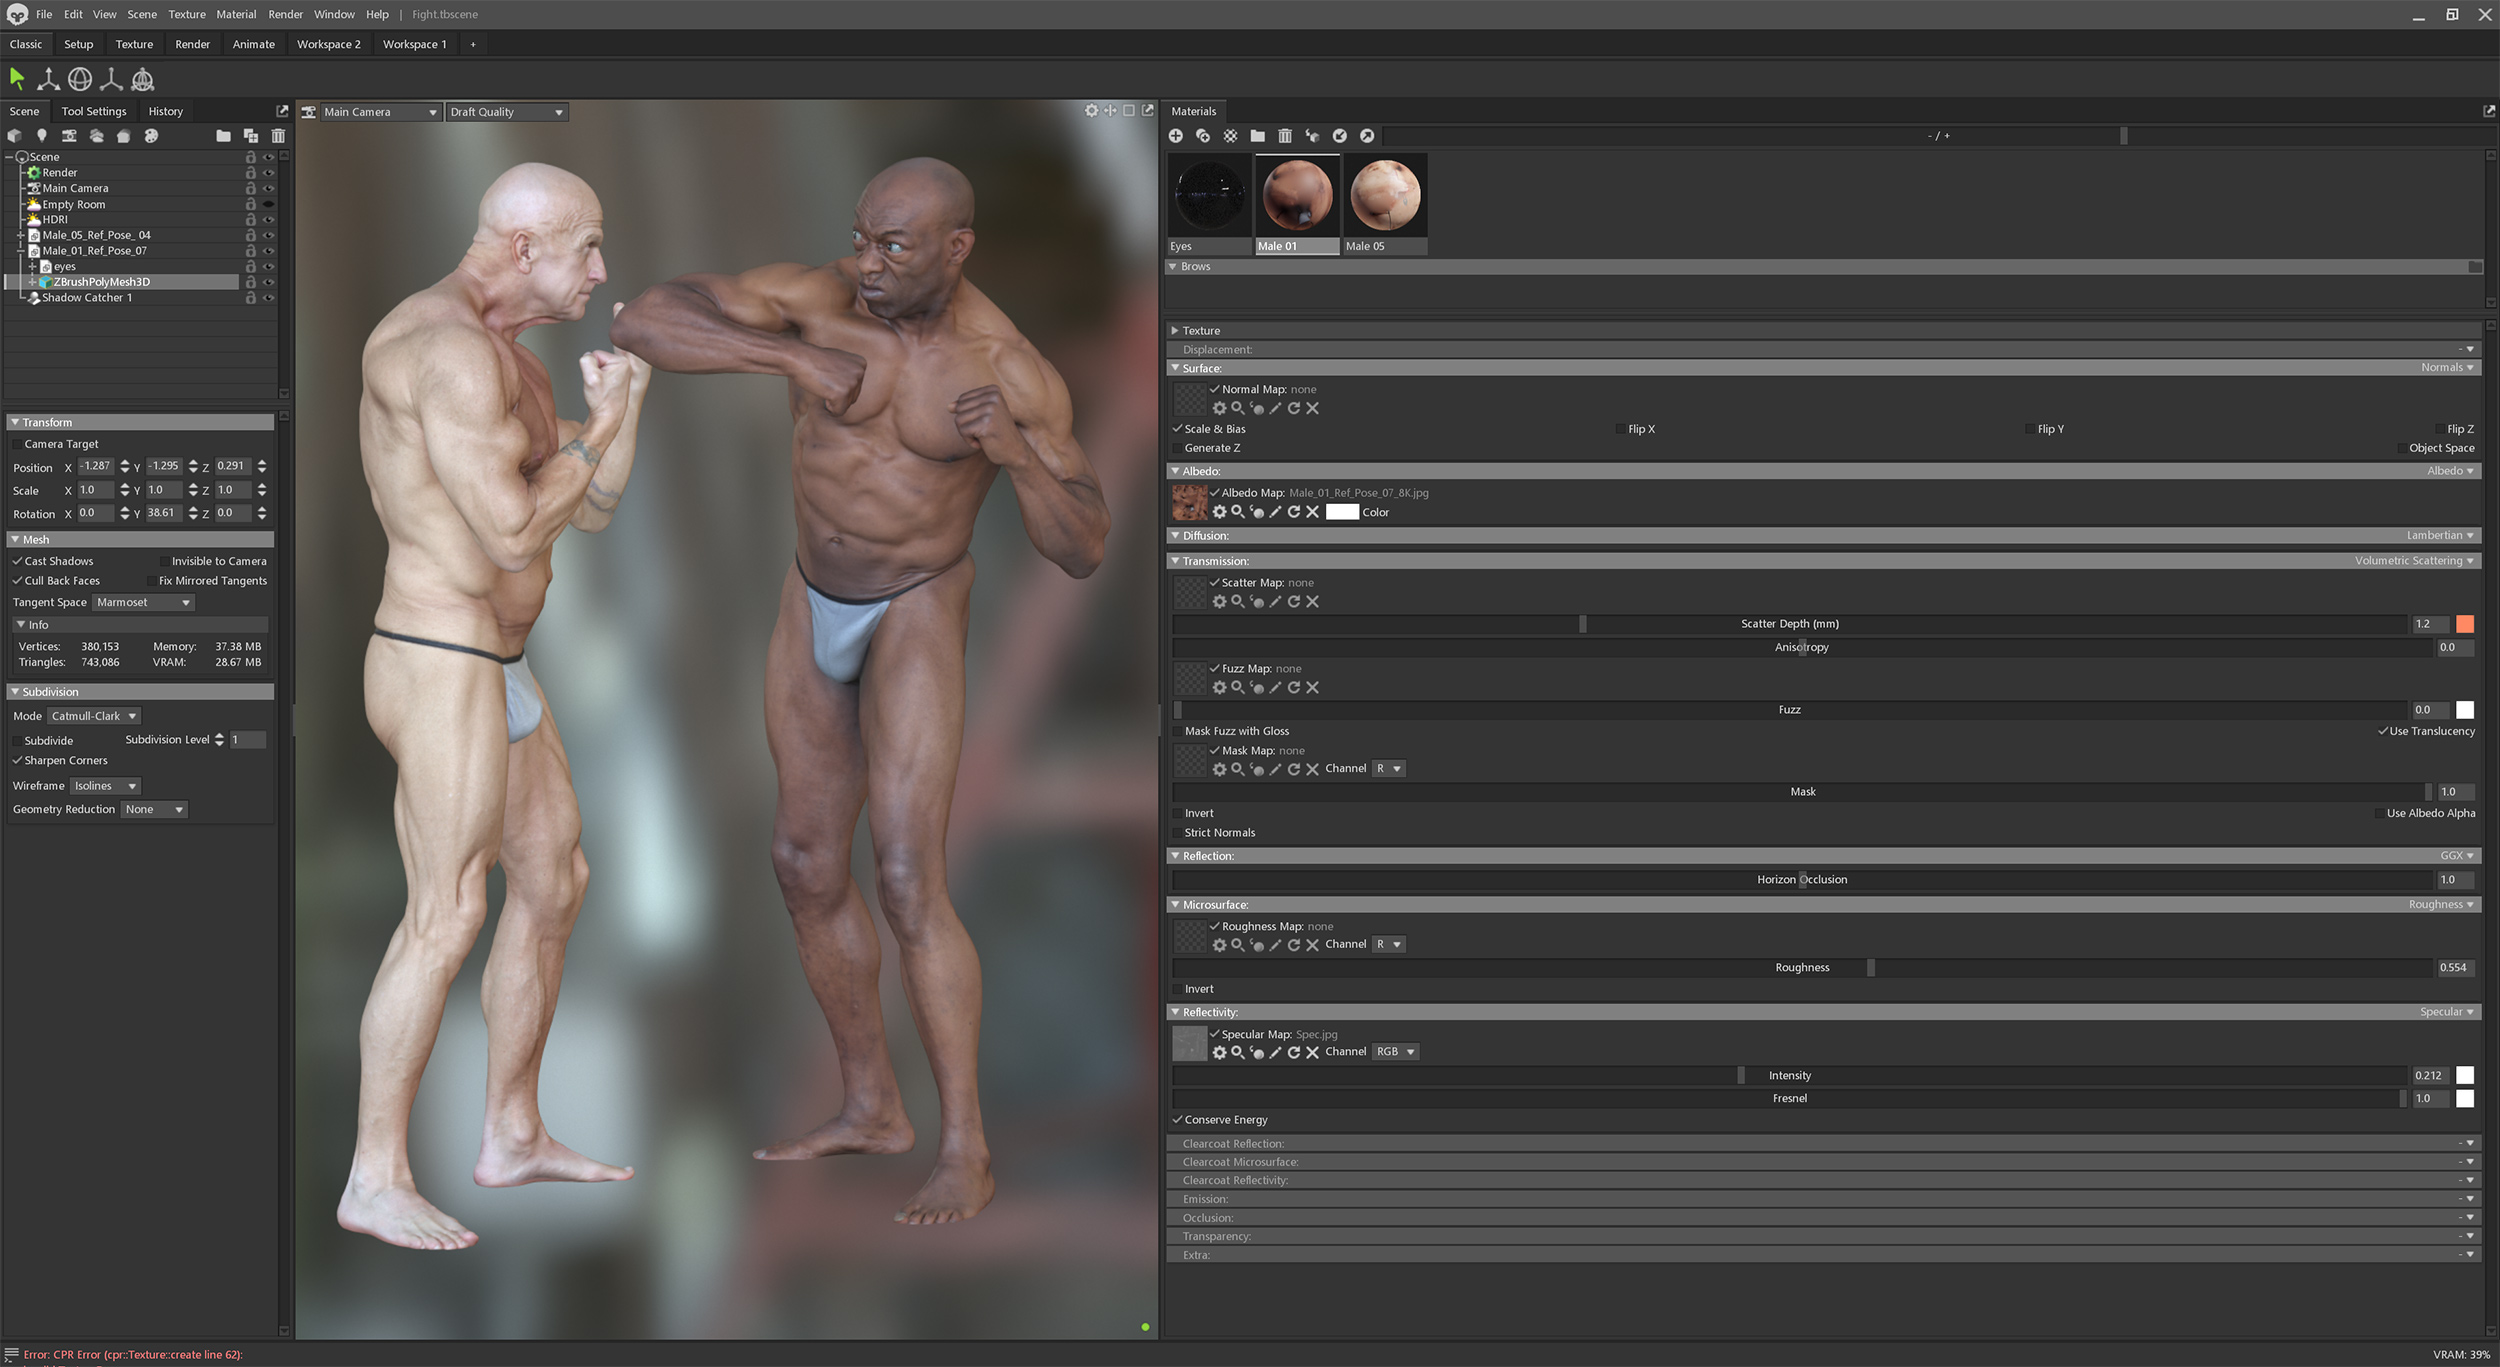
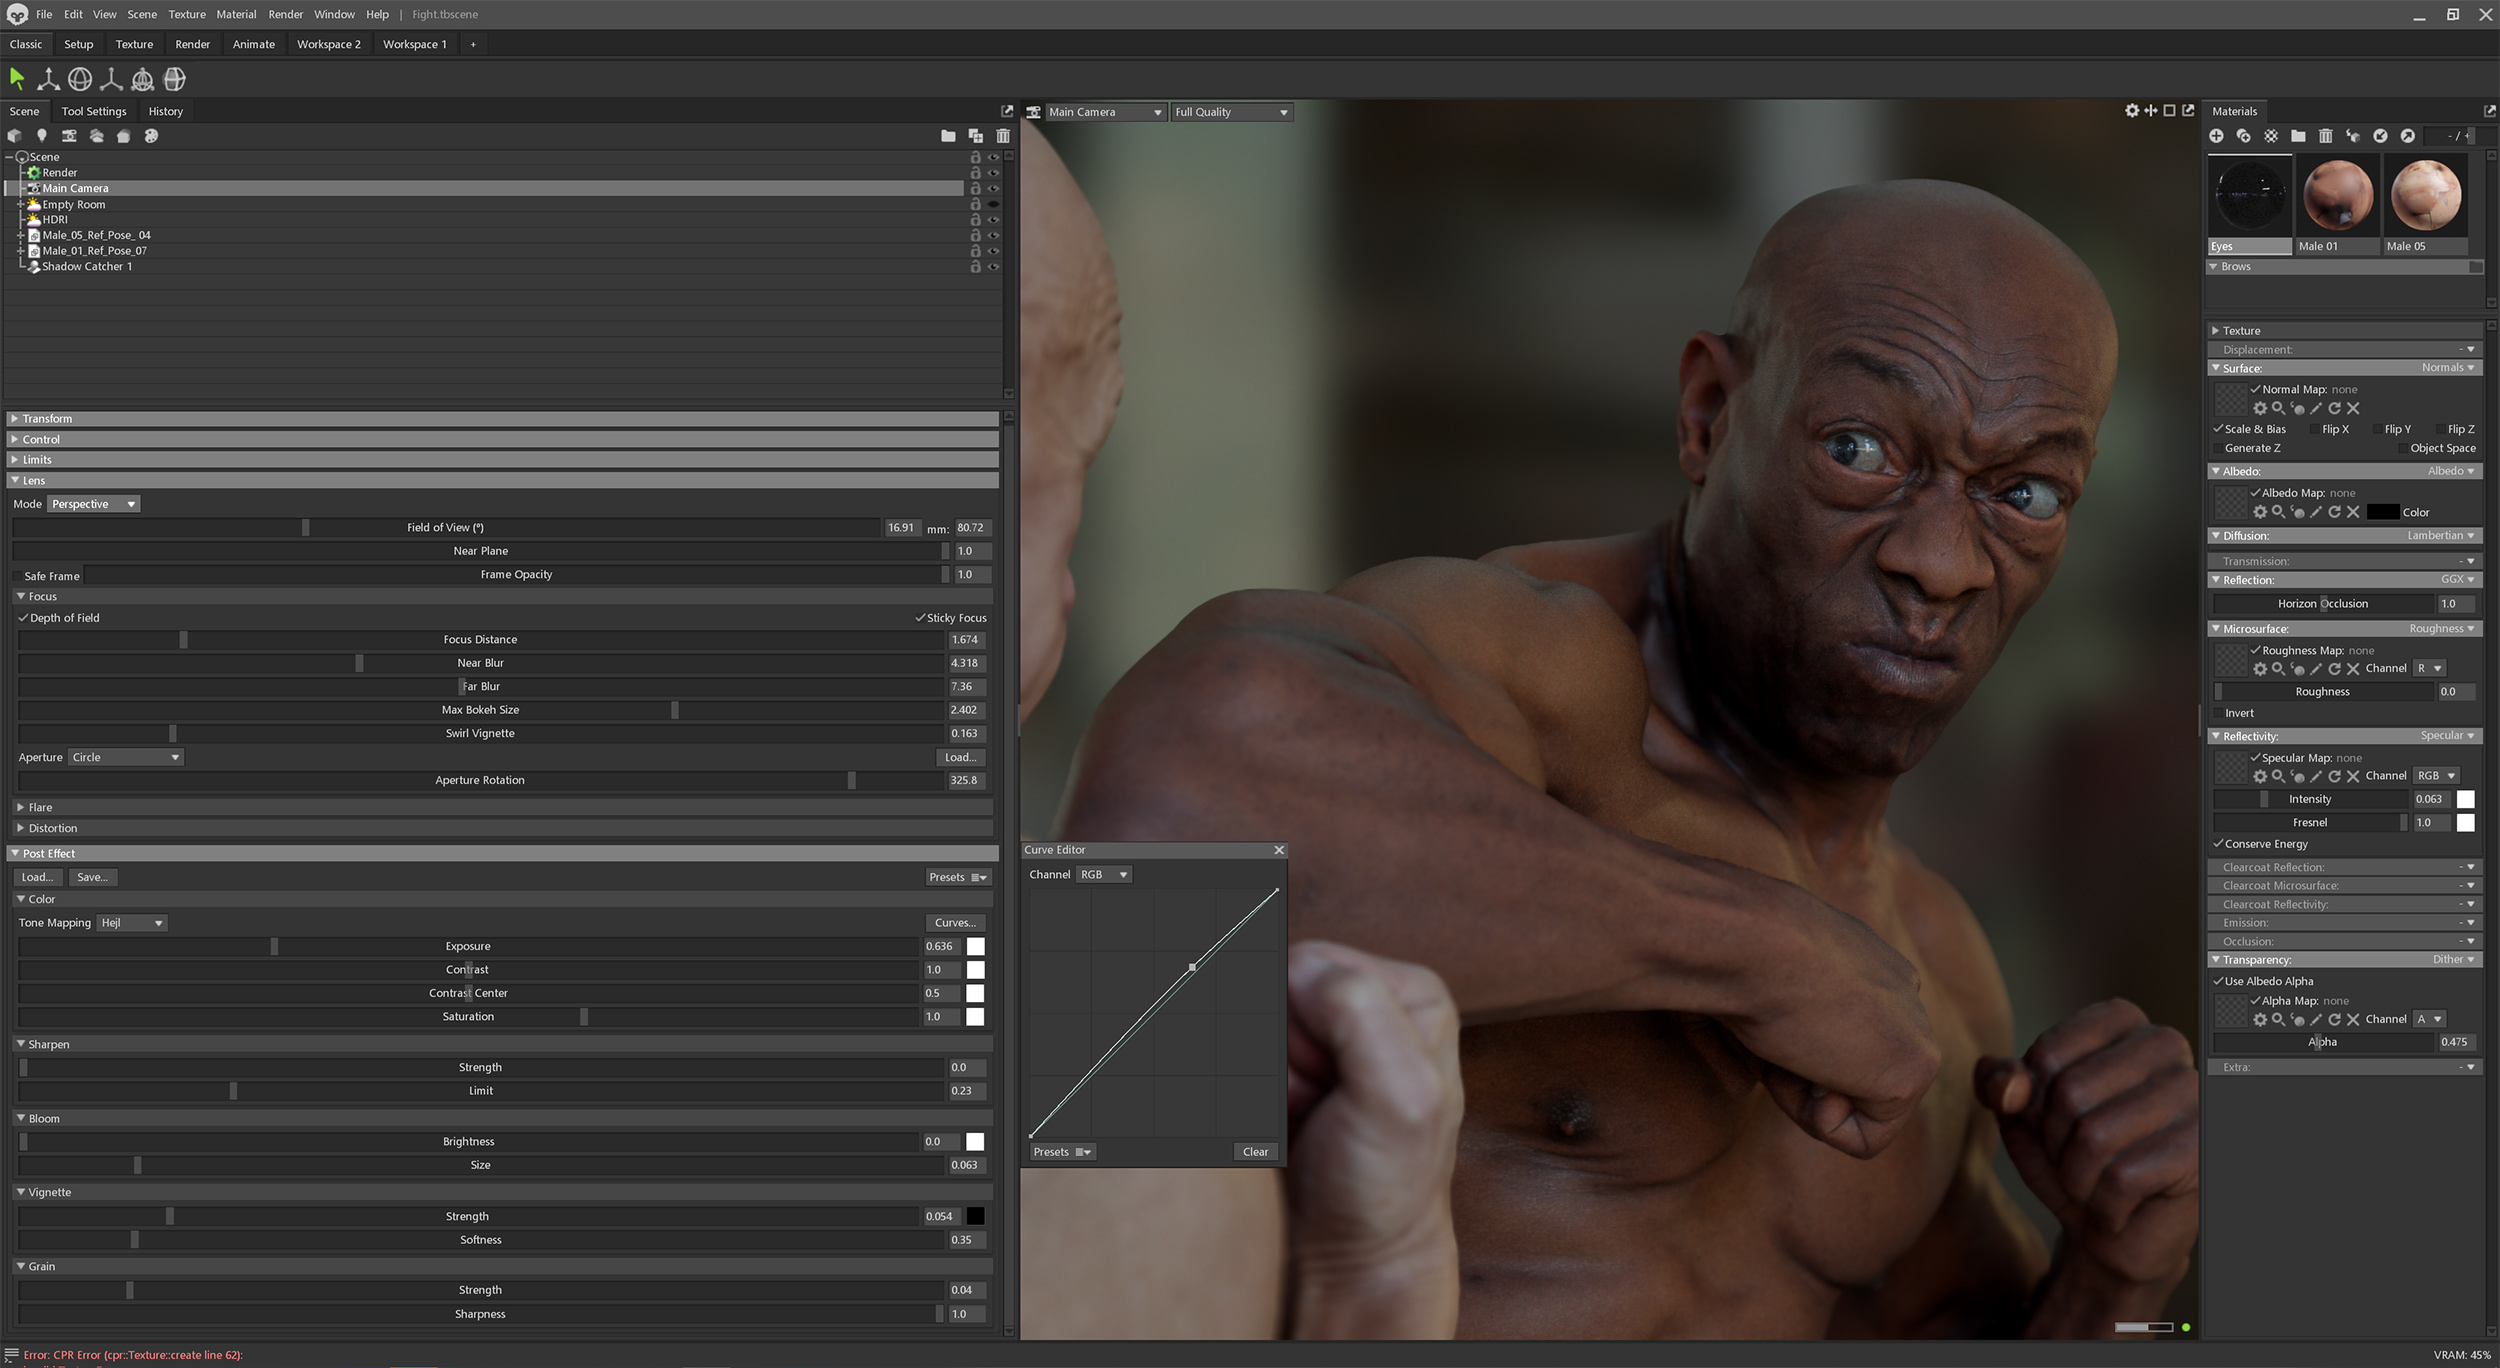
The shading is what really sells the characters, for this scene Im using a very simple setup using only the supplied Albedo and a custom spec maps generated from the albedo, I'll talk about how I created the spec map a bit later. Here's a screen shot of the shading setup, its the same for both characters. For the subsurface scattering Im using the new volumetric scattering setting set to 1.2
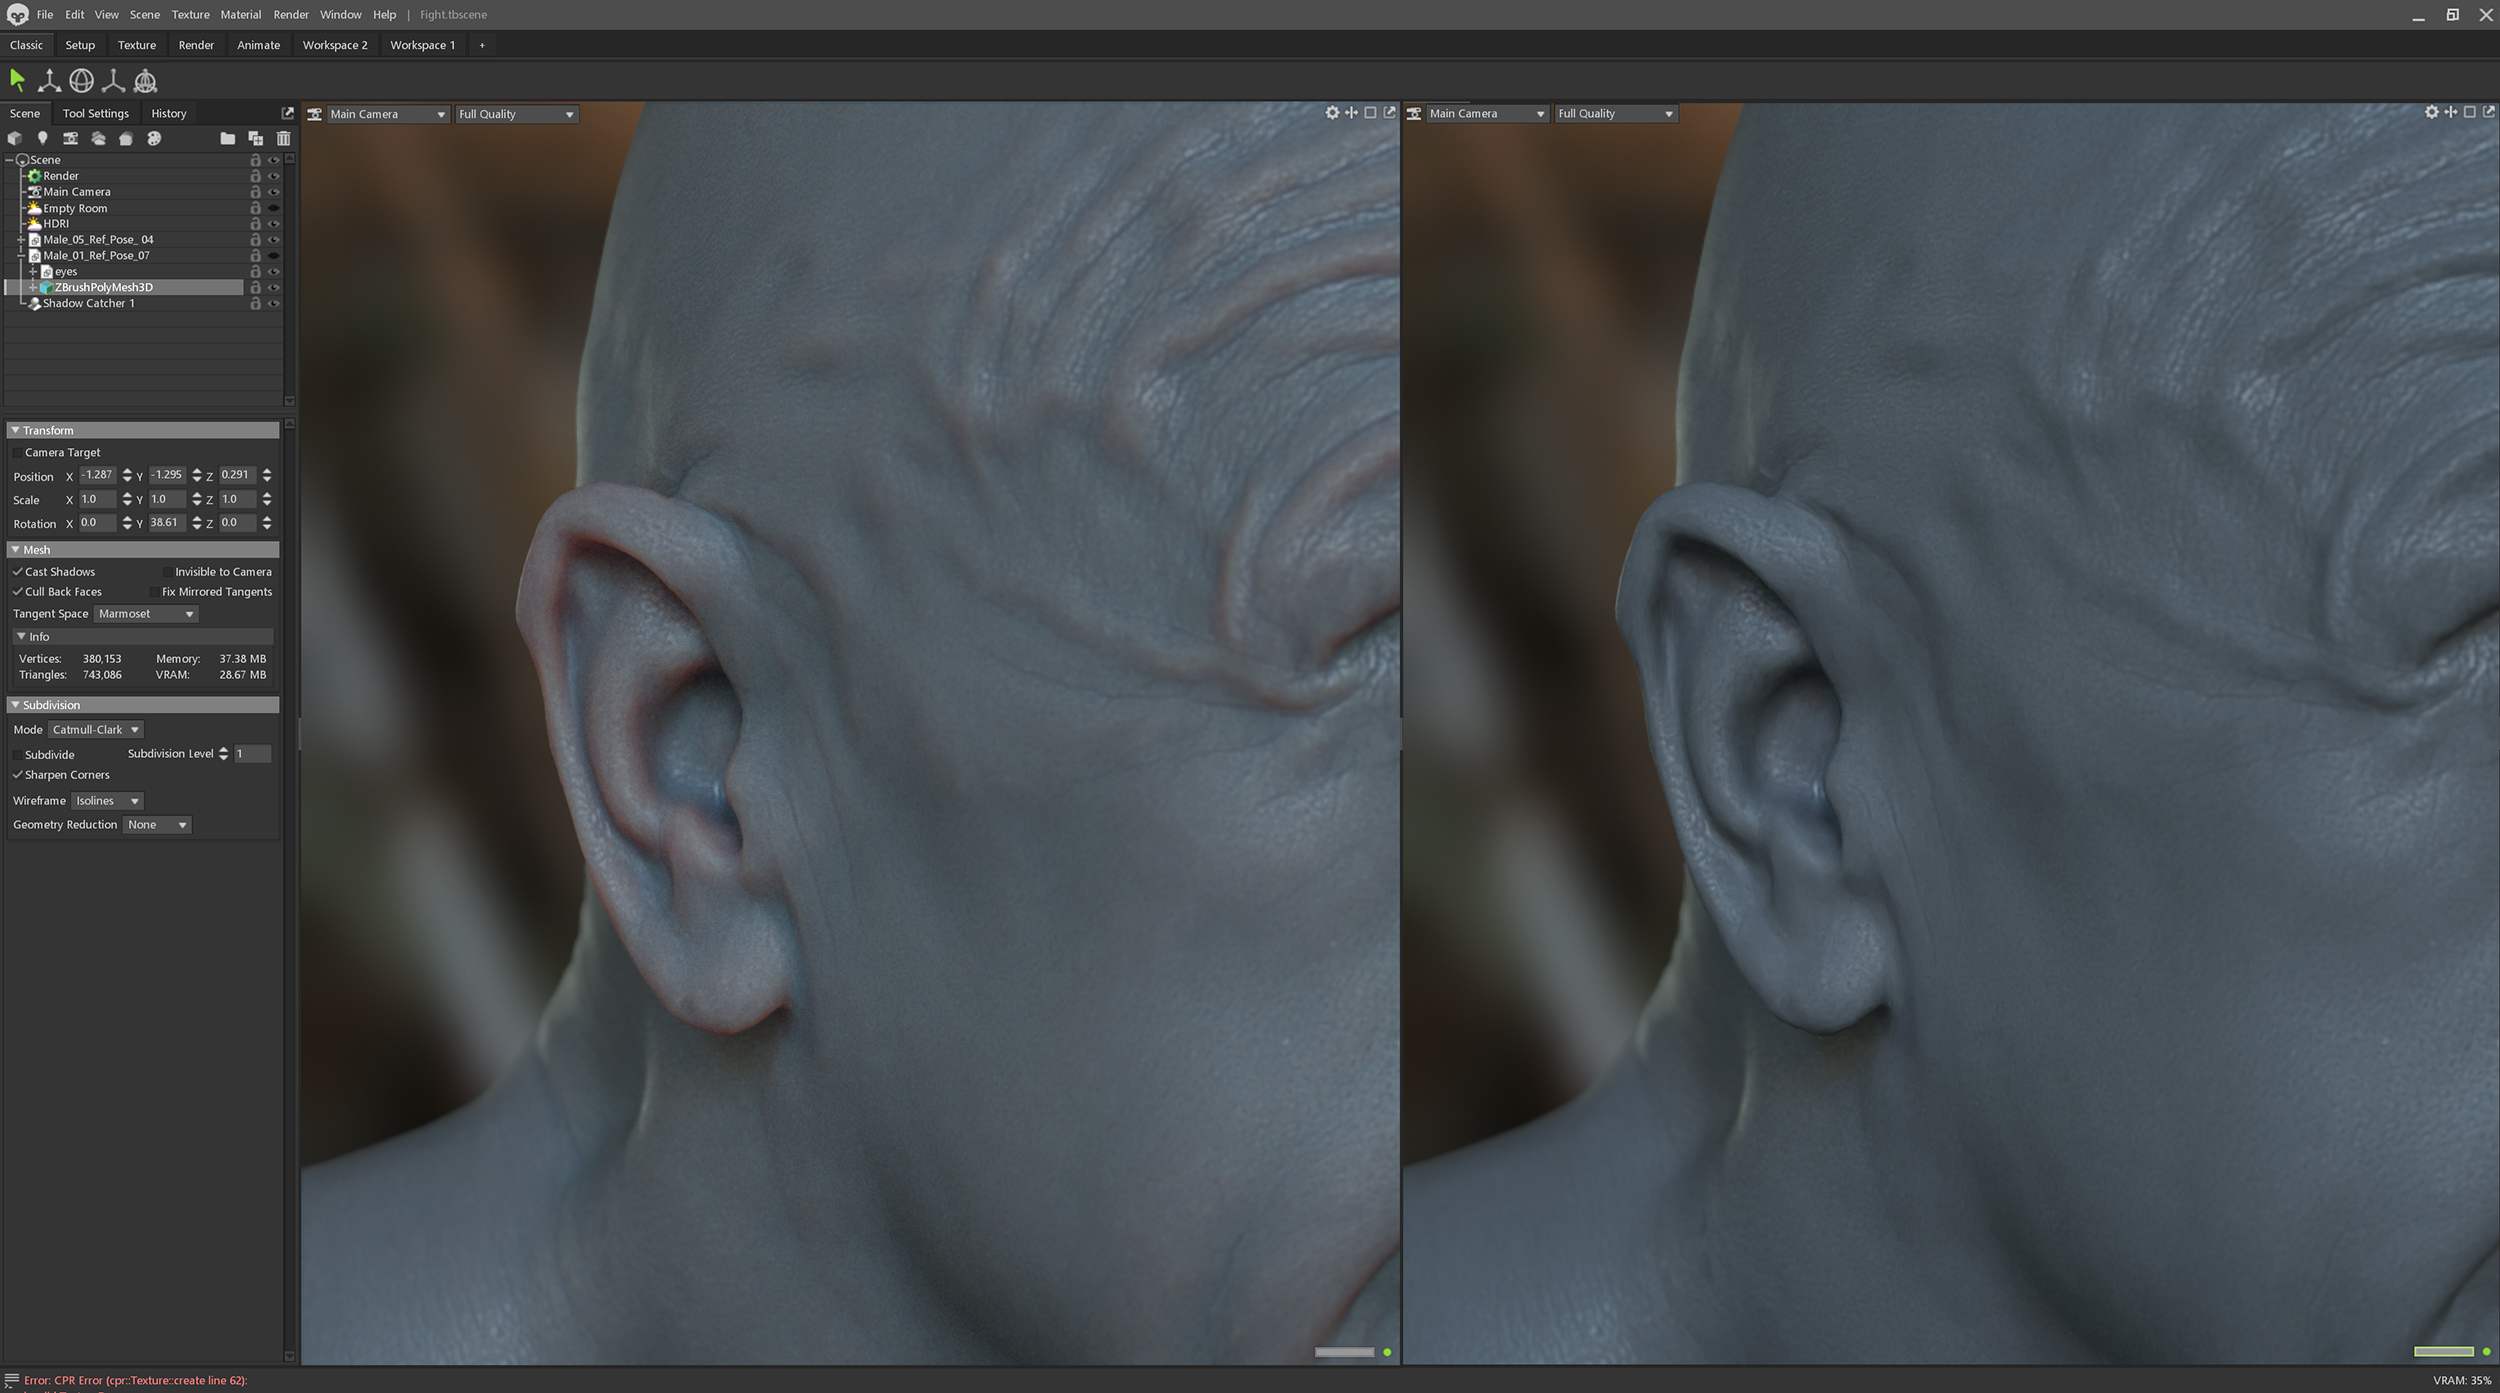
Volumetric Scattering on the left and off on the right
Quick and dirty spec map
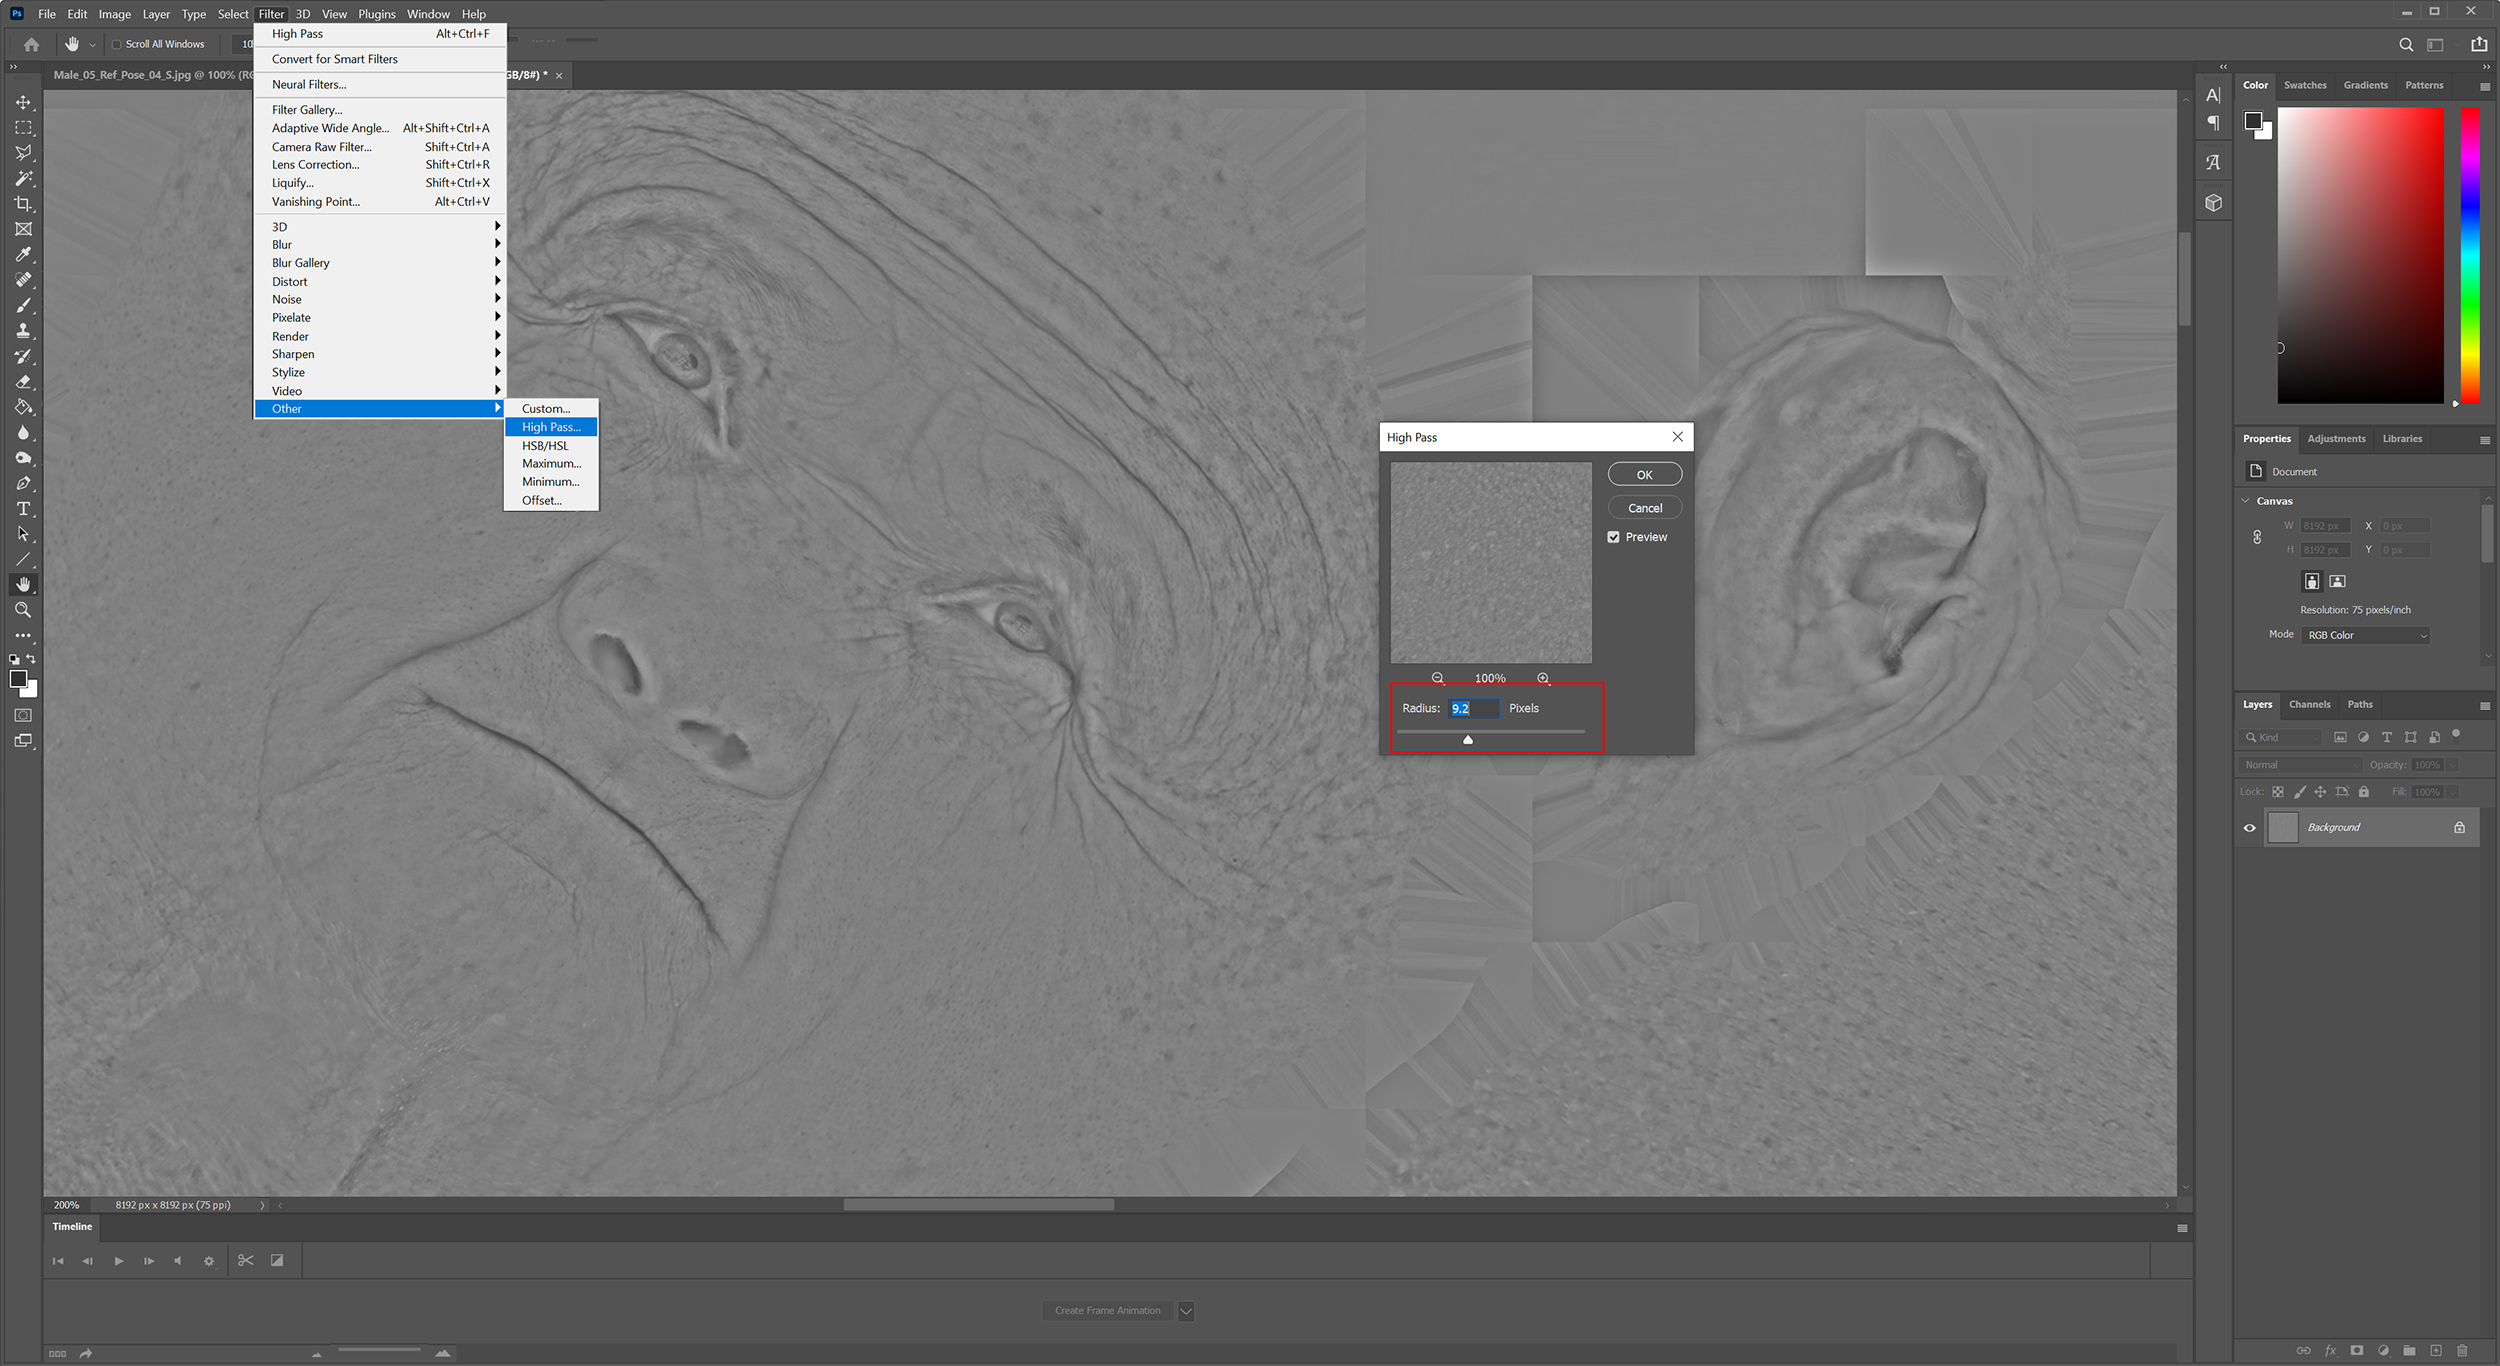
I'm not suggesting that this is the correct way to make a spec map, its not, it's totally wrong but if you need to render something out that look good in a very short space of time this works wonders. Simply load the albedo map into Photoshop, desaturate it and use the high pass filter with a setting of around 9.0
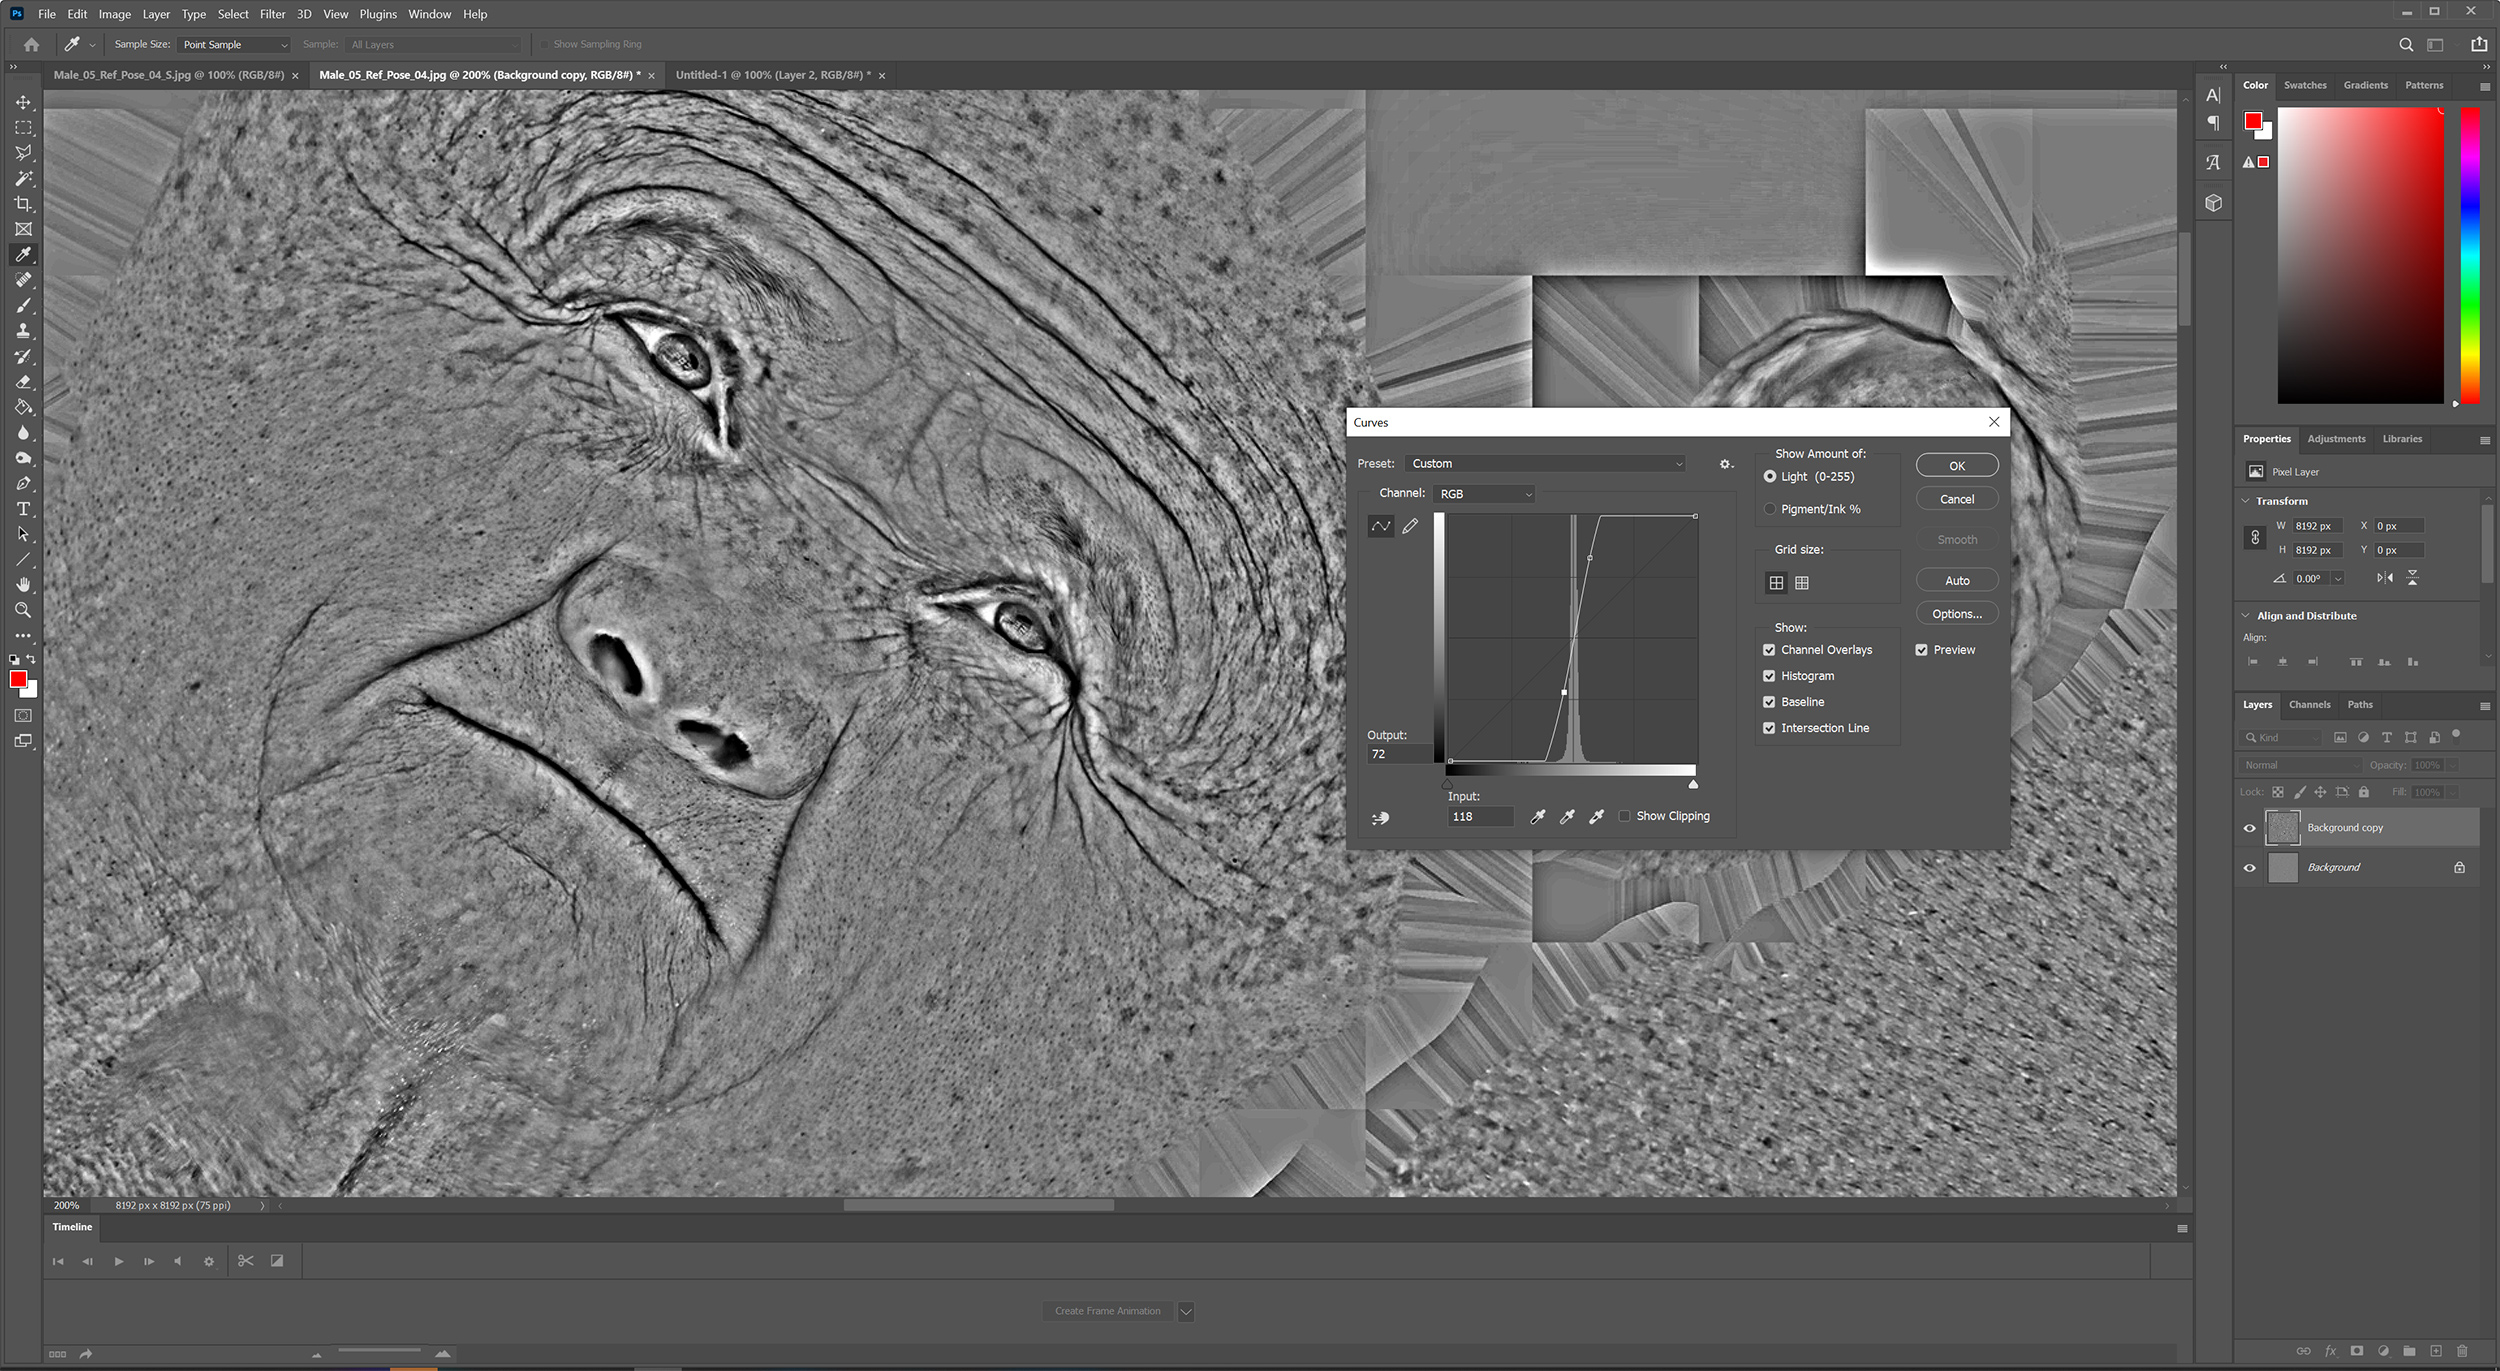
Next duplicate this layer and adjust the levels to create something similar to the image below
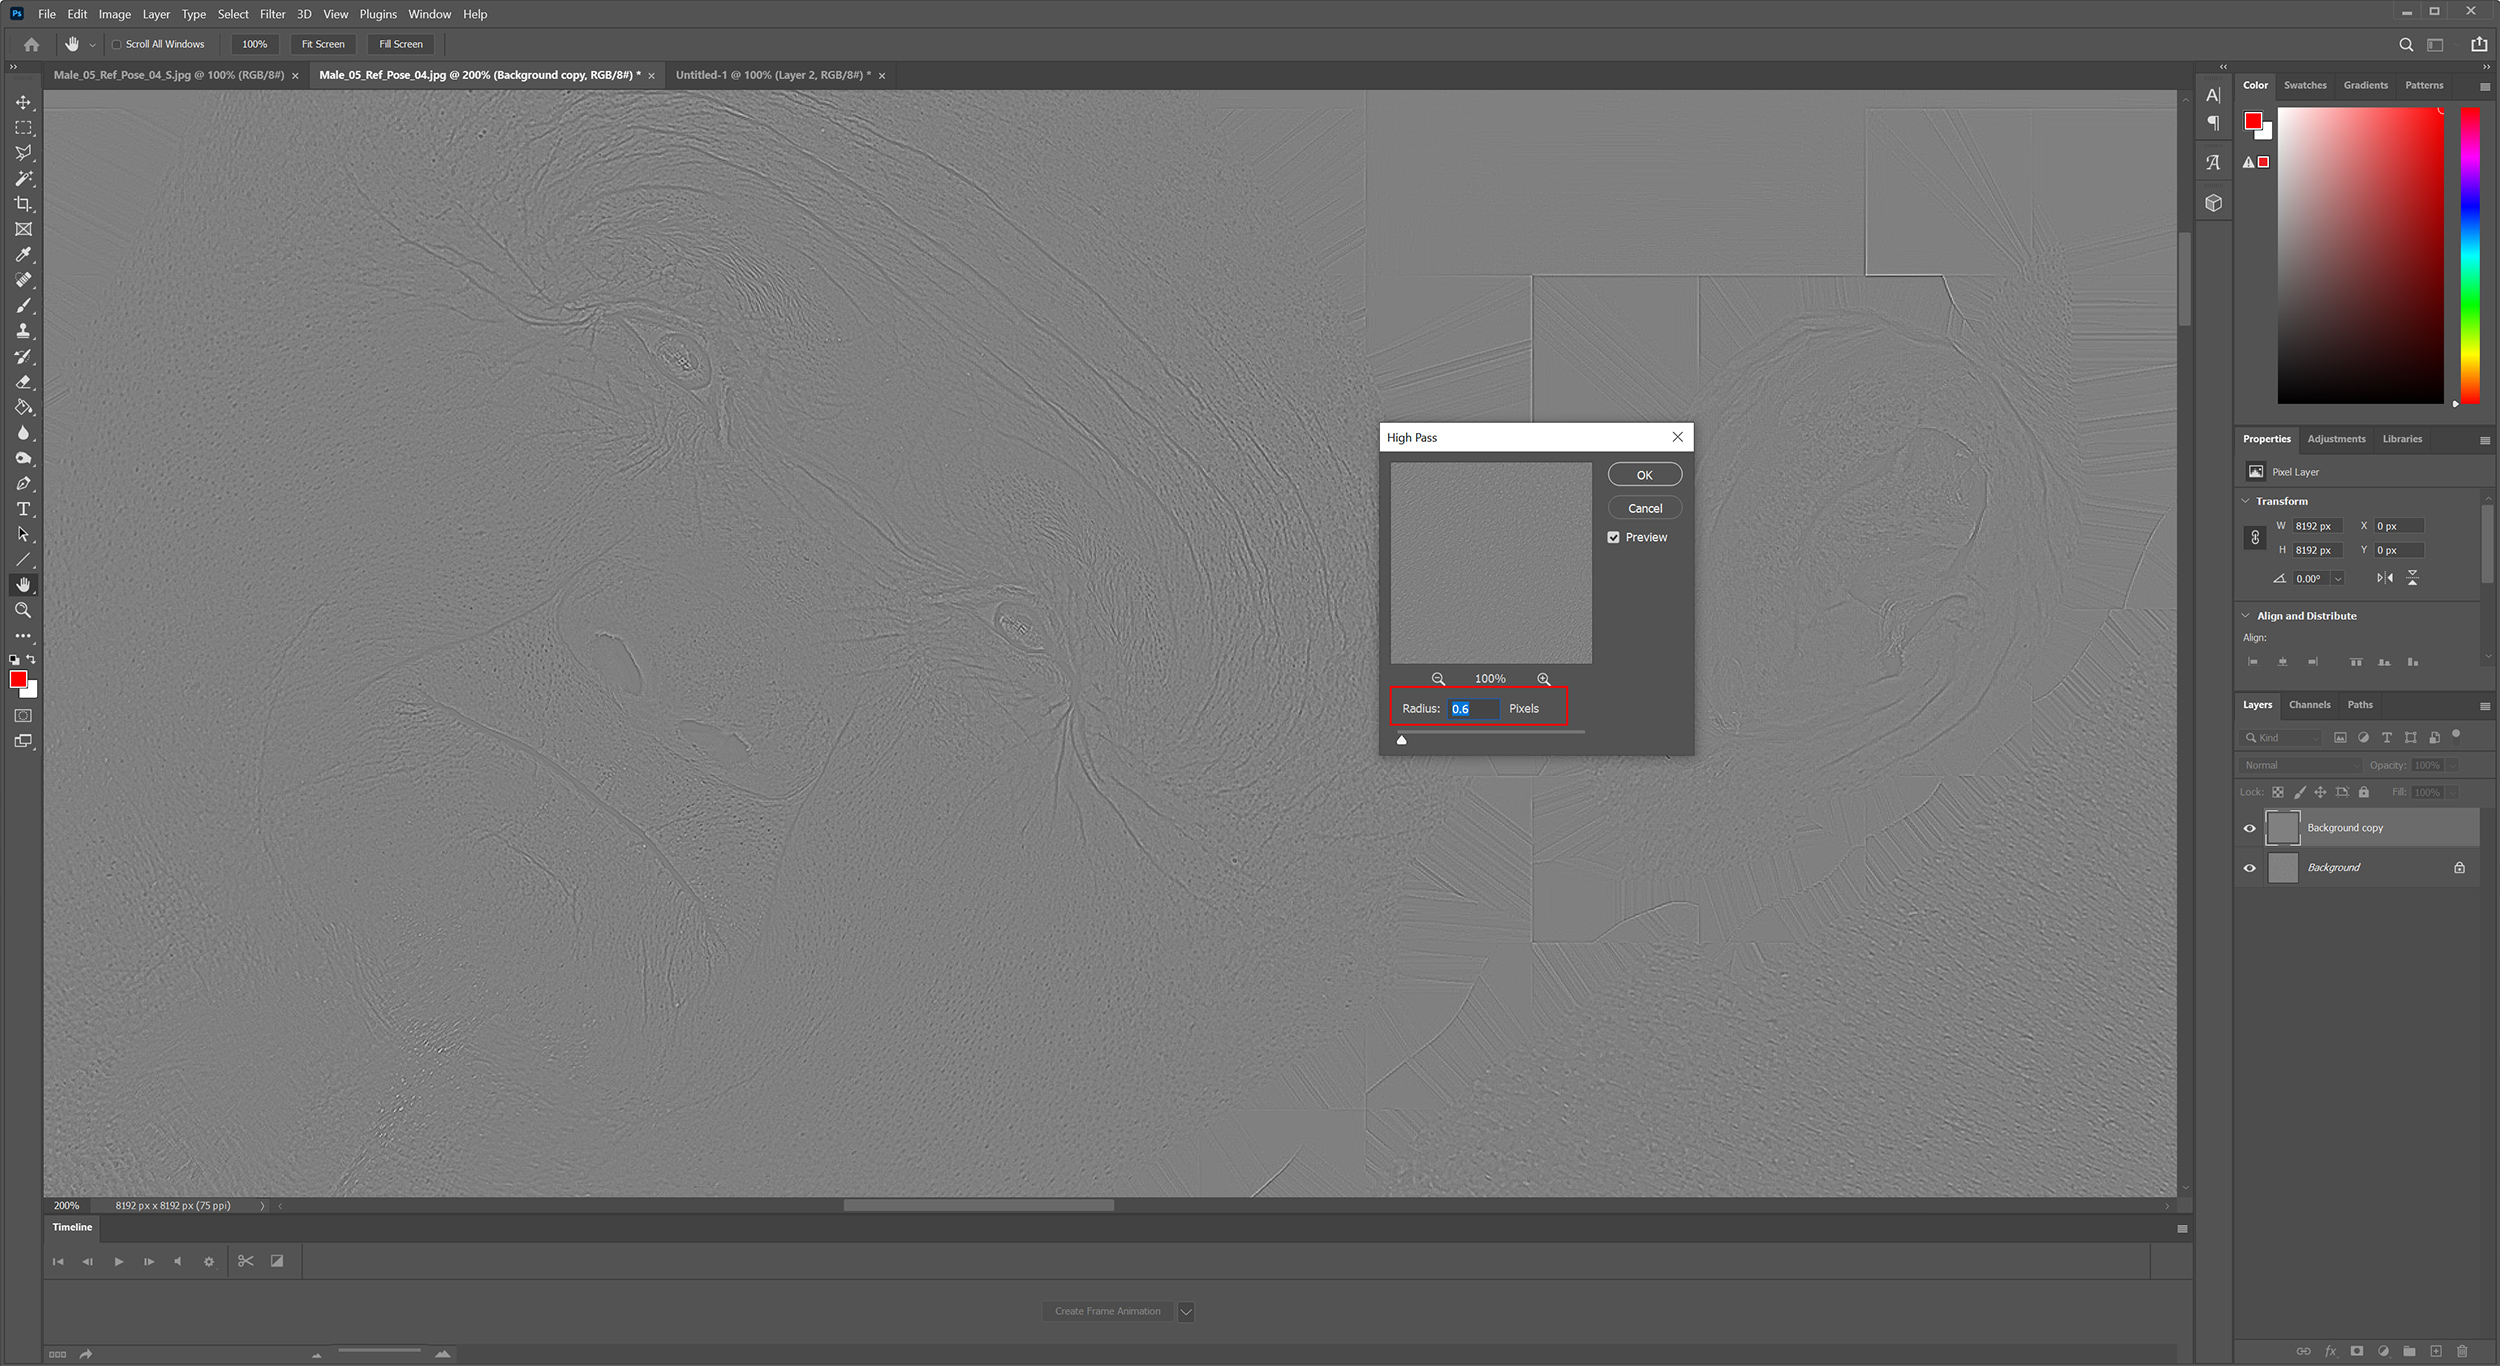
Now apply another high pass to this but this time set it to around 0.6 until you get something similar to the image below
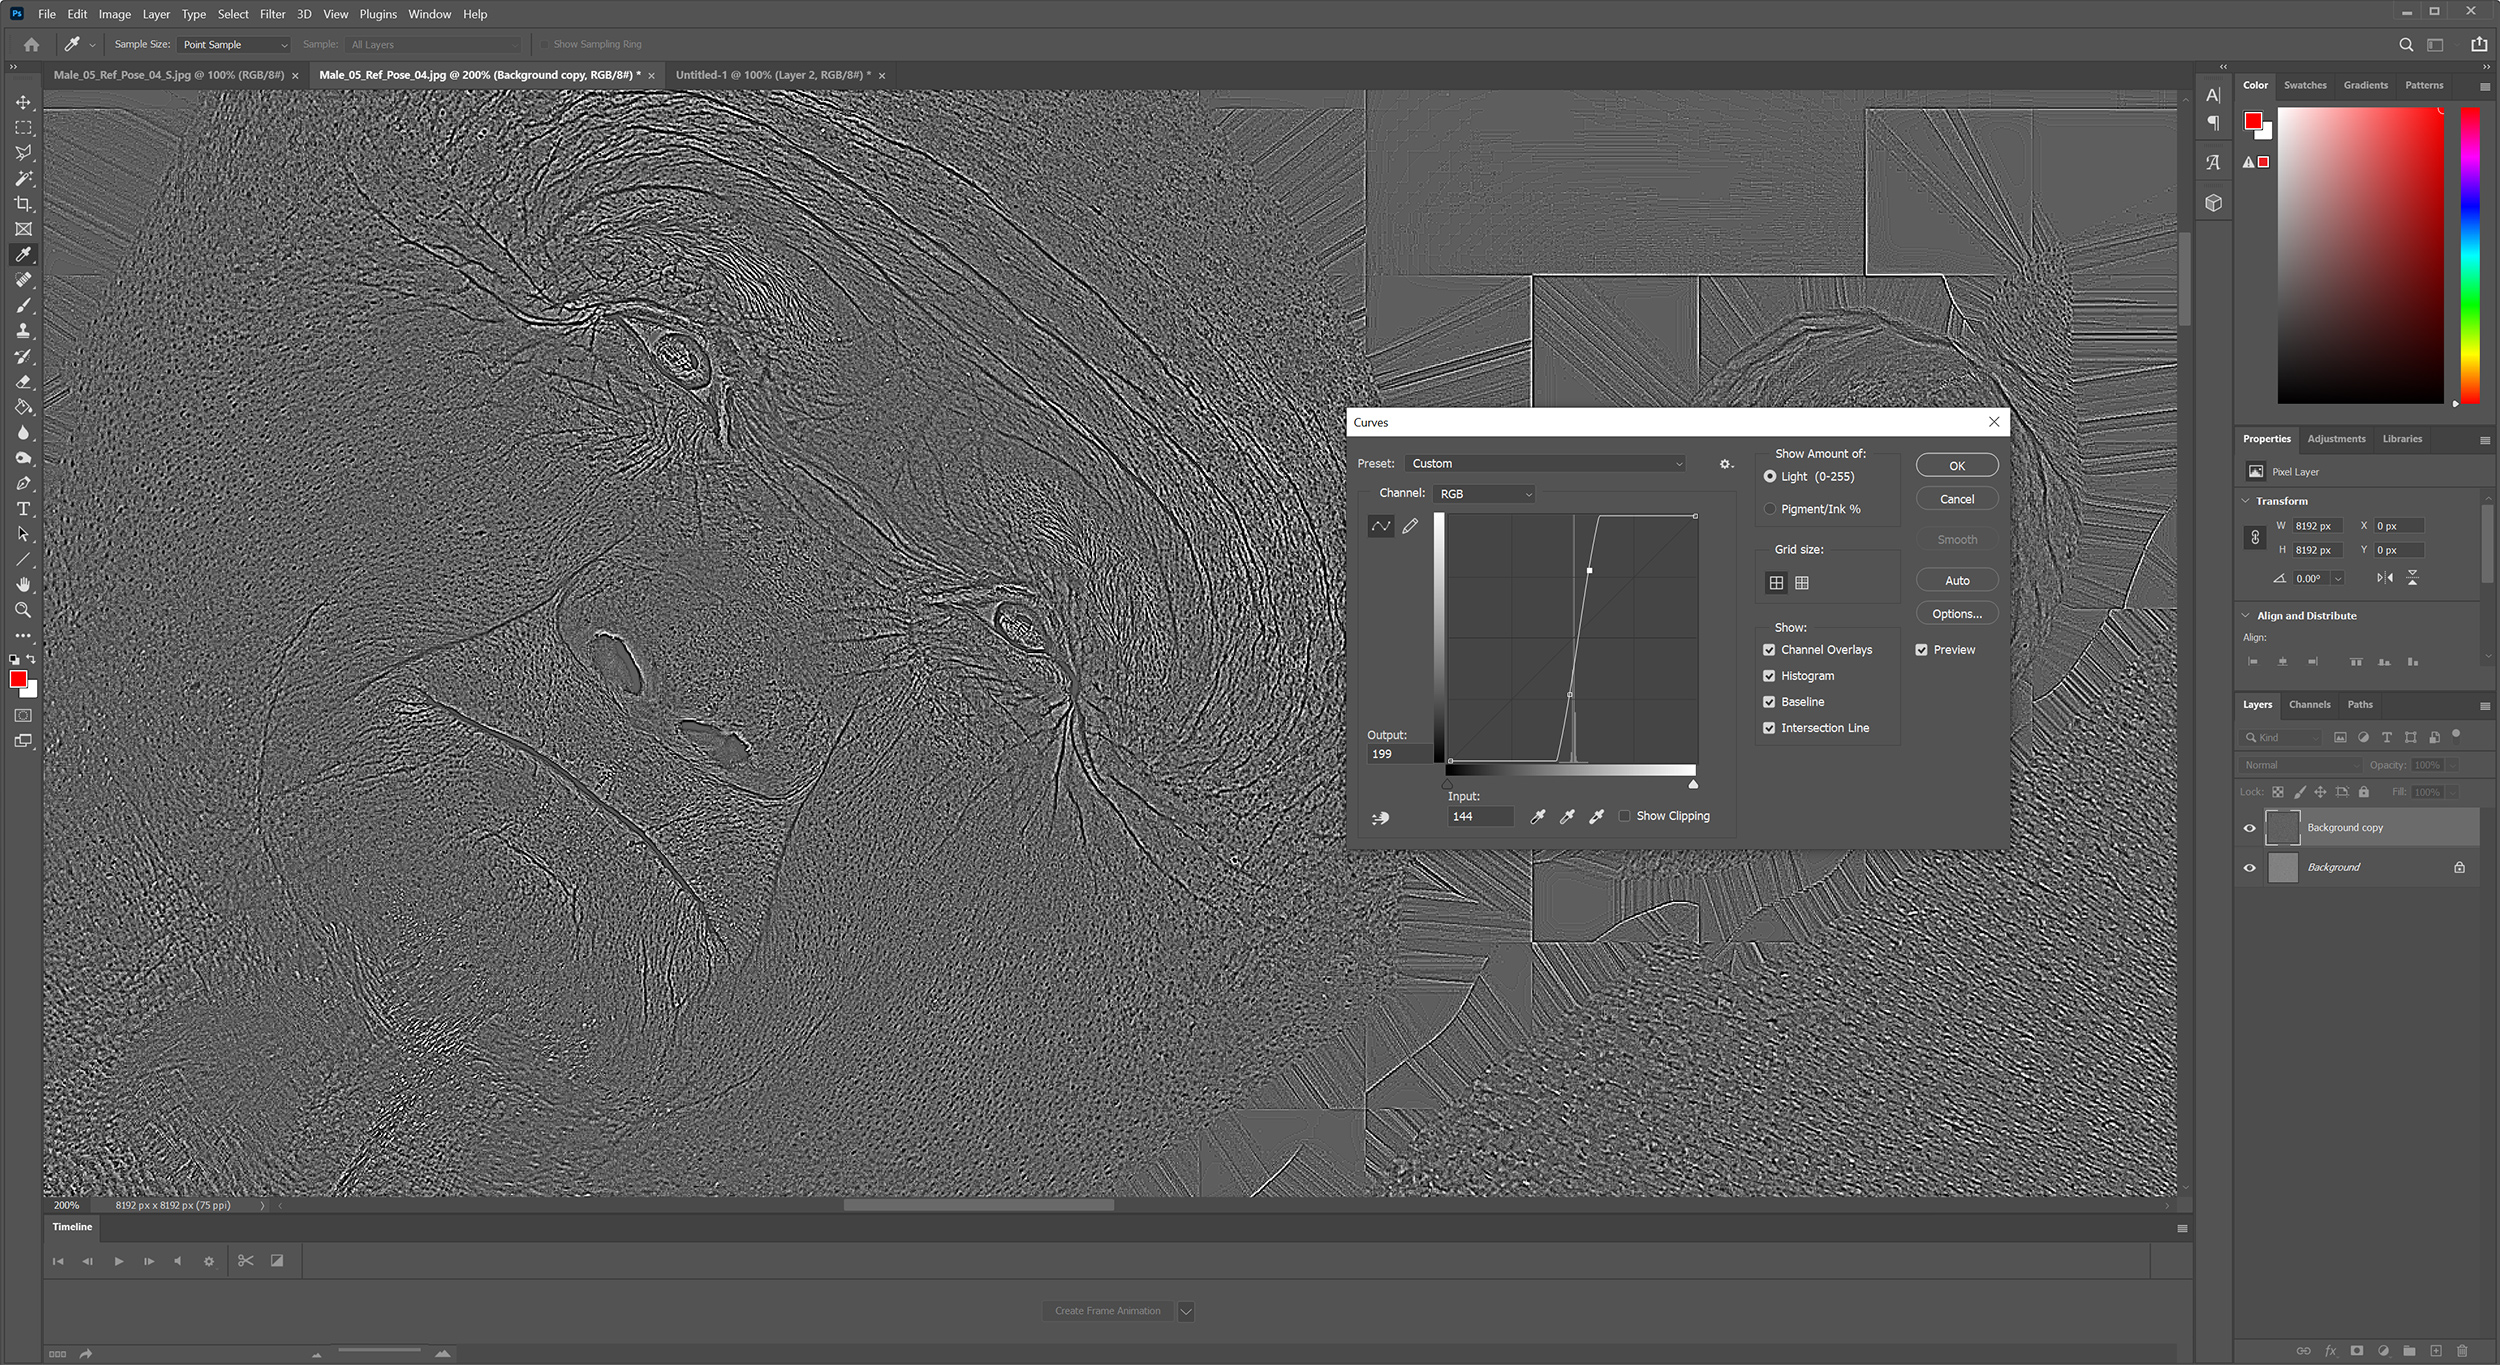
Once again adjust the levels on this layer to get a result as shown below.
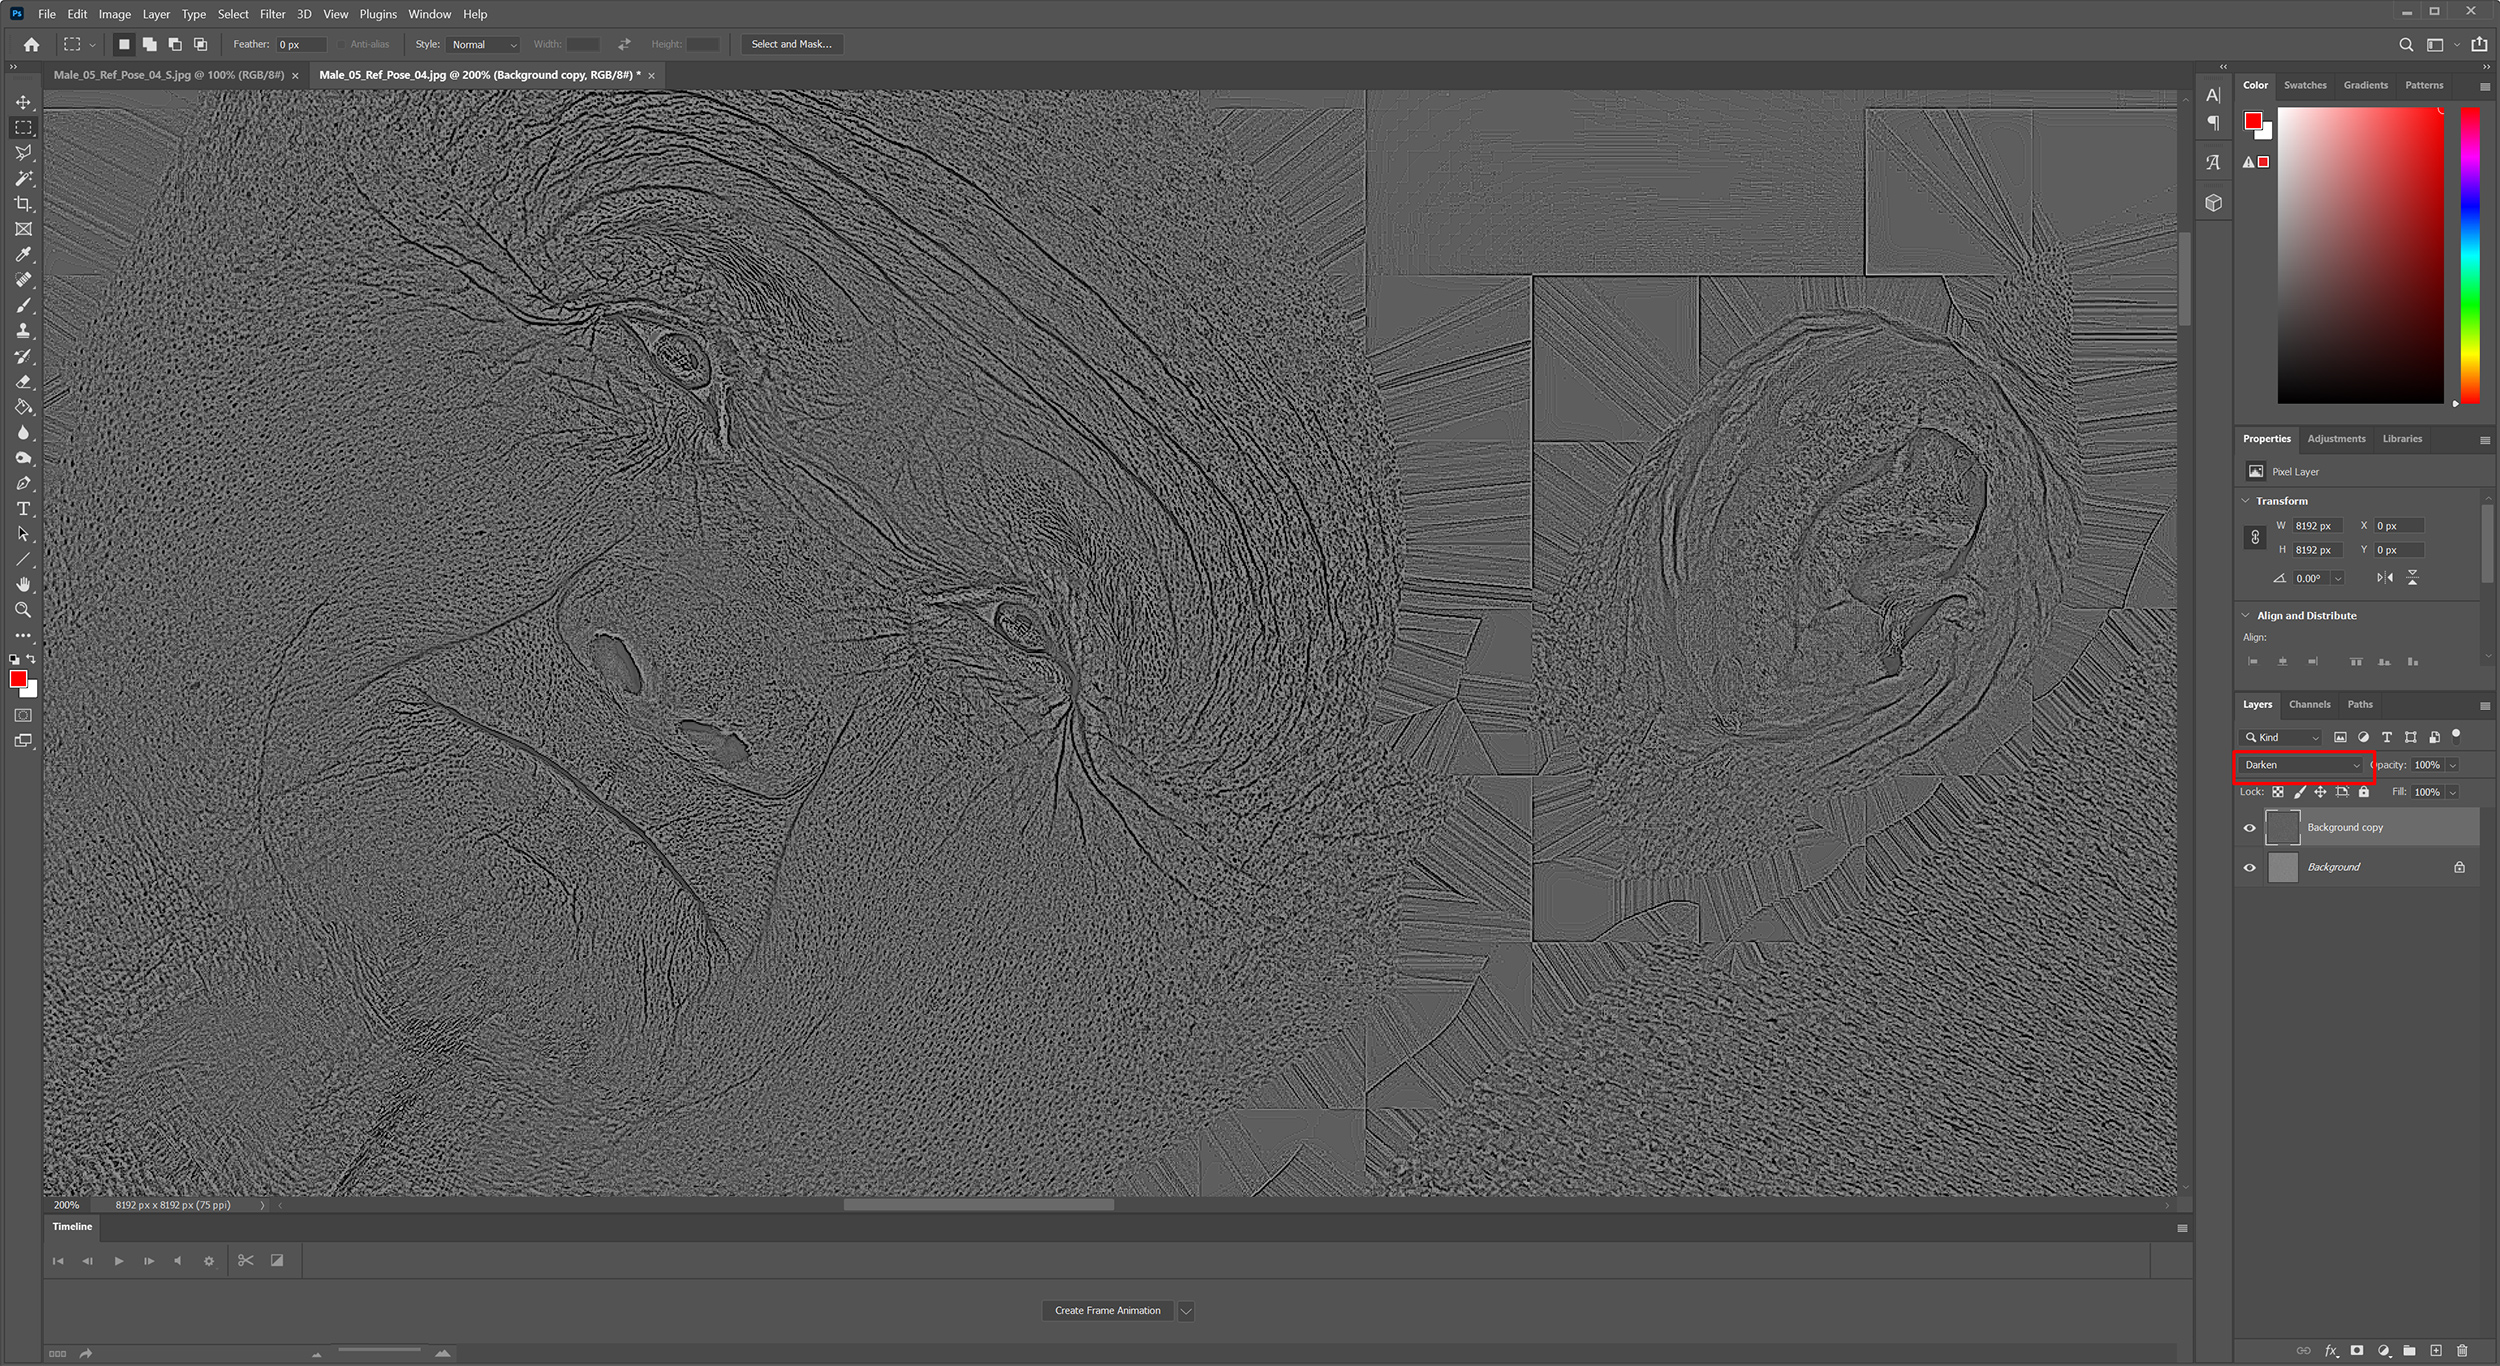
Now simply set this layers blend mode to "darken" and hey presto a dirty cheaty spec map. I once again want to reiterate that this is not physically correct in anyway, its a hack but it gives you a good basis for a spec map. If you want to make a proper specular map then you need to spend a lot more time that this painting areas of higher reflection removing moles, wrinkles and skin imperfections that will render incorrectly due to their darkness on the map. But for this article I'm trying to show you a very quick way to get 85% of the way there in a very short space of time. Sometimes the best way is the way is the simplest way to get good results fast, it's not always about being "physically correct"
Here you can see the results, it's not perfect but it helps to pick out the skin details and gives the render a much more realistic quality.
Eyes
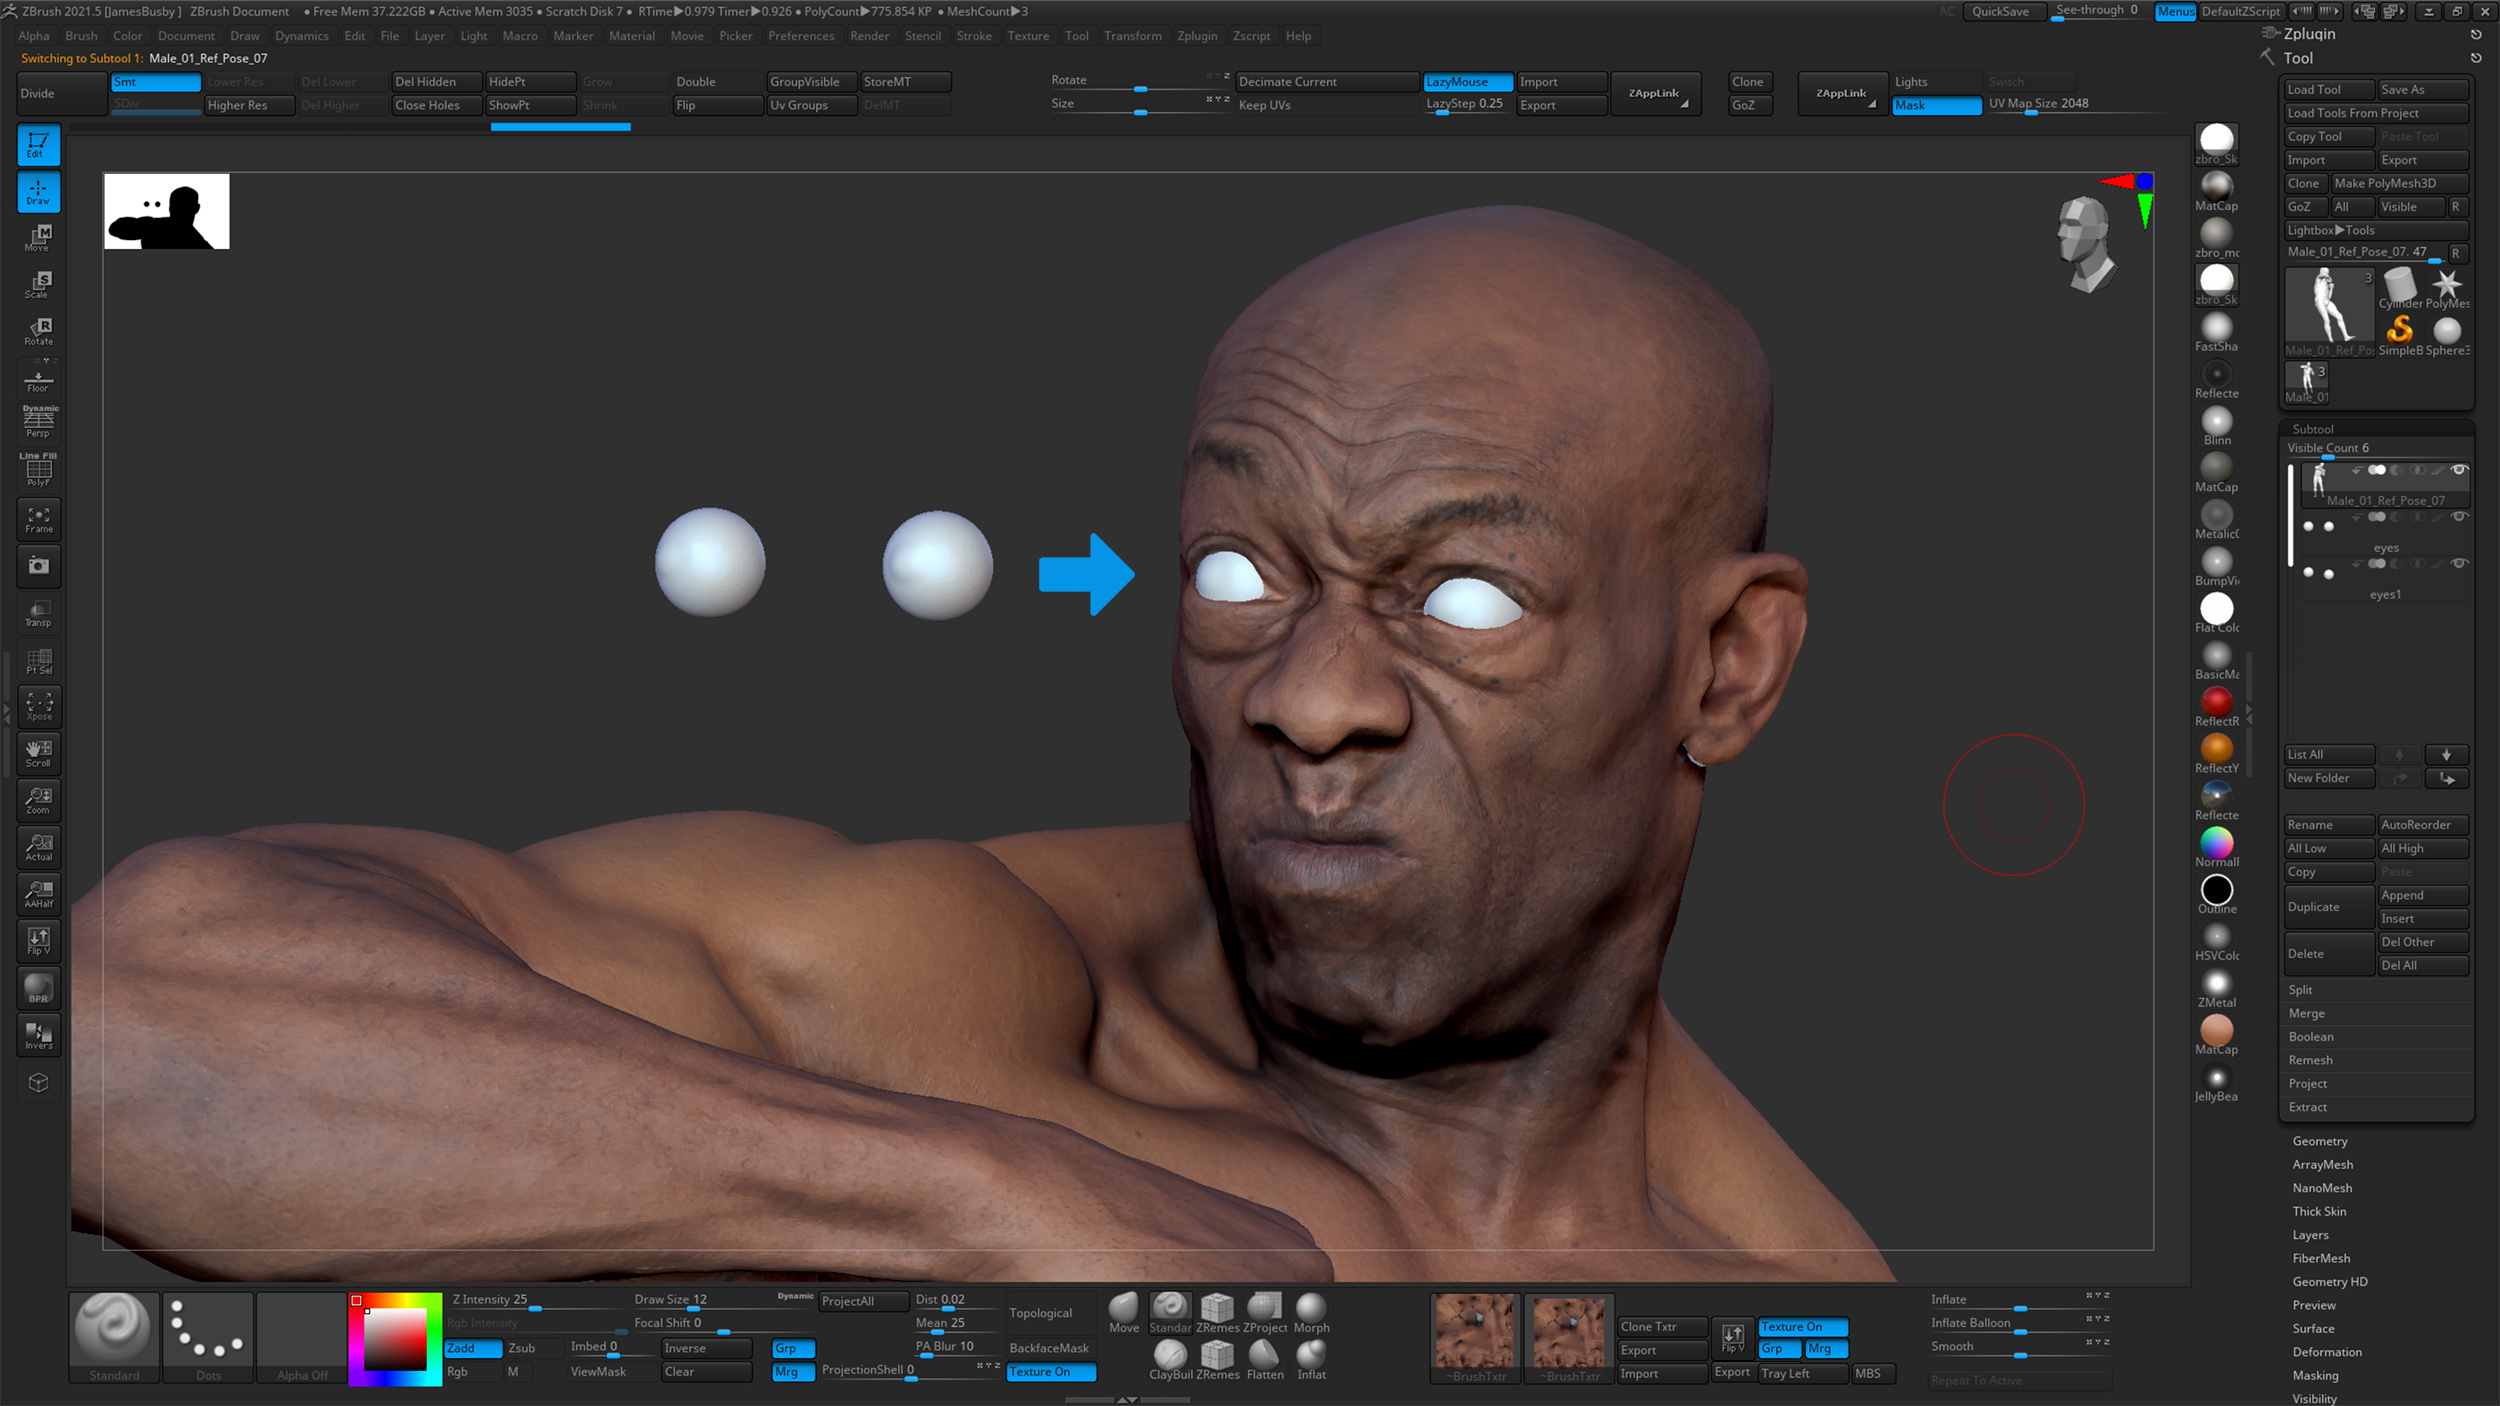
As I mentioned before the eyes are another quick hack, I've simply created 2 spheres in Zbrush and positioned them over the eyes in the scan.
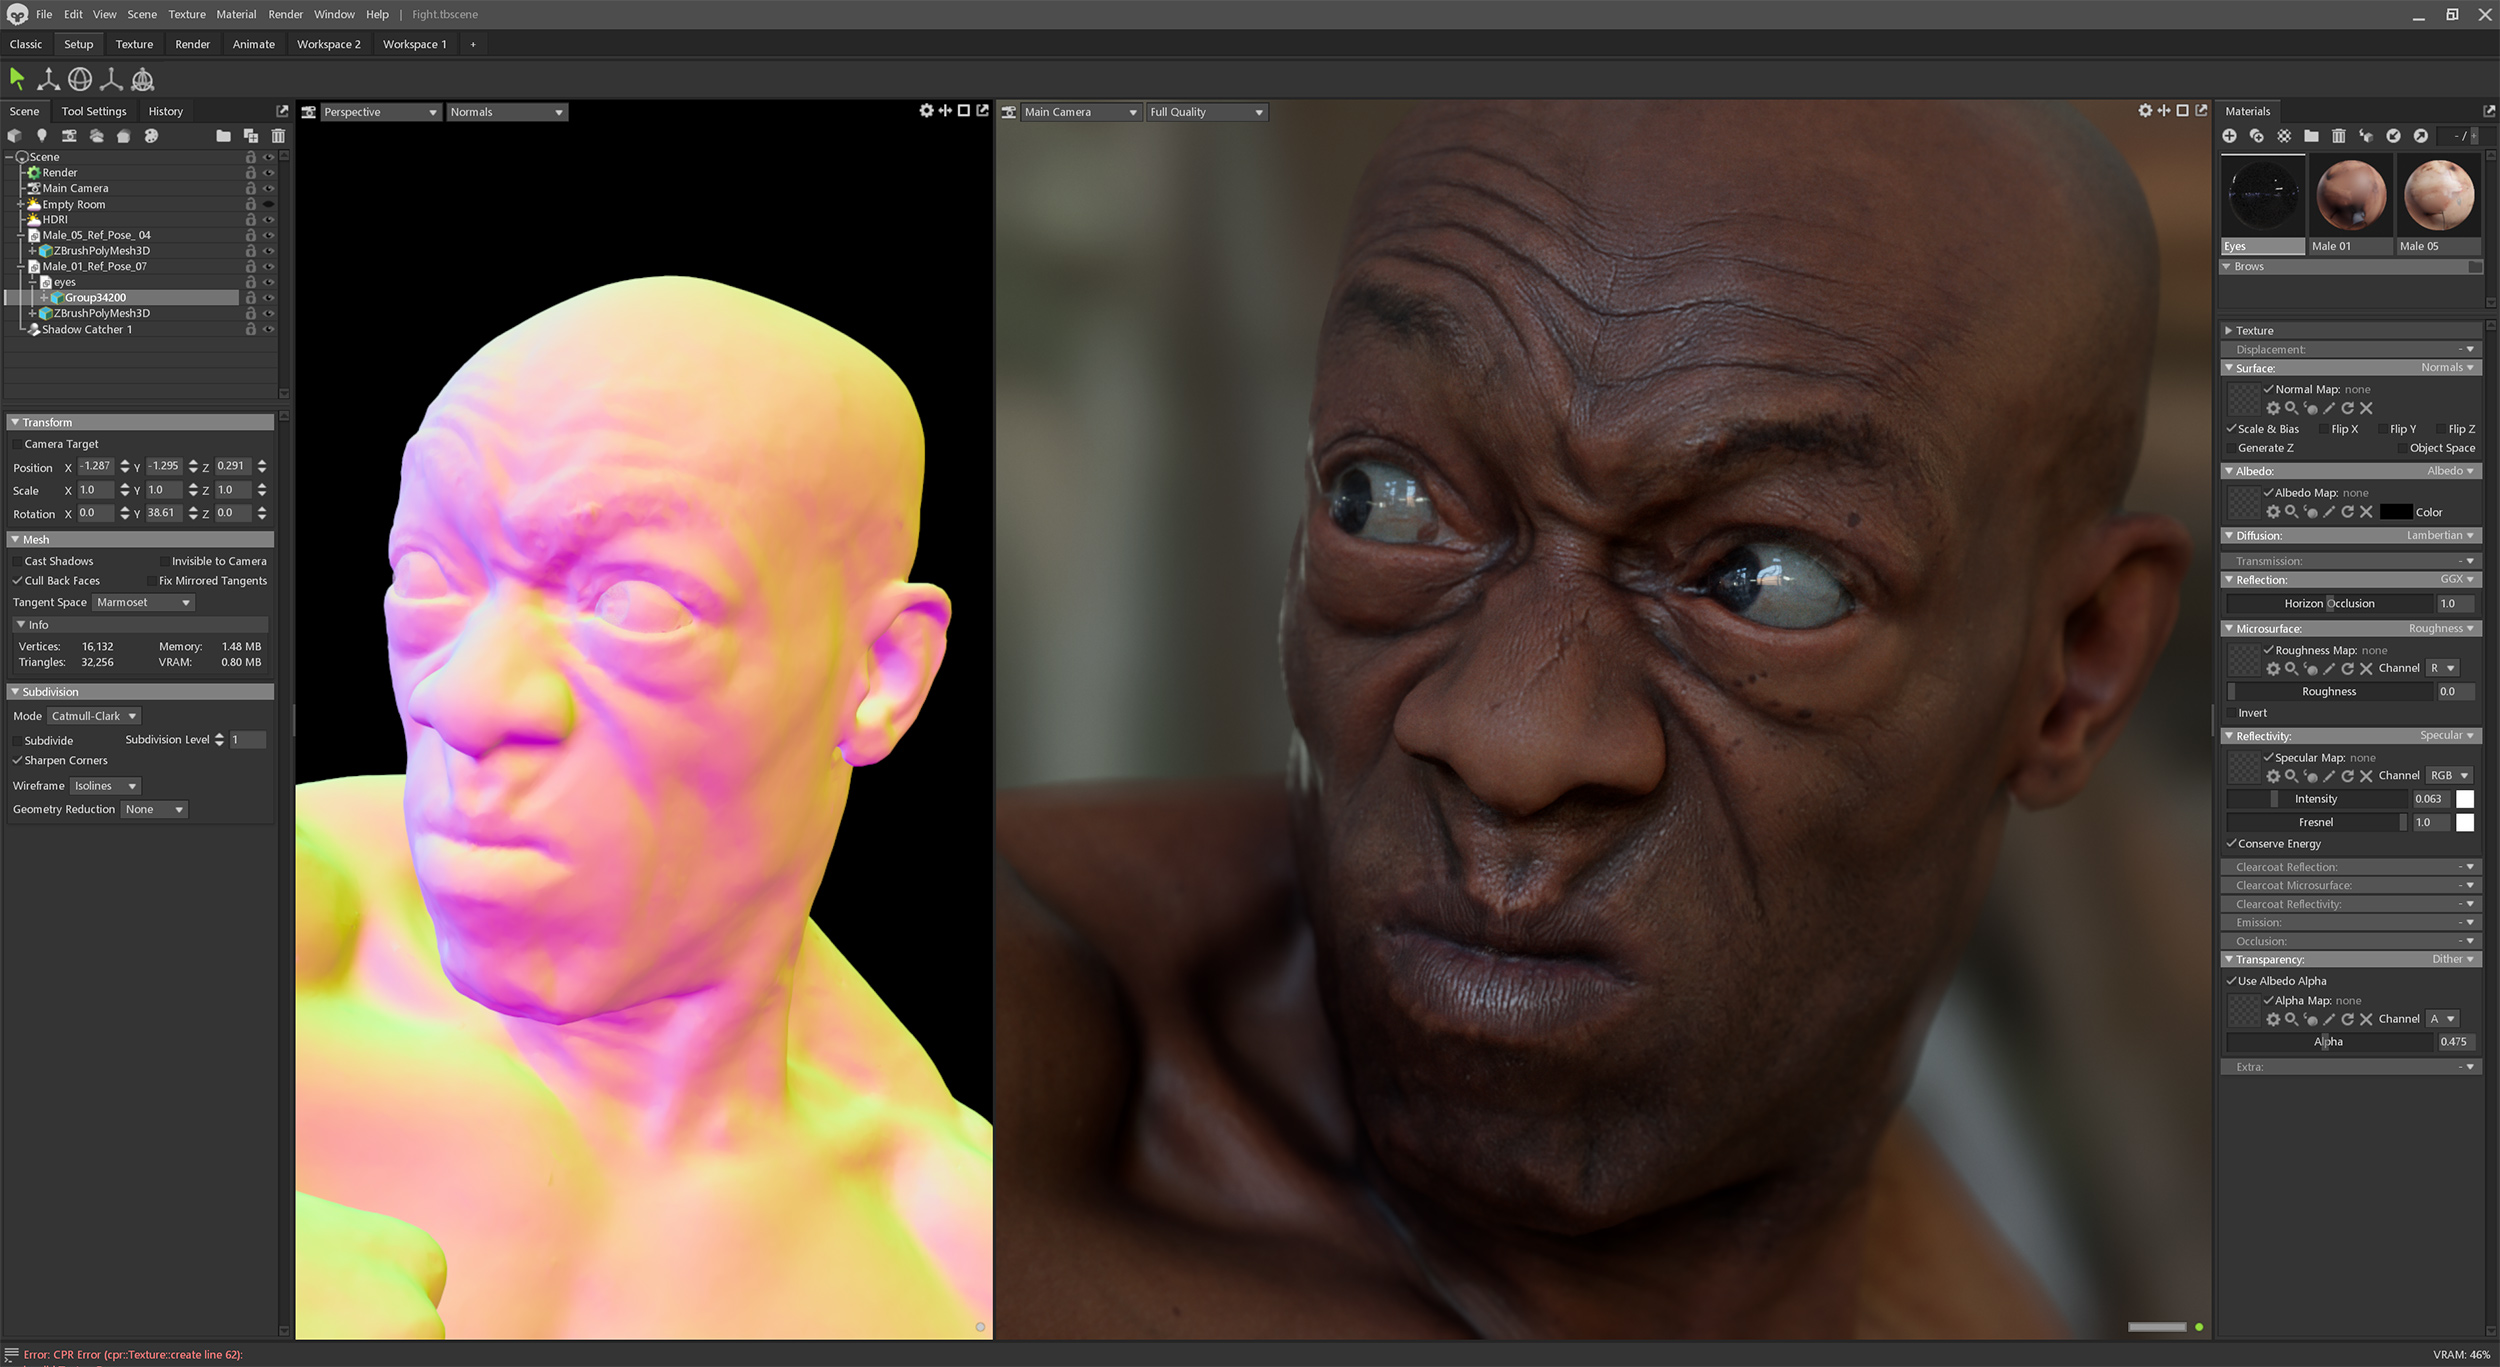
I loaded the eyes into Marmoset and applied a very simple shader with the albedo colour as black and the transparency set to "Dither" with a setting of about 0.47. Again this is a hack! a really bad one which will only hold up in certain situations but for these renders it works perfectly. The image below shows a close up of the eyes in the scene, if we get any closer than this they will look dreadful! I mean they don't look great at this distance but for this shot I'm going to be a lot further away and all I really want is the reflection to match that of the scene lighting. Without the lens models and reflections the eyes would look lifeless.
Lighting
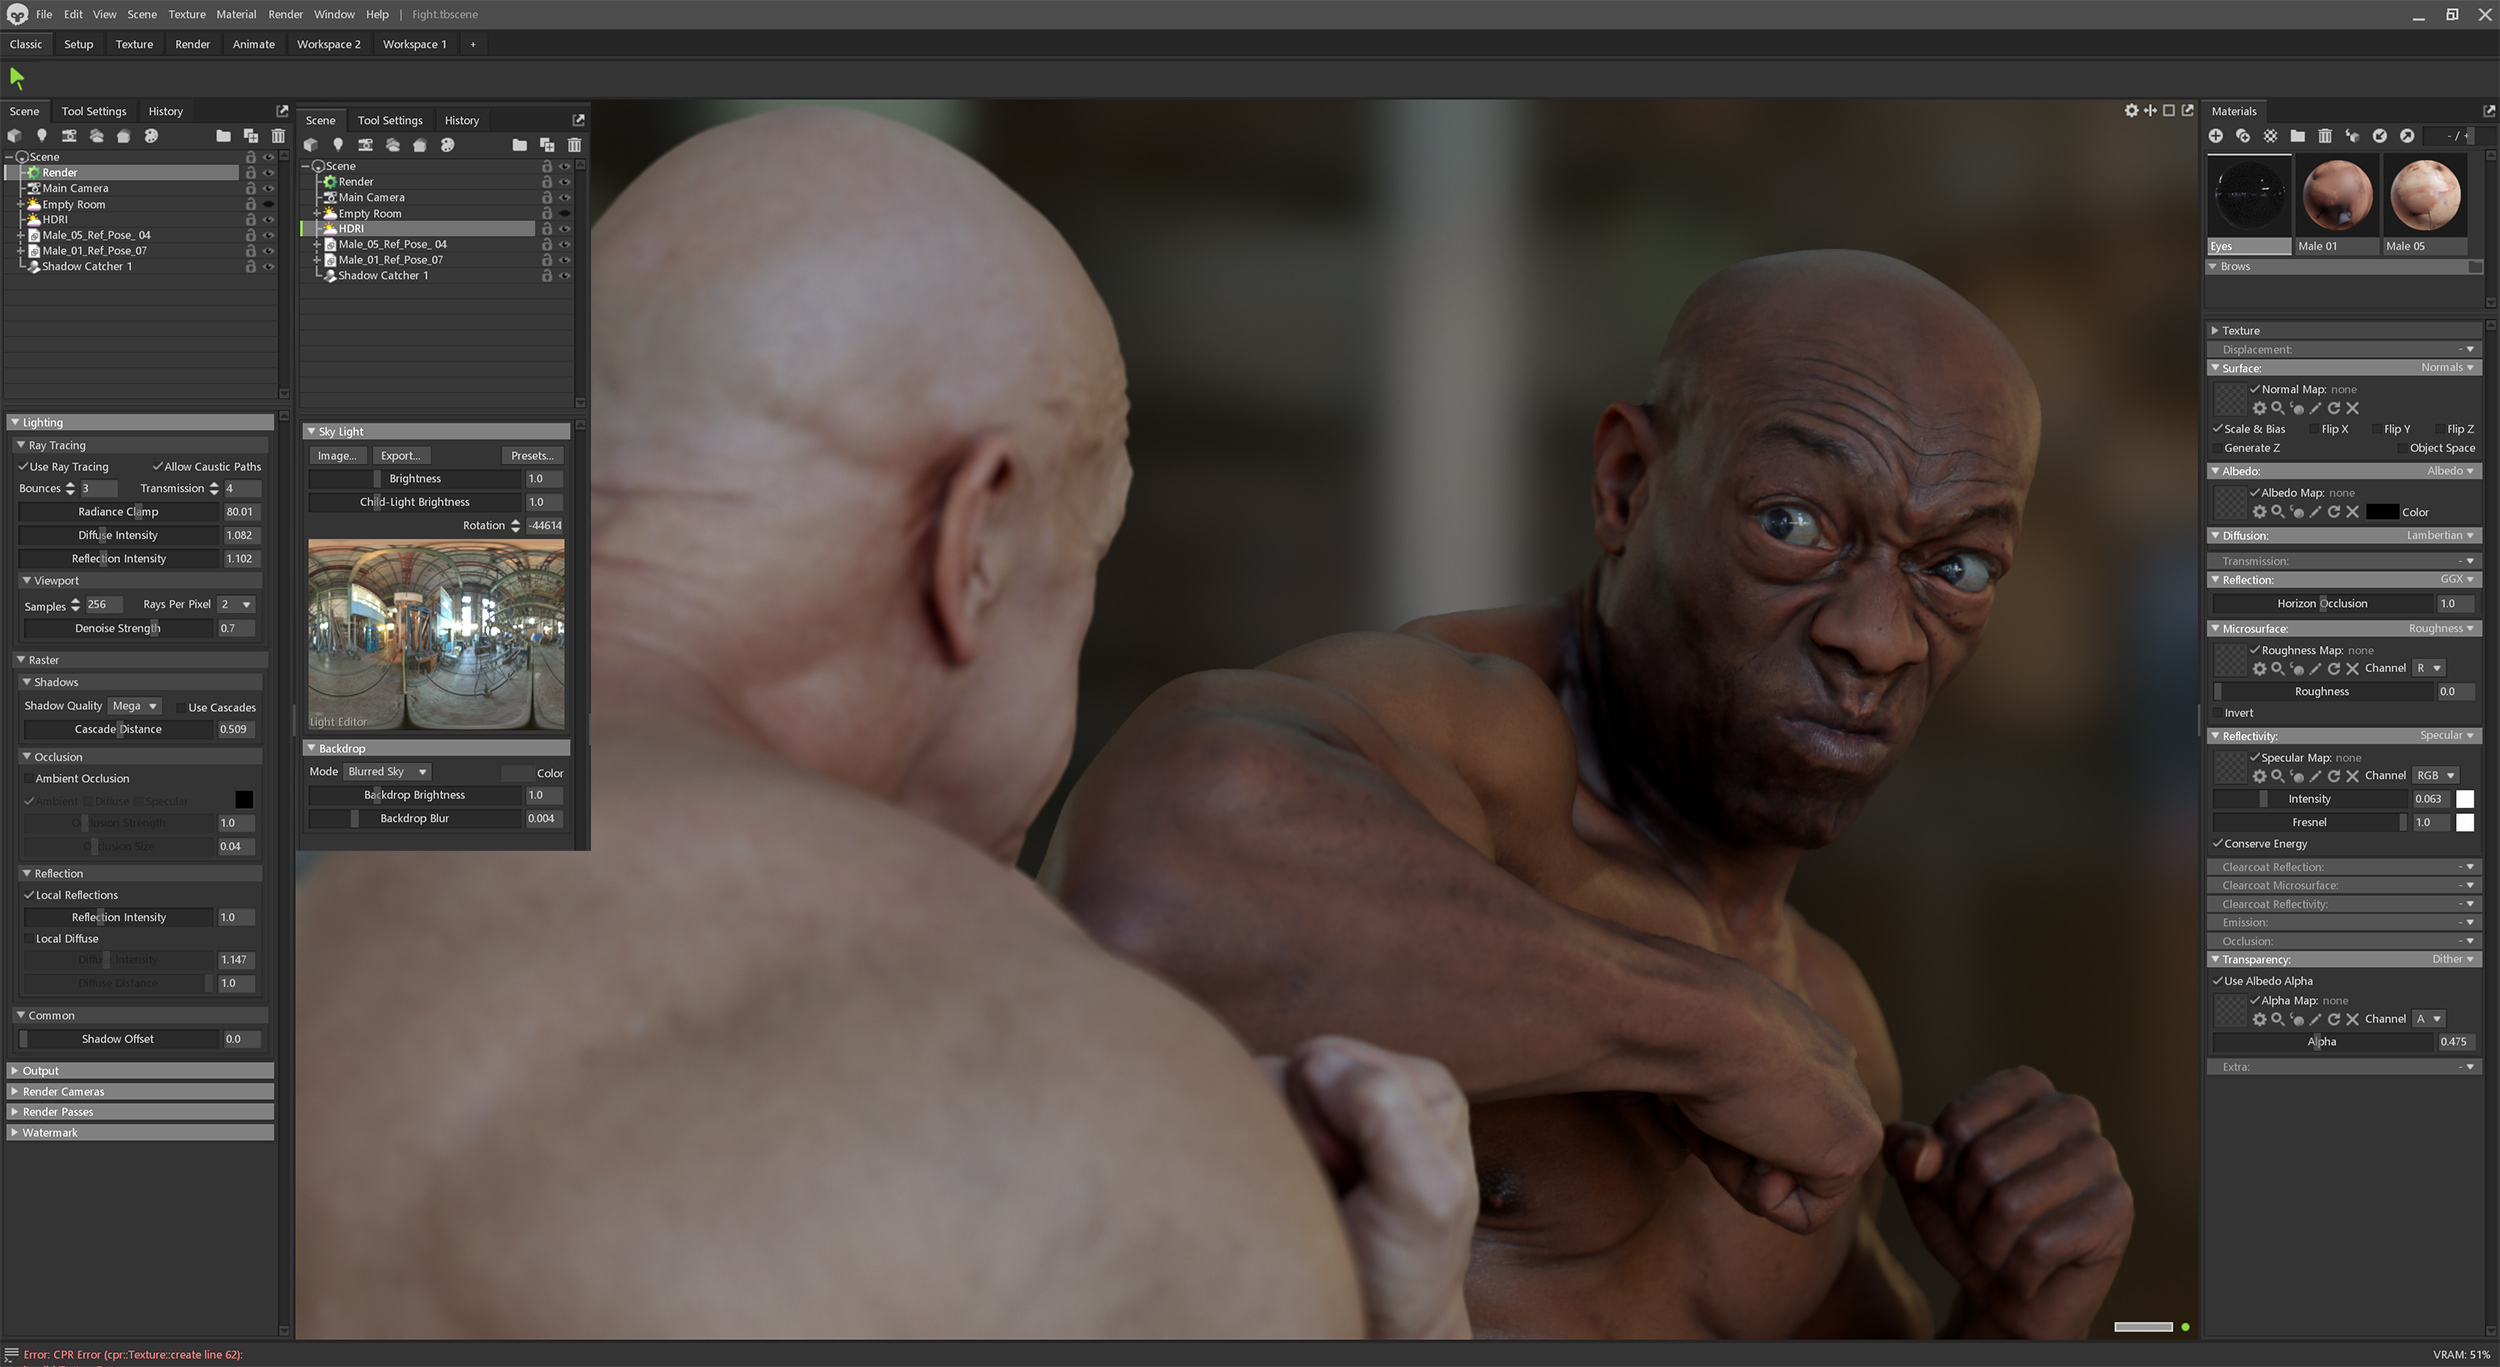
The first thing to do here is switch on the Ray Tracing, you can see my settings in the image below, hey are more or less the default settings. There isn't really much I can say about the lighting. I used a free HDR from HDRI Haven which you can download here. https://hdrihaven.com/hdri/?h=peppermint_powerplant This is a great site for free HDRI images if you do use them don't forget to donate something on their Patreon page. Other than rotating the HDRI around a bit to get the look I wanted thats it for the lighting setup, its incredibly simple with no additional lights or bounce cards.
Camera setup
I pretty much always set my cameras up the same in Marmoset, Field of view set to around 80mm Depth of field is always on regardless of the distance from the subject. The closer you get to the subject the more I like to increase the "near blur" for this particular scene I have near and far blur off set by quite a lot as you can see from the image below, but these settings seem to work nicely for this shot. I wanted the foreground guy to be out of focus with the camera focused on the guy throwing the elbow. DOF setting are a personal choice and I really love messing around with them to simulate different lenses. Tone mapping is set to Hejl which I find gives everything much more film like quality as it crushes the blacks nicely and removes that "CG" look. Ive compensated for the slight darkening of the tone mapping by brighting the entire image a bit by adjusting the tone mapping curves just a little bit as shown below. All the other settings have been left as default.
Post processing
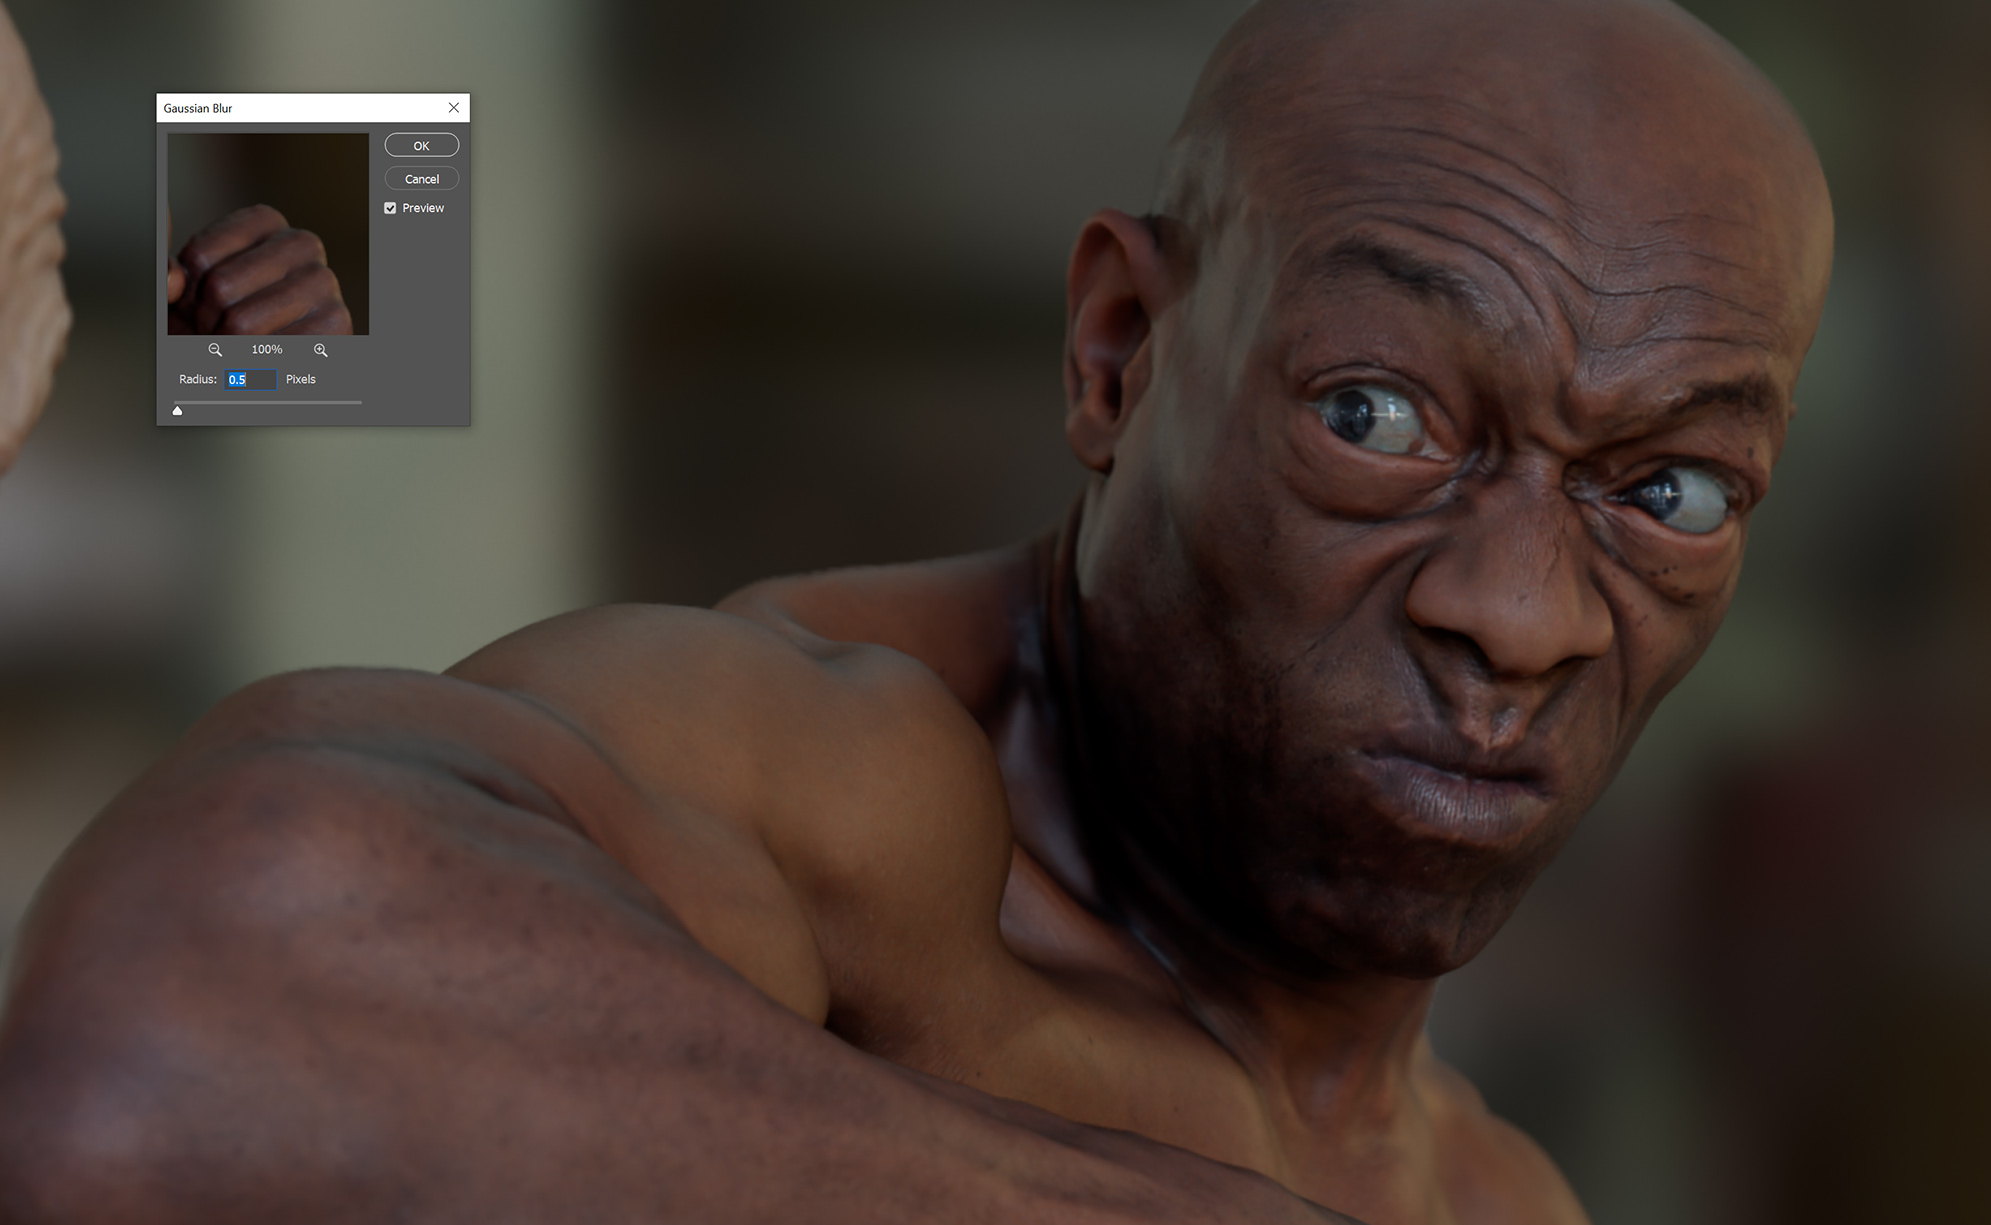
To finish the image off I did a bit of post processing in Photoshop. Firstly I added a slight Gaussian blur about 0.5 pixels. I like to do this to take the edge off the uber sharp rendered look.
Next I added a little bit of chromatic aberration buy selecting each of the RGB channels and offsetting them by 1 pixel.
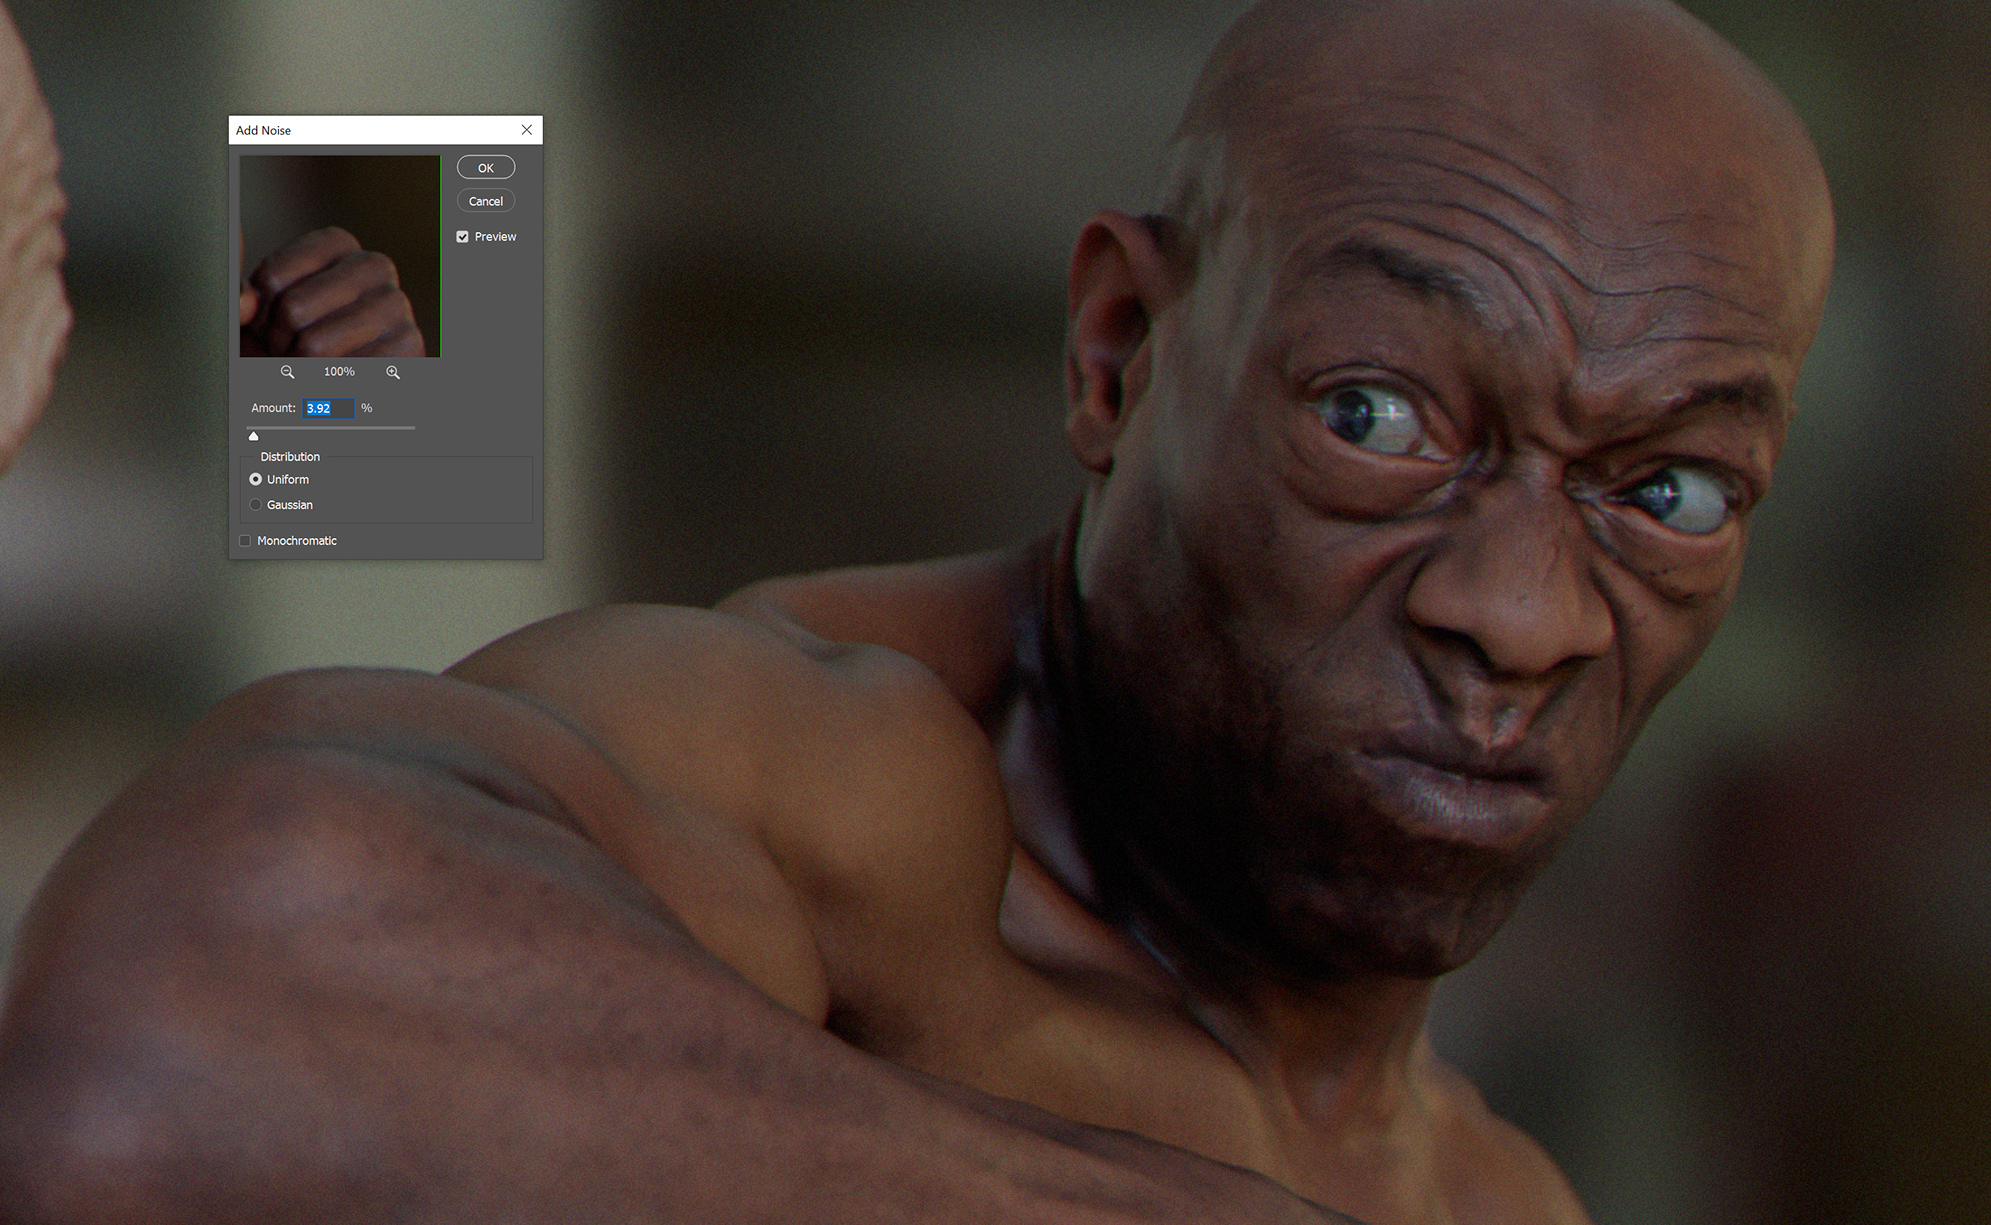
Next I added some noise
And then finally a slight green colour tint.

And thats it. Here's the final image with some cinematic bars added for extra effect.
I hope this was useful, I really want to reiterate the point that the techniques used here are very cheaty and not in any way intended to be used in a production workflow, I simply wanted to show a very fast way of creating a scene using relatively low resolution scans and make the point that you don't need pore level details and super complicated shader networks to produce cool images. If you have any questions feel free to email me jamie@ten24.info.