Introduction
In this tutorial we are going to look at how to setup a fairly simple skin shader using a 3d scan from our store. For the purposes of this article I’m only going to be focusing on the skin and completely ignoring things like the eyes and hair. I’m going to make this a 2-part tutorial so this will show you the basics of how to setup the shader and the scene as well as create some of the secondary maps such as the gloss and spec. In part 2 I will look more in-depth at tileable micro skin details using TextureXYZ maps.
Assets and software used
Male 45 Head Scan Cleaned - Avaliable here
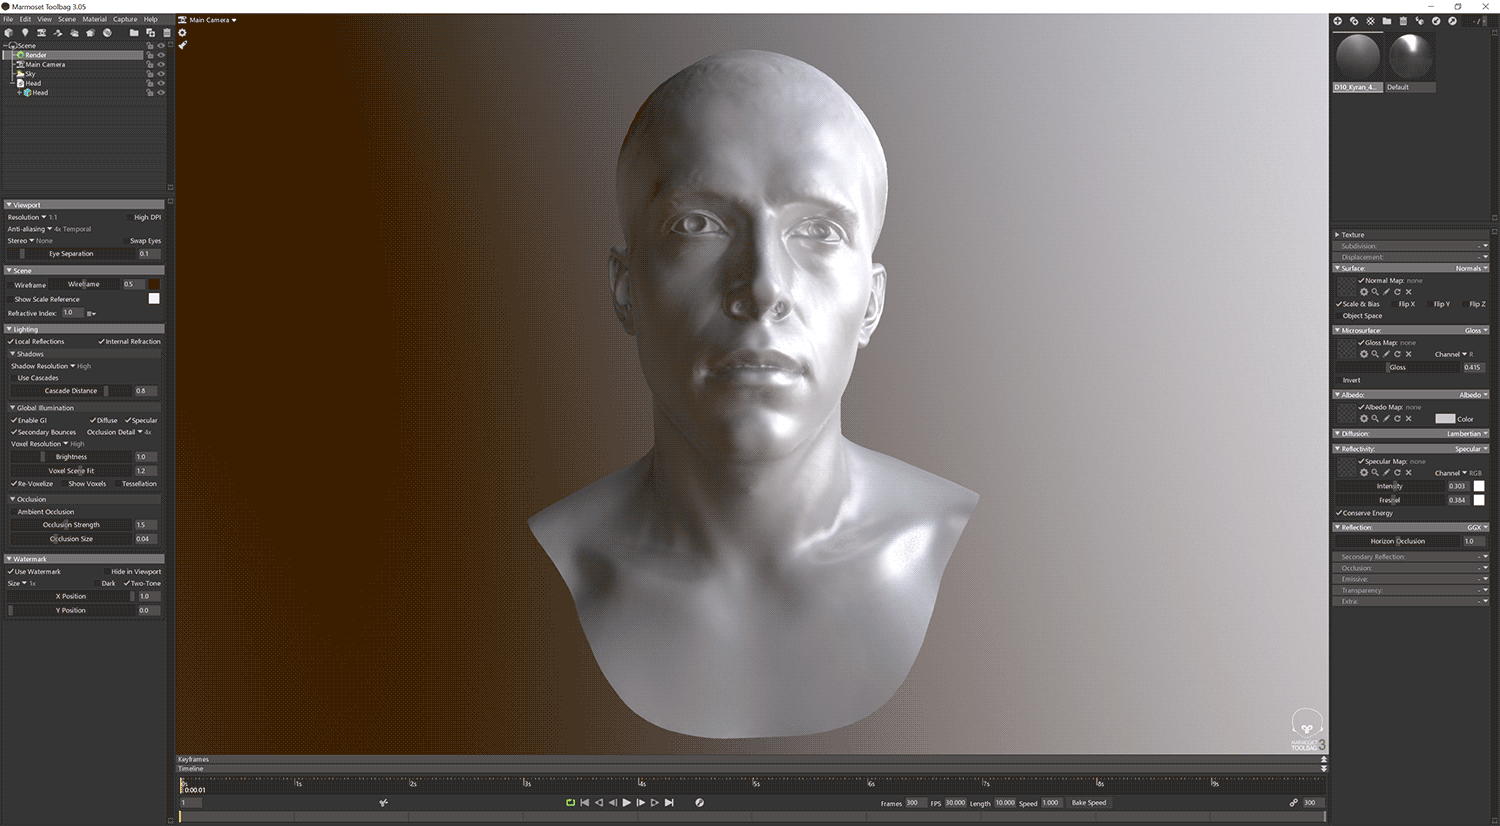
Scene Setup
The very first thing we need to do is import our model, File> Import model. For this I like to export an FBX rather than an OBJ from Zbrush because they store normal information and don’t result in unwanted smoothing errors on the mesh.
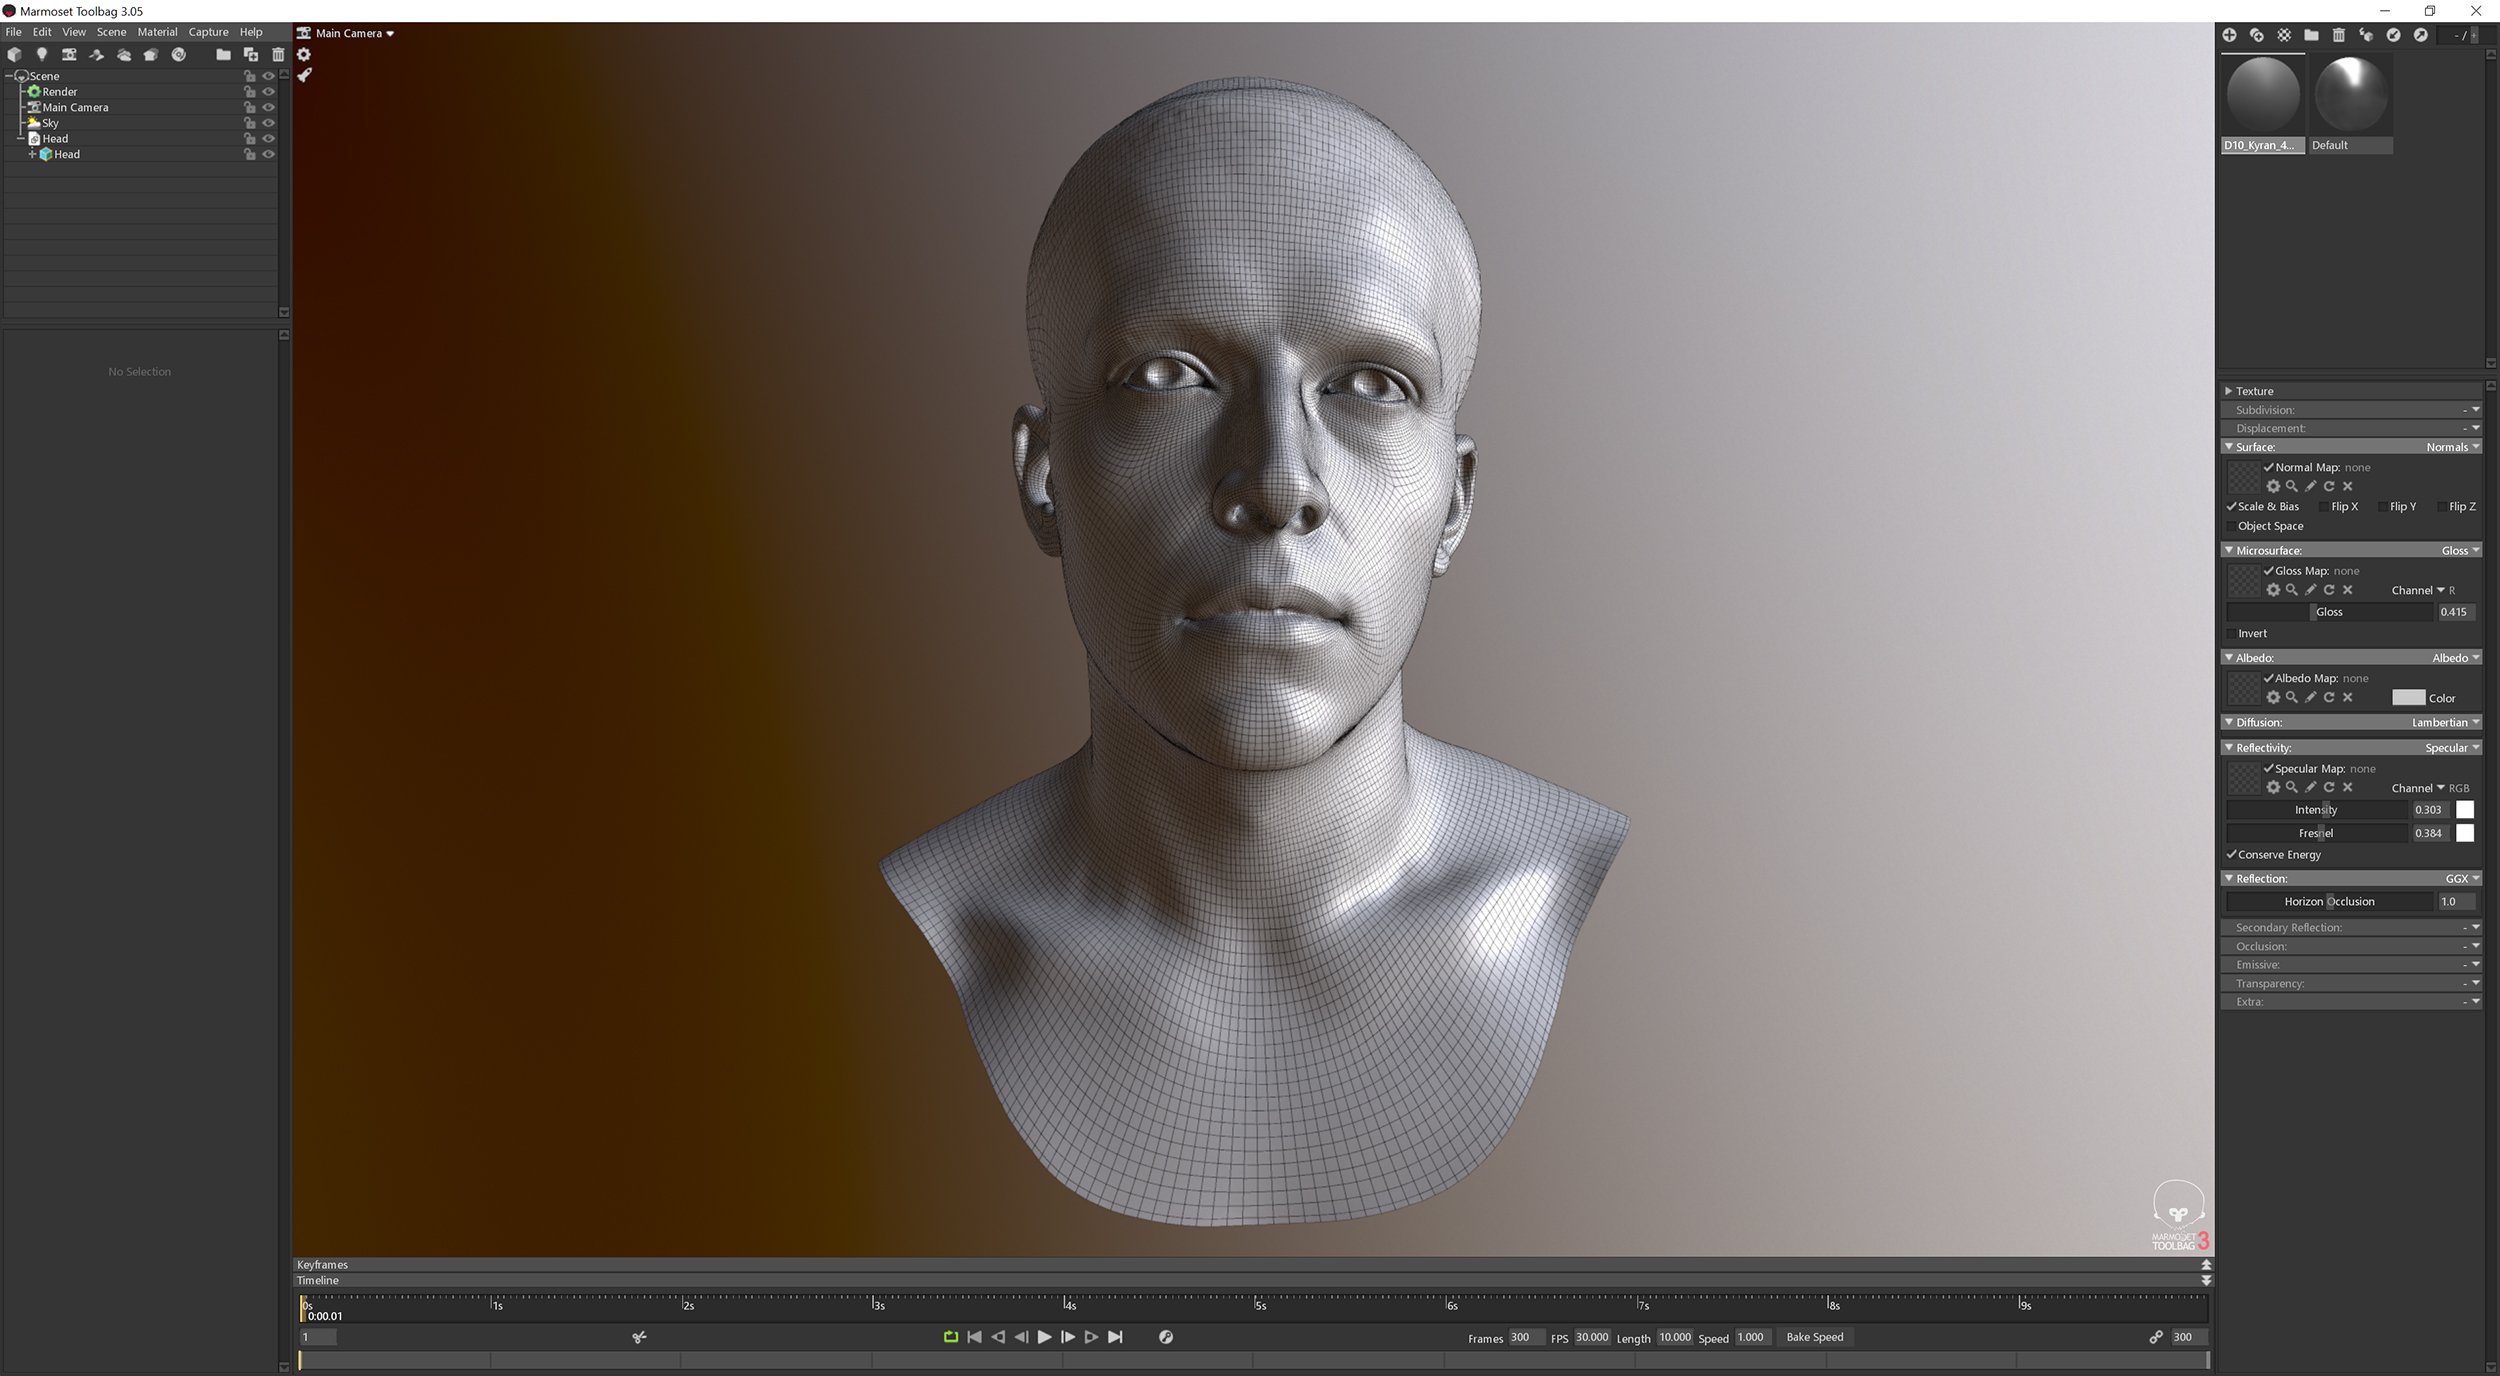
I like to setup the camera early on, as I've said in previous articles no one likes a horse face and a sure fire way to do that is to have use a 35mm focal distance. I like to set it to somewhere around the 70mm mark which is much more in keeping with portrait photography, you can see the difference this makes in the image below.
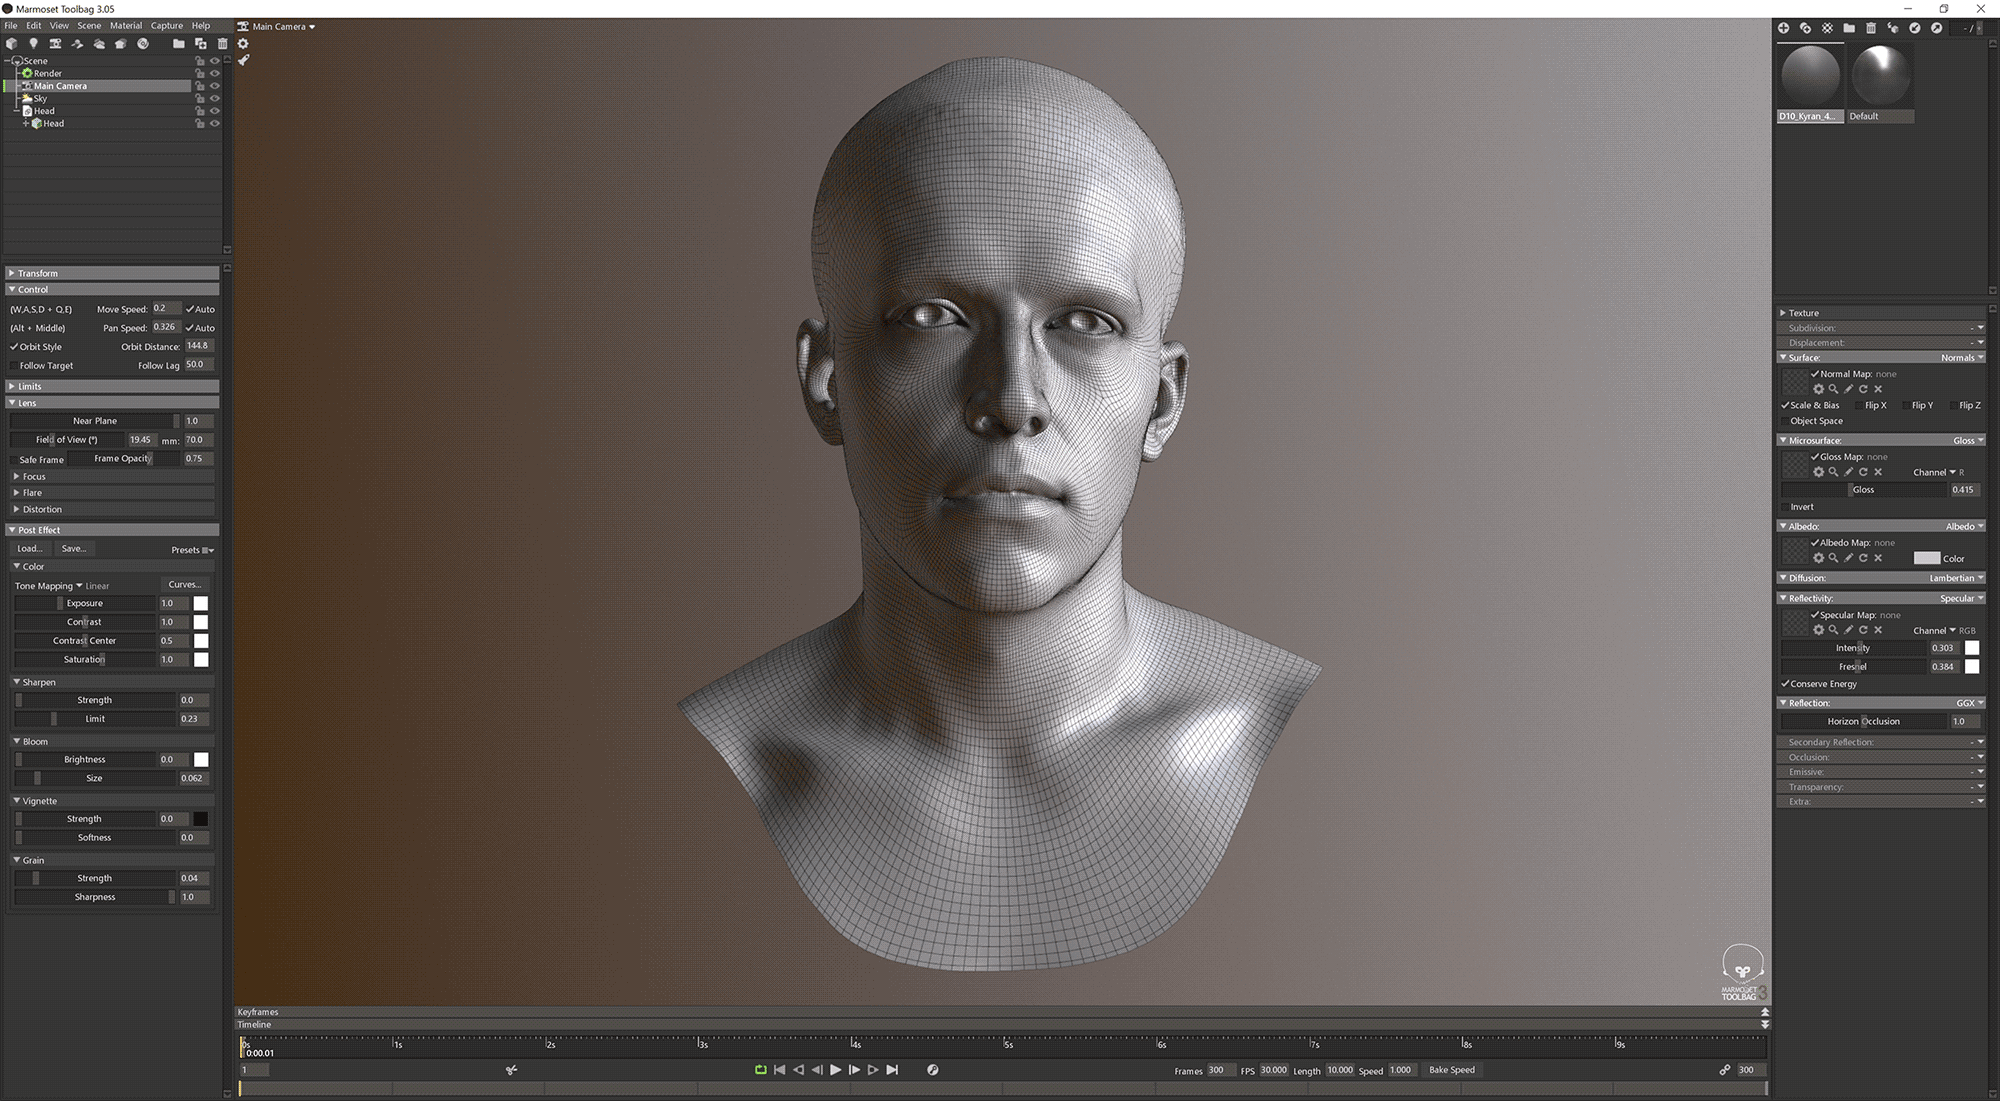
Next I’m going to switch on some of the basic global illumination and lighting settings that I like to keep consistent throughout the process. In the "Render" tab enable Lighting>Local Reflections and Lighting>Internal Refraction as well as Global Illumination>Enable and set Voxel Resolution to High. Depending on the specs of your PC the Voxel resolution can have a bit of an effect on frame rate so if it drops too much it might be worth keeping it on medium until you're happy with the results and switching to High for final renders.
Shading
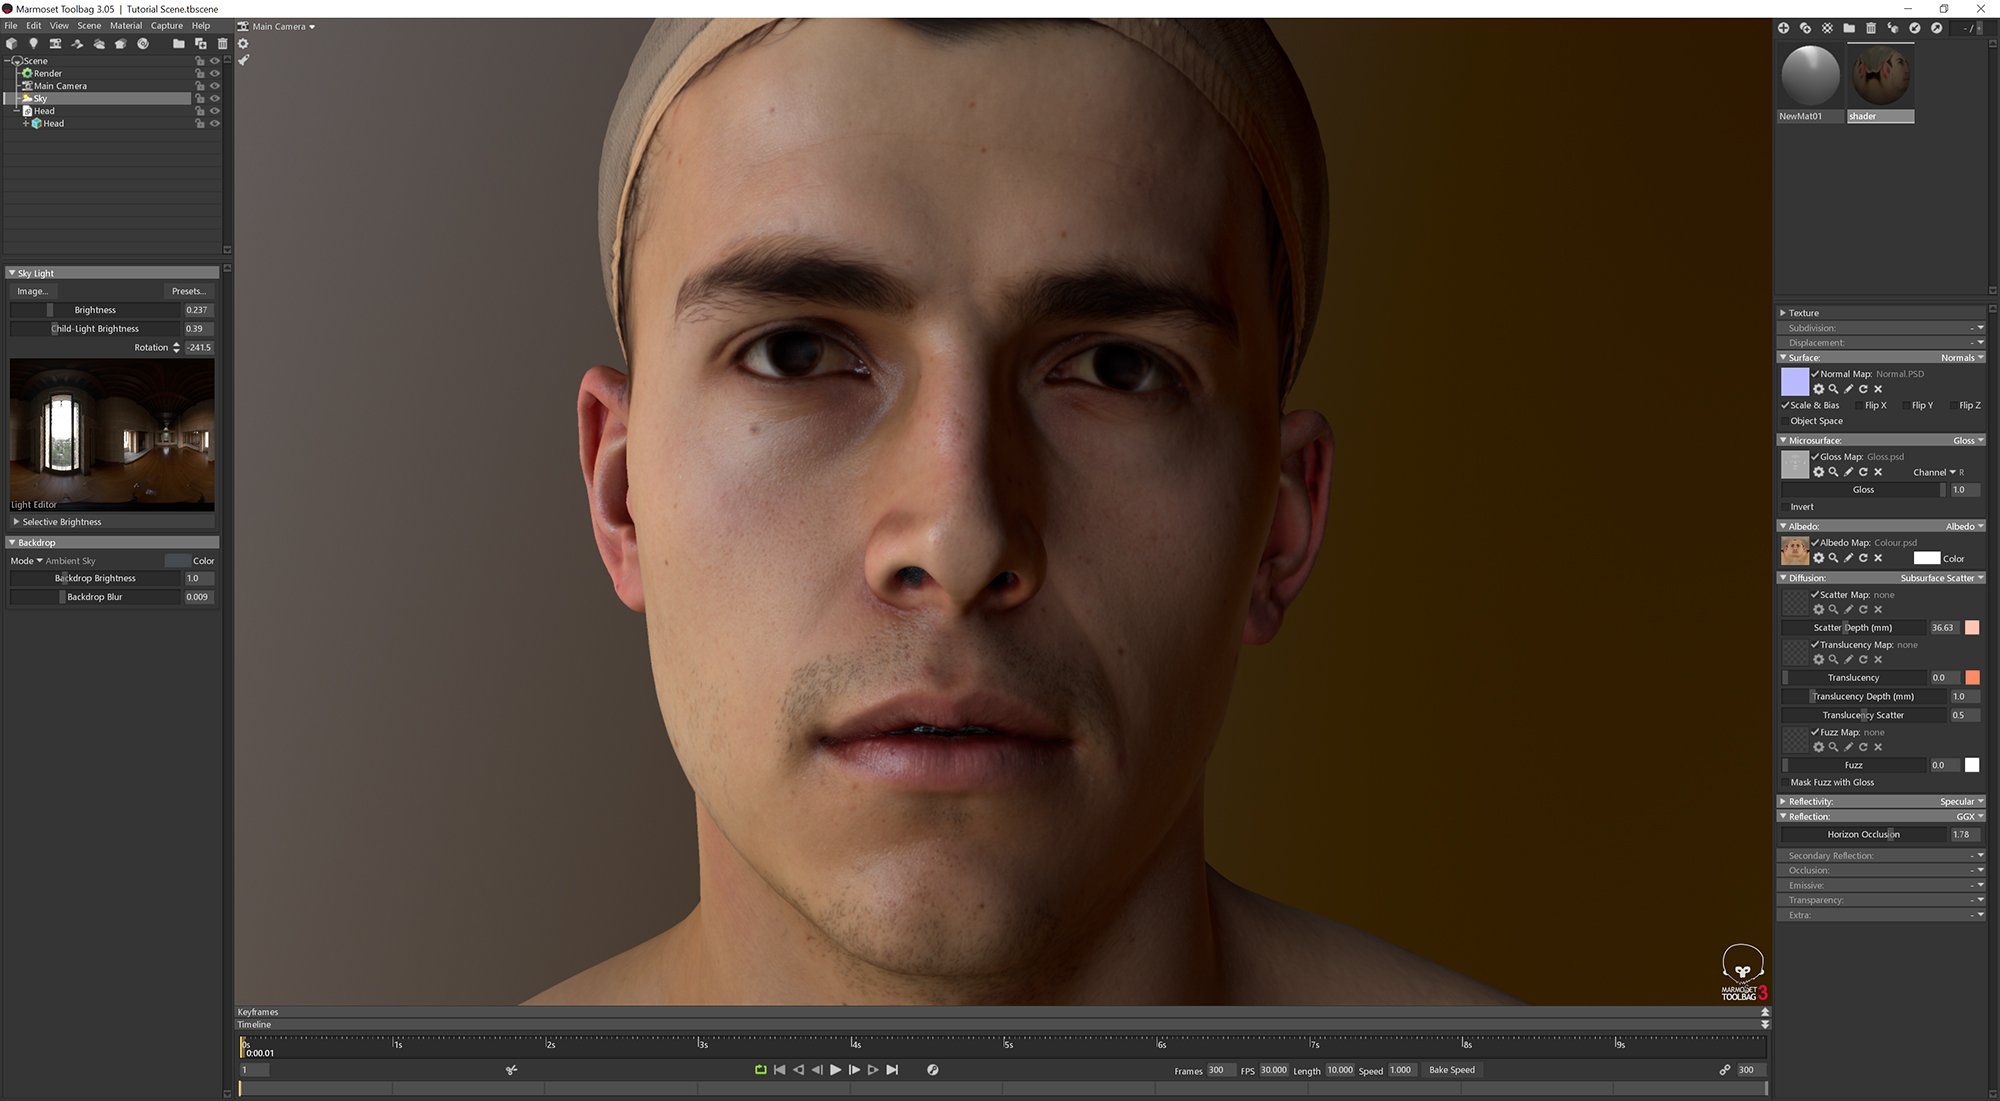
Now that we've more or less setup the scene (more on that later) we can load our 2 basic maps. Normal and Albedo (colour). For this example, I’m using one of our latest head scans available here. The model comes complete with both normal and albedo maps so all you have to do is load them from the directory. If your using your own model then you will need to export your normal map from whatever sculpting package your using for this I will assume Zbrush which will only export a maximum of 8k which suits us fine as that is also the maximum image size that Marmost will display. It would be great if they would allow for higher resolution maps but for the time being this is the largest image size we can work with.
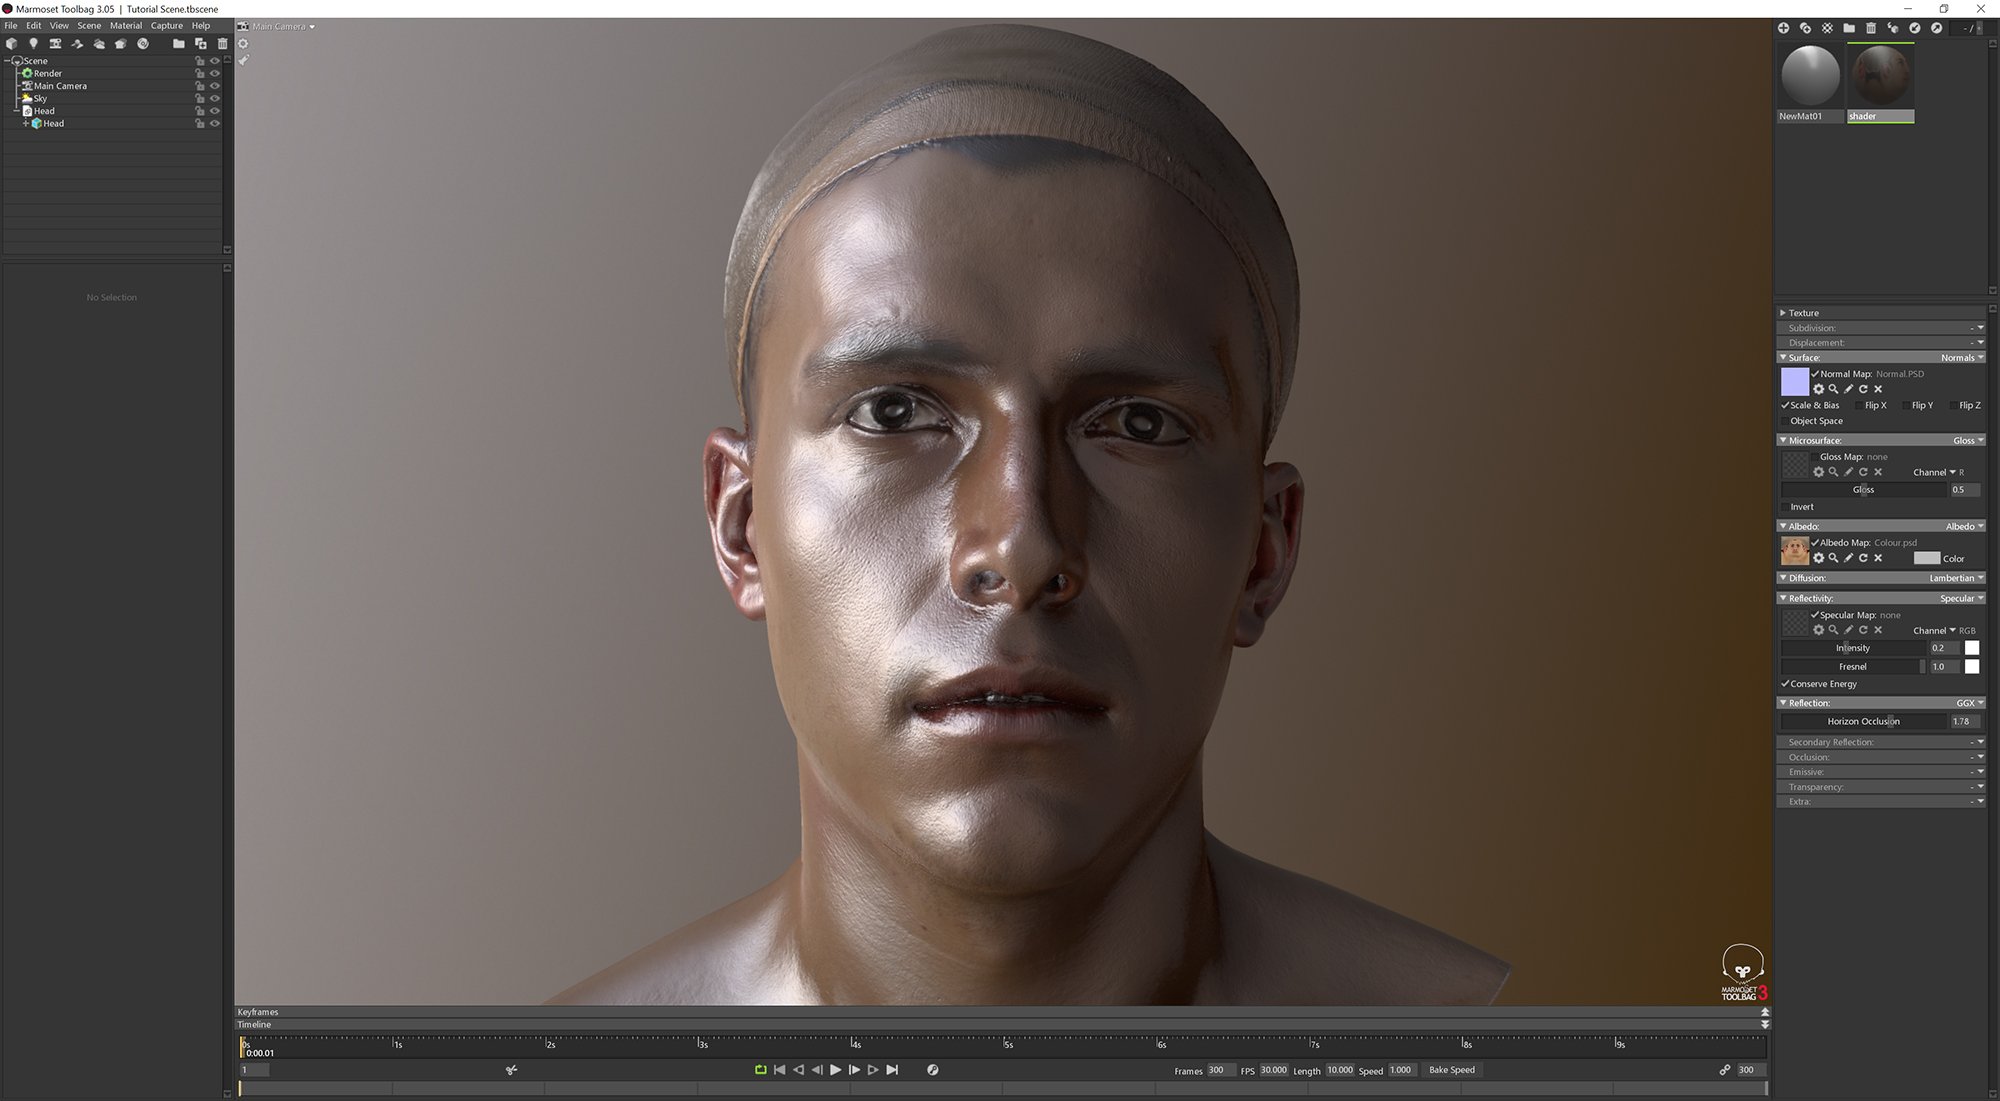
Now were going to adjust the specular colour to a light blue, there are a few different opinions on this but what we have observed shooting polarised and cross polarised imagery of faces the resulting extracted reflection colour is always a shade of blue, however this could be down to the inability to correctly colour balance polarised imagery due to there not being a colour chart capable of doing this. Either way I like a nice blue hue to the spec so were going to stick with that for the purposes of this tutorial, feel free to change it to something closer to white if you prefer.
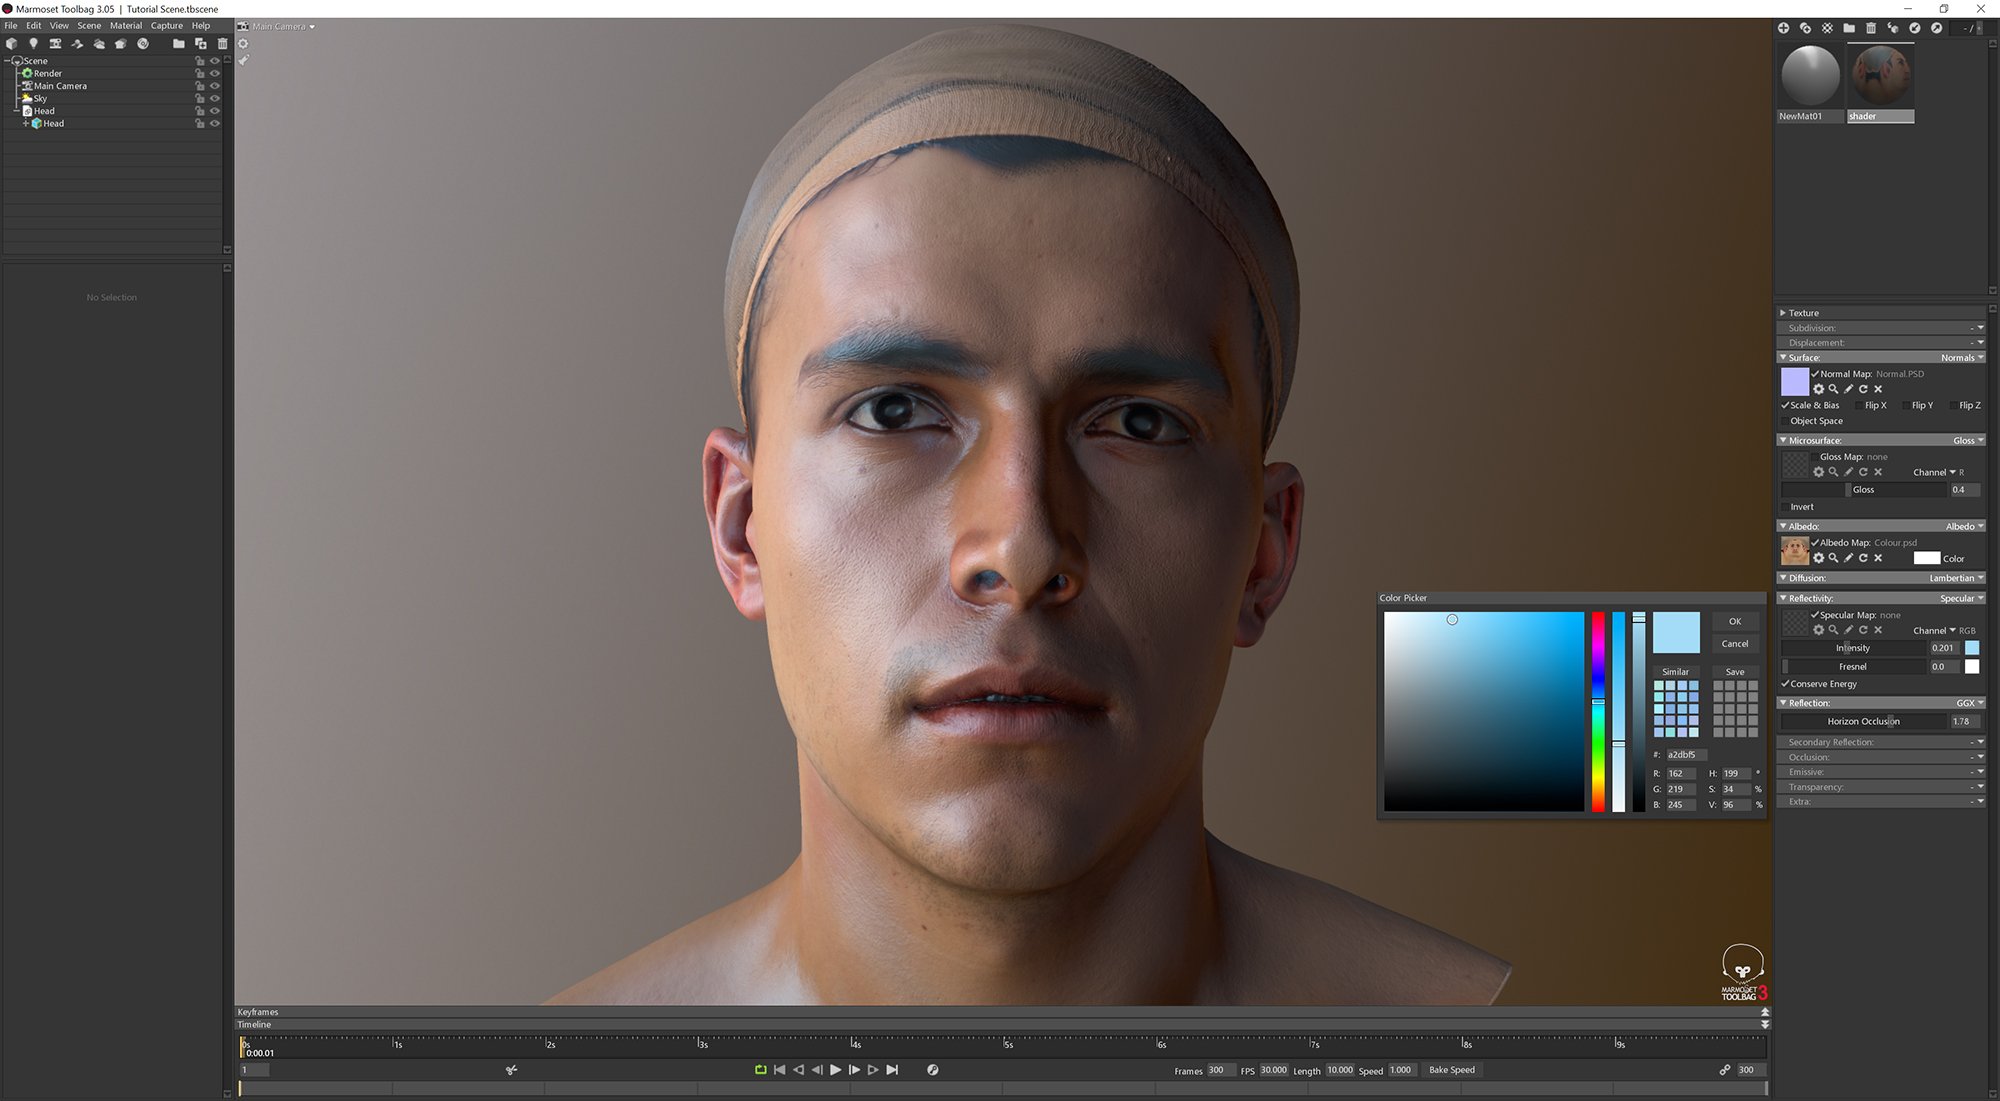
Specular Map
Now its time to create the spec map, I used a fairly standard and straight forward technique to do this. The first step is to desaturate the images in photoshop and then simply apply the high pass filter as shown in the image above. After that I used layers to paint on areas in white that re more reflective and areas in black that I don’t want to reflect. You will notice in the image above that I have painted both the hair and eyes completely black. This is obviously not the case in real life but for this tutorial I want to focus almost entirely on the skin. So for the sake of simplicity I’m ignoring these areas. The most important aspect of creating a spec map by hand is painting everything on layers, this means you can easily go back to them and tweak areas that your not happy with in marmoset.
And here we have the model with the spec map applied. If after you have applied the spec map you think it looks a little bit too sharp, i.e. the reflection terminates to quickly around a dark areas such as a pore or hair then you can try applying a 1% gaussian blur to the entire image in photoshop
Sub Surface Scattering
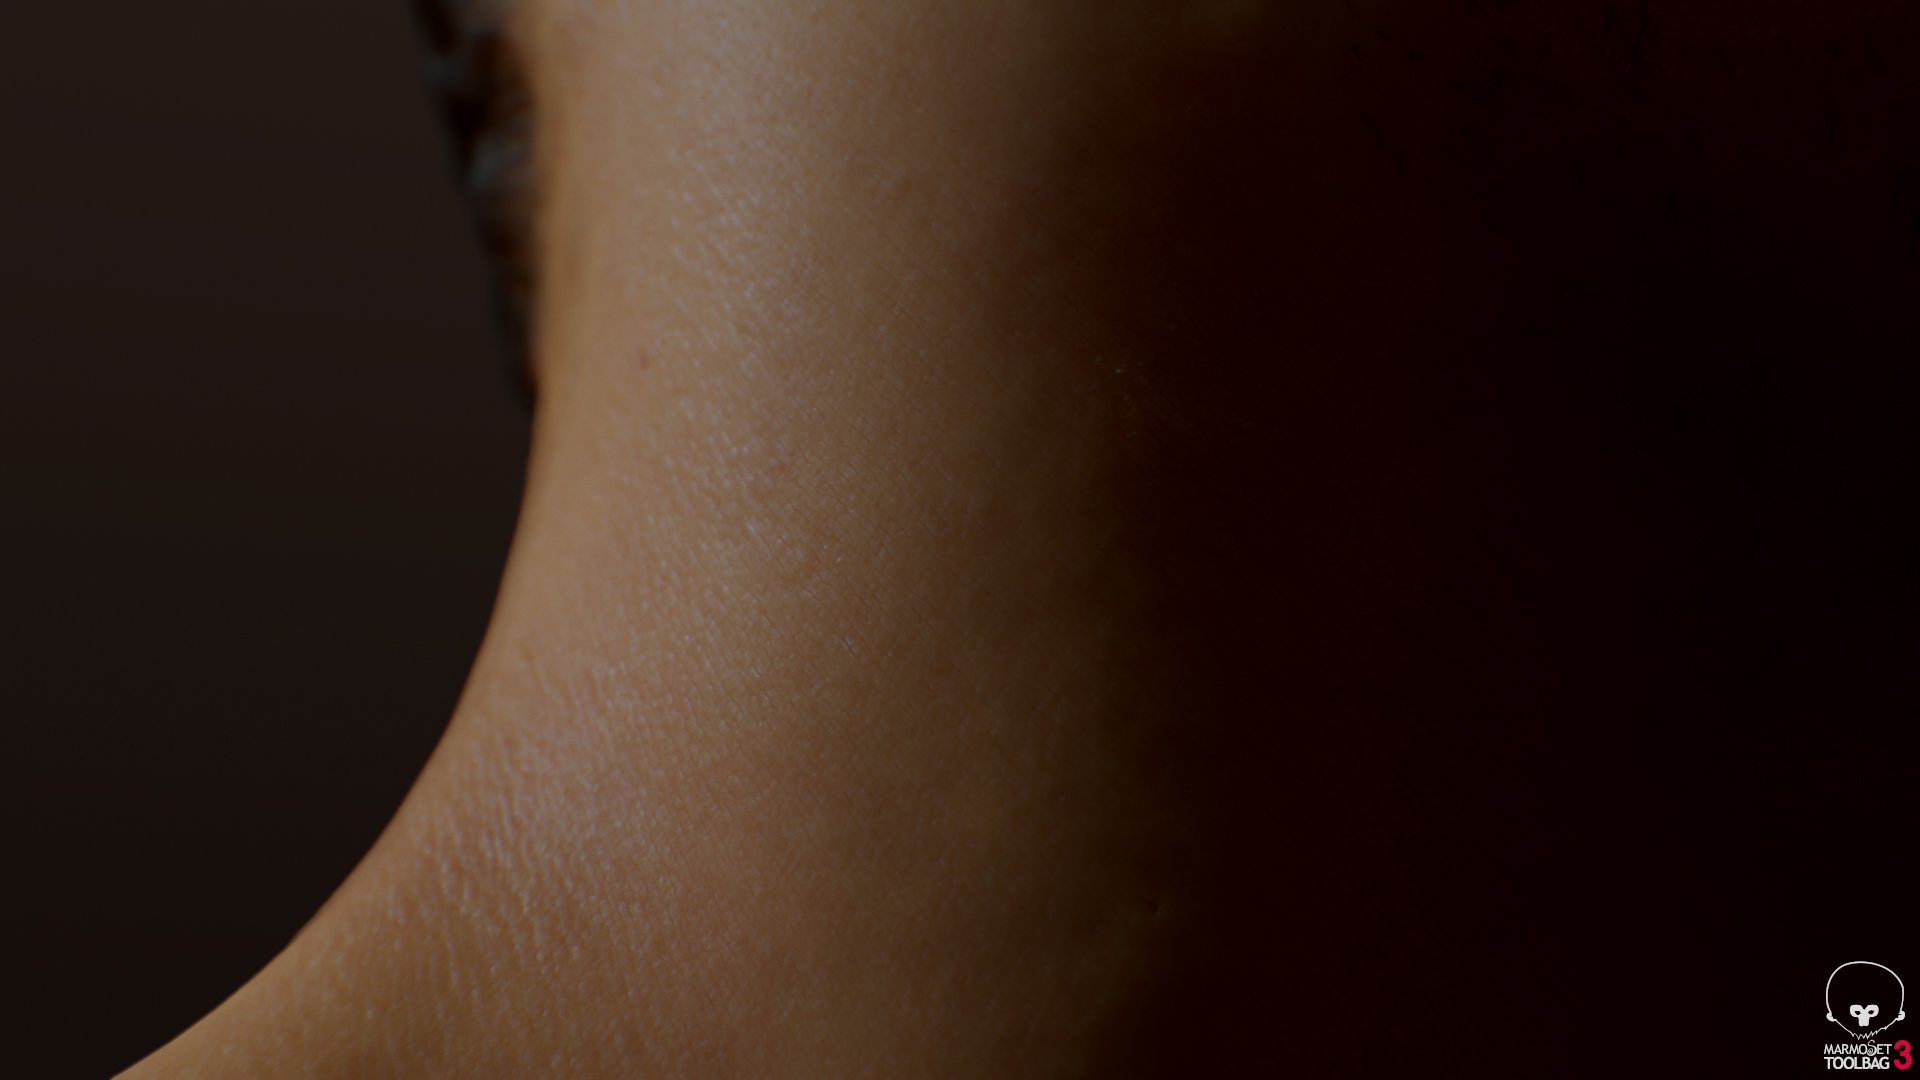
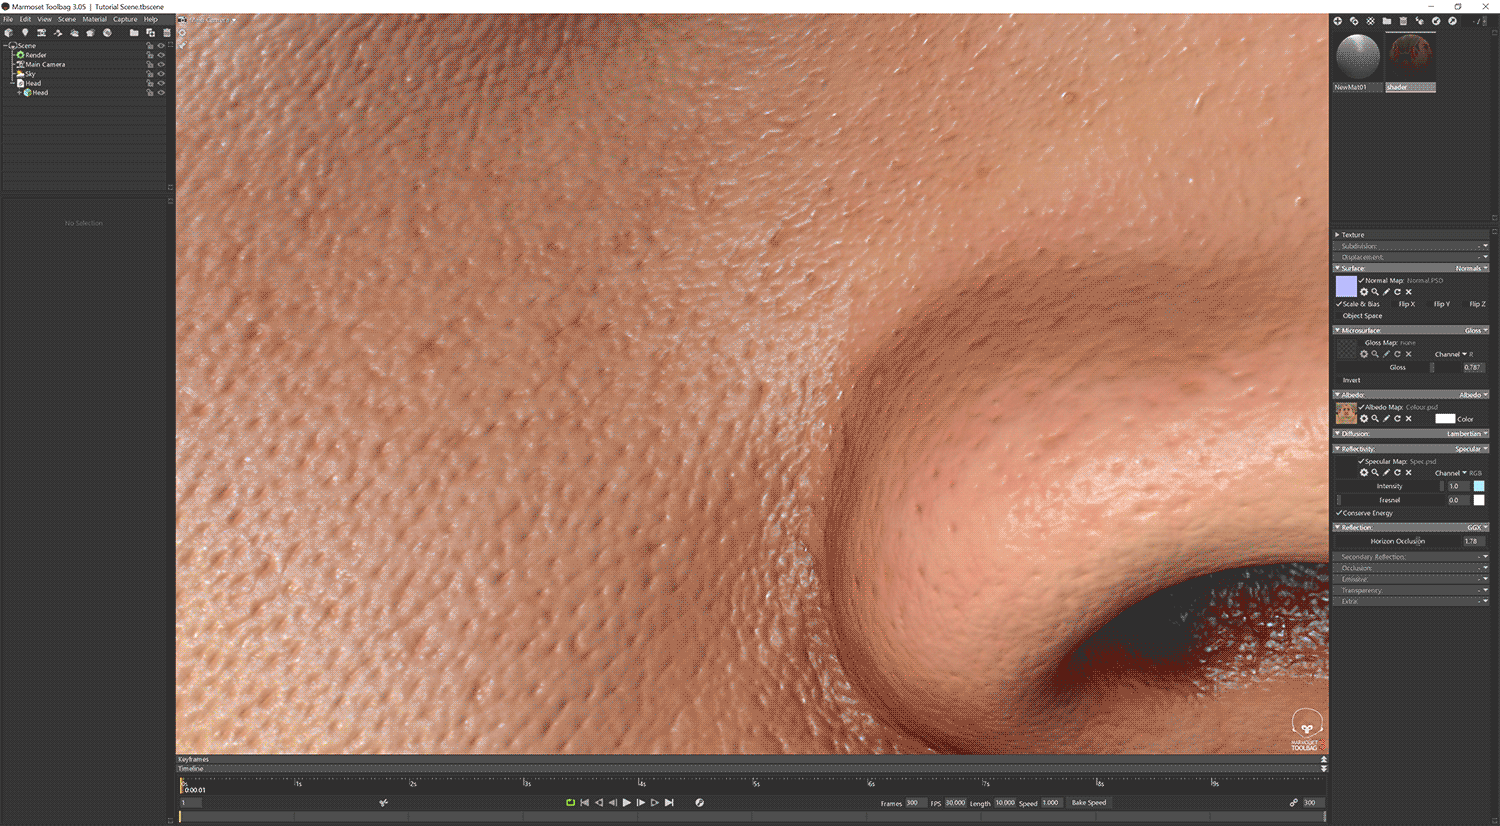
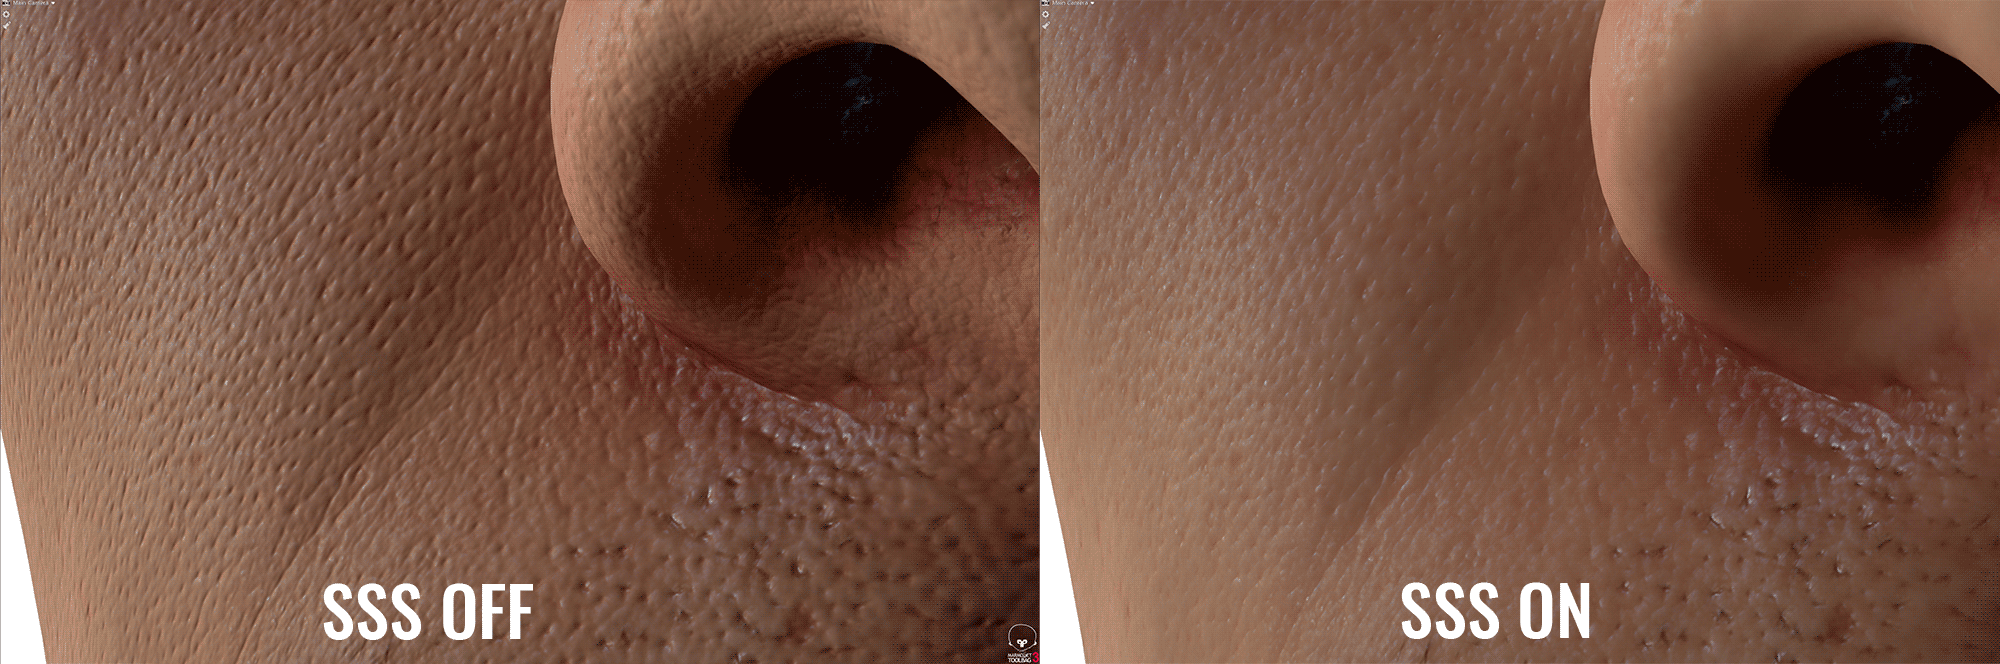
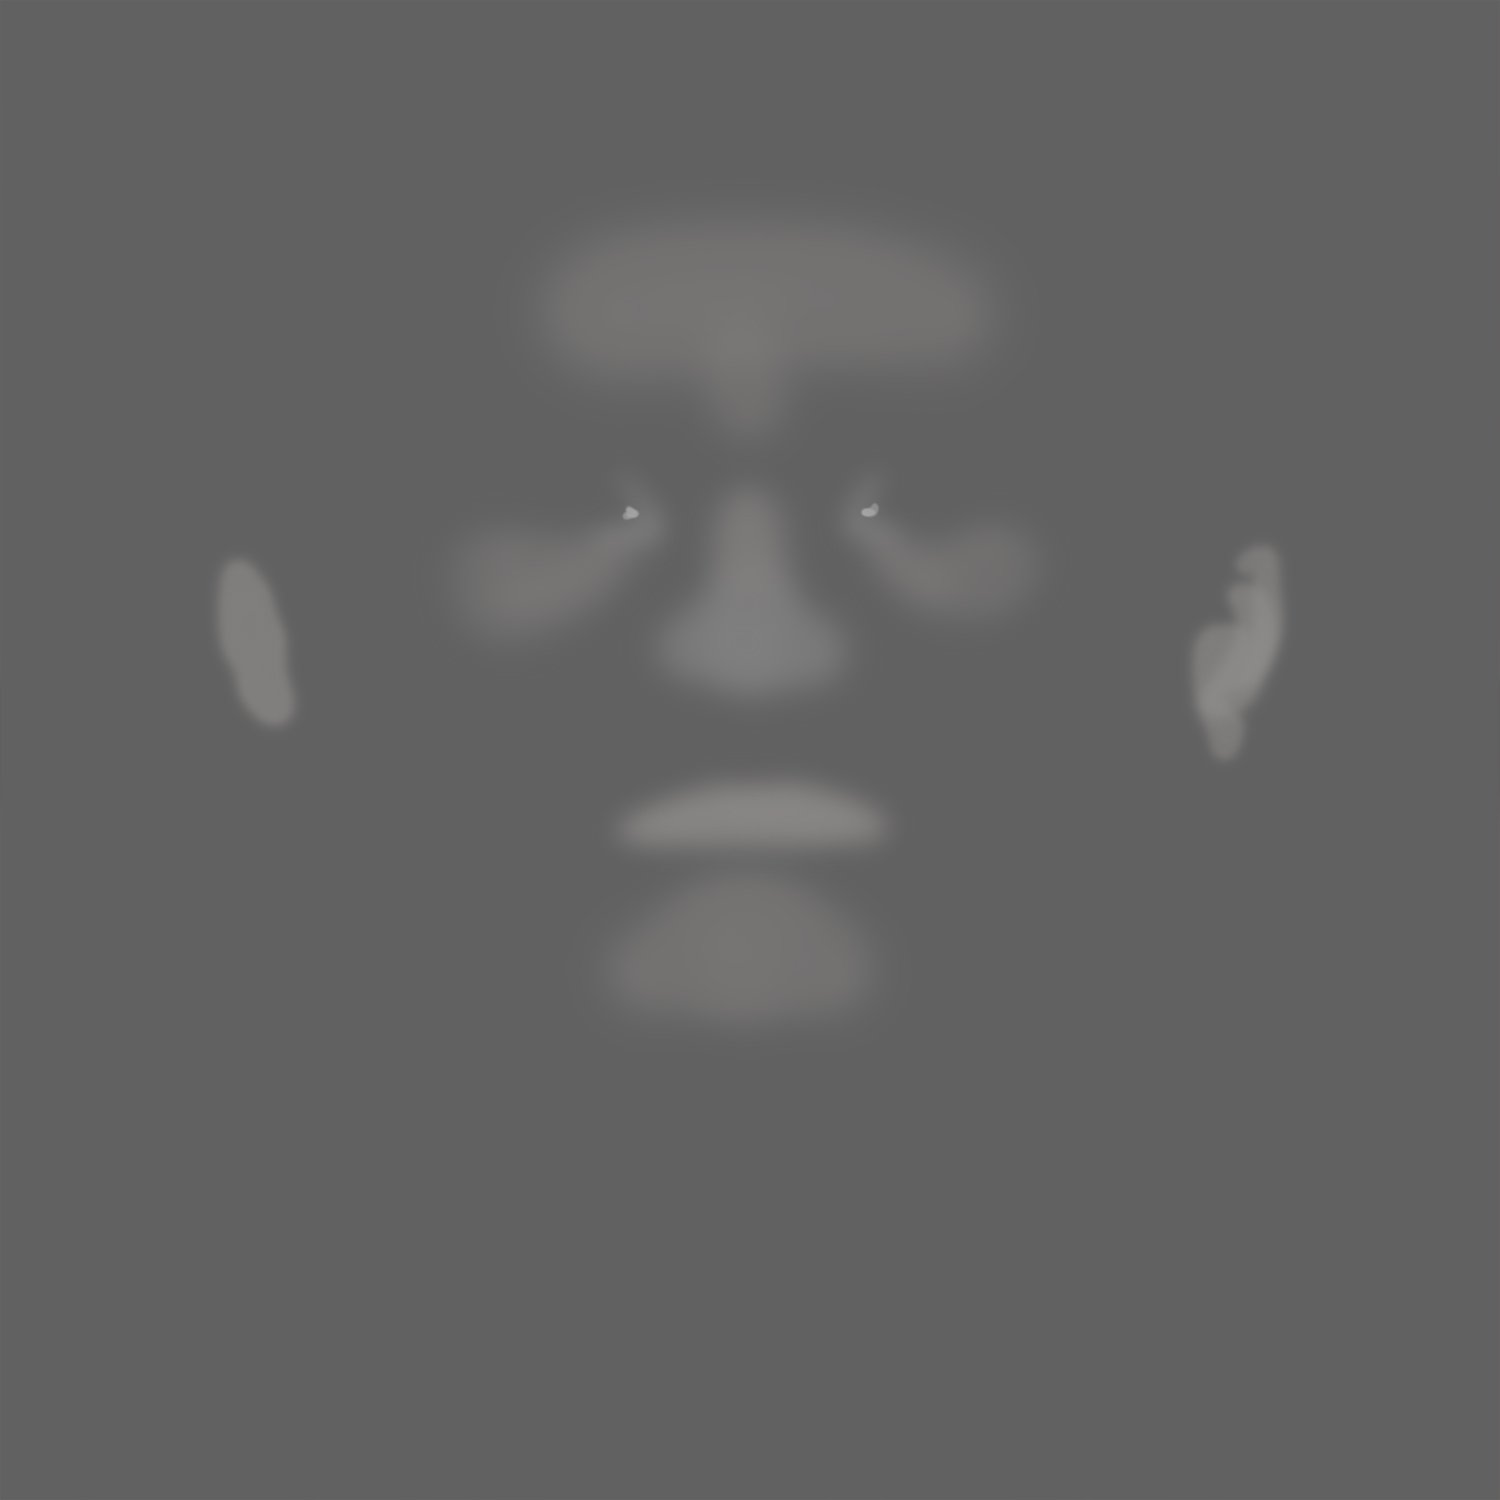
Before we go any further with the specular / reflection shading I think we should take a quick look at the subsurface scatting settings as this can affect to look of reflection and is very simple and to setup in Marmoset. For me there is no hard and fast rule for this, basically whatever looks good. The way I tend to do it is to zoom right in on the face (make sure normal map is applied) and adjust the scatting until the diffuse component of the skin pores almost vanishes, it’s this very computer generated and harsh shadowing of high frequency details that often leads to the sandy dry skin look that you see on a lot of 3d renders. If you were to look at your skin under a microscope you wouldn’t see these kind of harsh shadows on every skin pore as the skin at this level is very translucent and lets a lot of light though diffusing any kind of shadow. I’m not going to touch any of the other settings in the SSS panel I’ve never really be able to use them to any real effect and translucency seems to do weird things with the shadows. The only real map that you might want to consider is the scatter map which defines how deep the scattering is on various areas of the face. However because we are using a scan and all the measurements are accurate in the model specifically skin depth behind the ears and nose a generic value should work for the entire face.
Gloss Map
The next map that we need to look at is the gloss map. This defines areas of the face that are more or less oily which results in tighter highlights. This can be a very simple and very small image if you like, there is no need to define huge amounts of high frequency detail in here just a map to generally define certain areas that will have tighter highlights. Broadly speaking its more or less the same as the spec map with the same facial areas i.e. lips, nose, ears, forehead and eyes picked out as the shiny areas. Again, working with each area on a separate layer in photoshop is a must for tweakability.
Lighting
As with everything I’m doing here I want to try and keep the lighting as simple as possible, rather than making a load of images to try and explain how I have set it up I’ve created a quick video that shows exactly how it works. Basically I’m using the standard marmoset cathedral HDR with a single directional light source which I’ve changed the colour to a nice bright white.
Post Processing
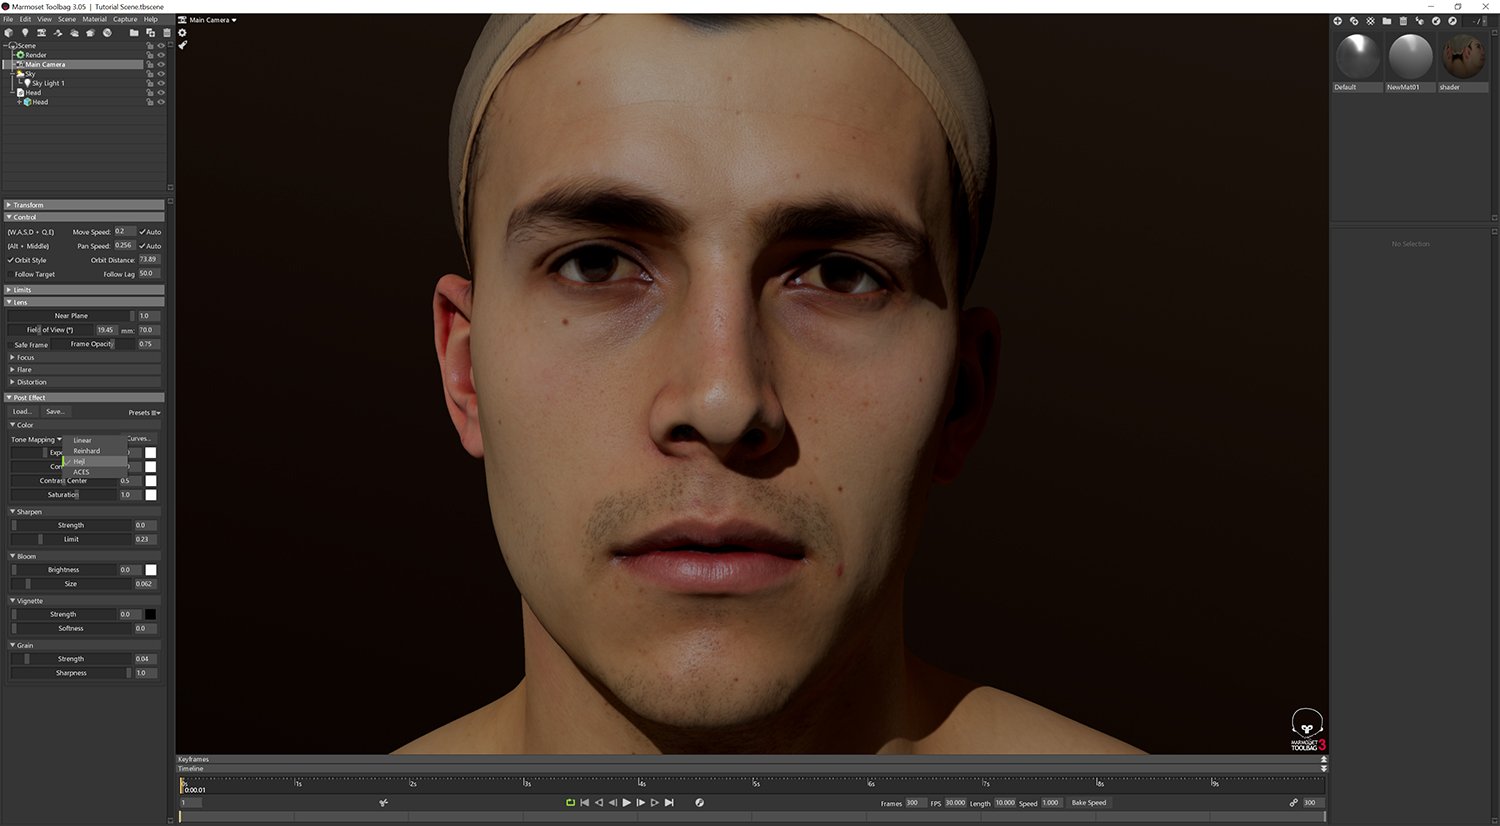
To help the image pop a little bit were going to add some simple post processing effects. The first of which is the "Hejl" tone mapping which will give the scene a more cinematic look. Select the camera and scroll down the "Post Effects" and then select "Hejl" from the tone mapping drop down menu. You can also play around with the curves, exposure settings to try and replicate the look but this is a quick and easy way to add a bit more depth to the scene.
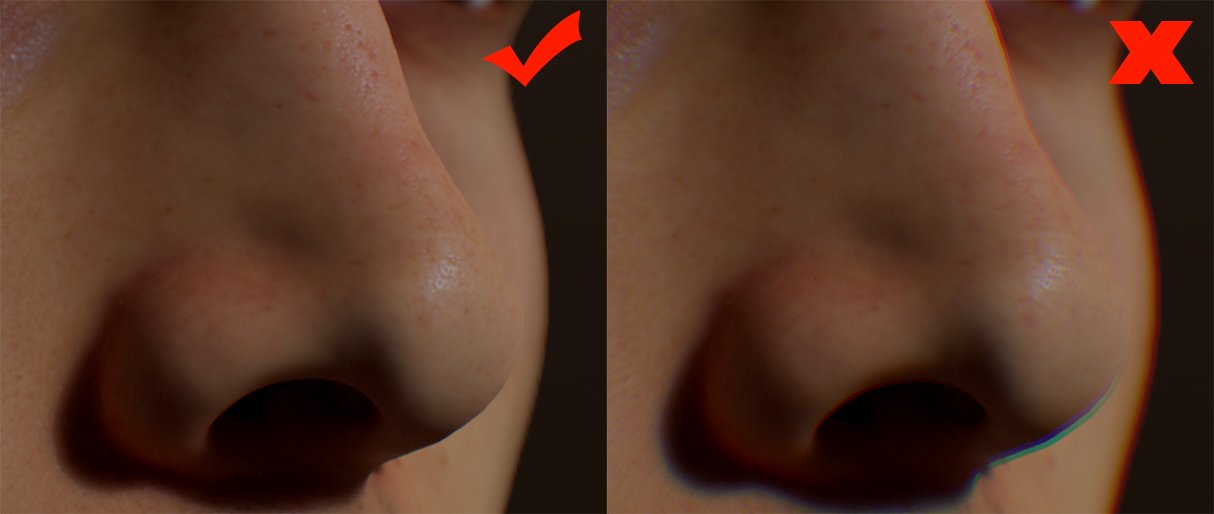
Chromatic Aberration
Chromatic Aberration is the effect produced by the refraction of different wavelengths of light through slightly different angles, resulting in a failure to focus and a RGB split. Some refer to it as the modern day lens flair, i.e. over used and not very subtle but for me chromatic aberration used sparingly can add a lot of realism to a real time render especially when combined with Depth of field (below) All I can say about this setting is fiddle with it until it looks right, but don’t be tempted to set it super high as it can look very ugly.
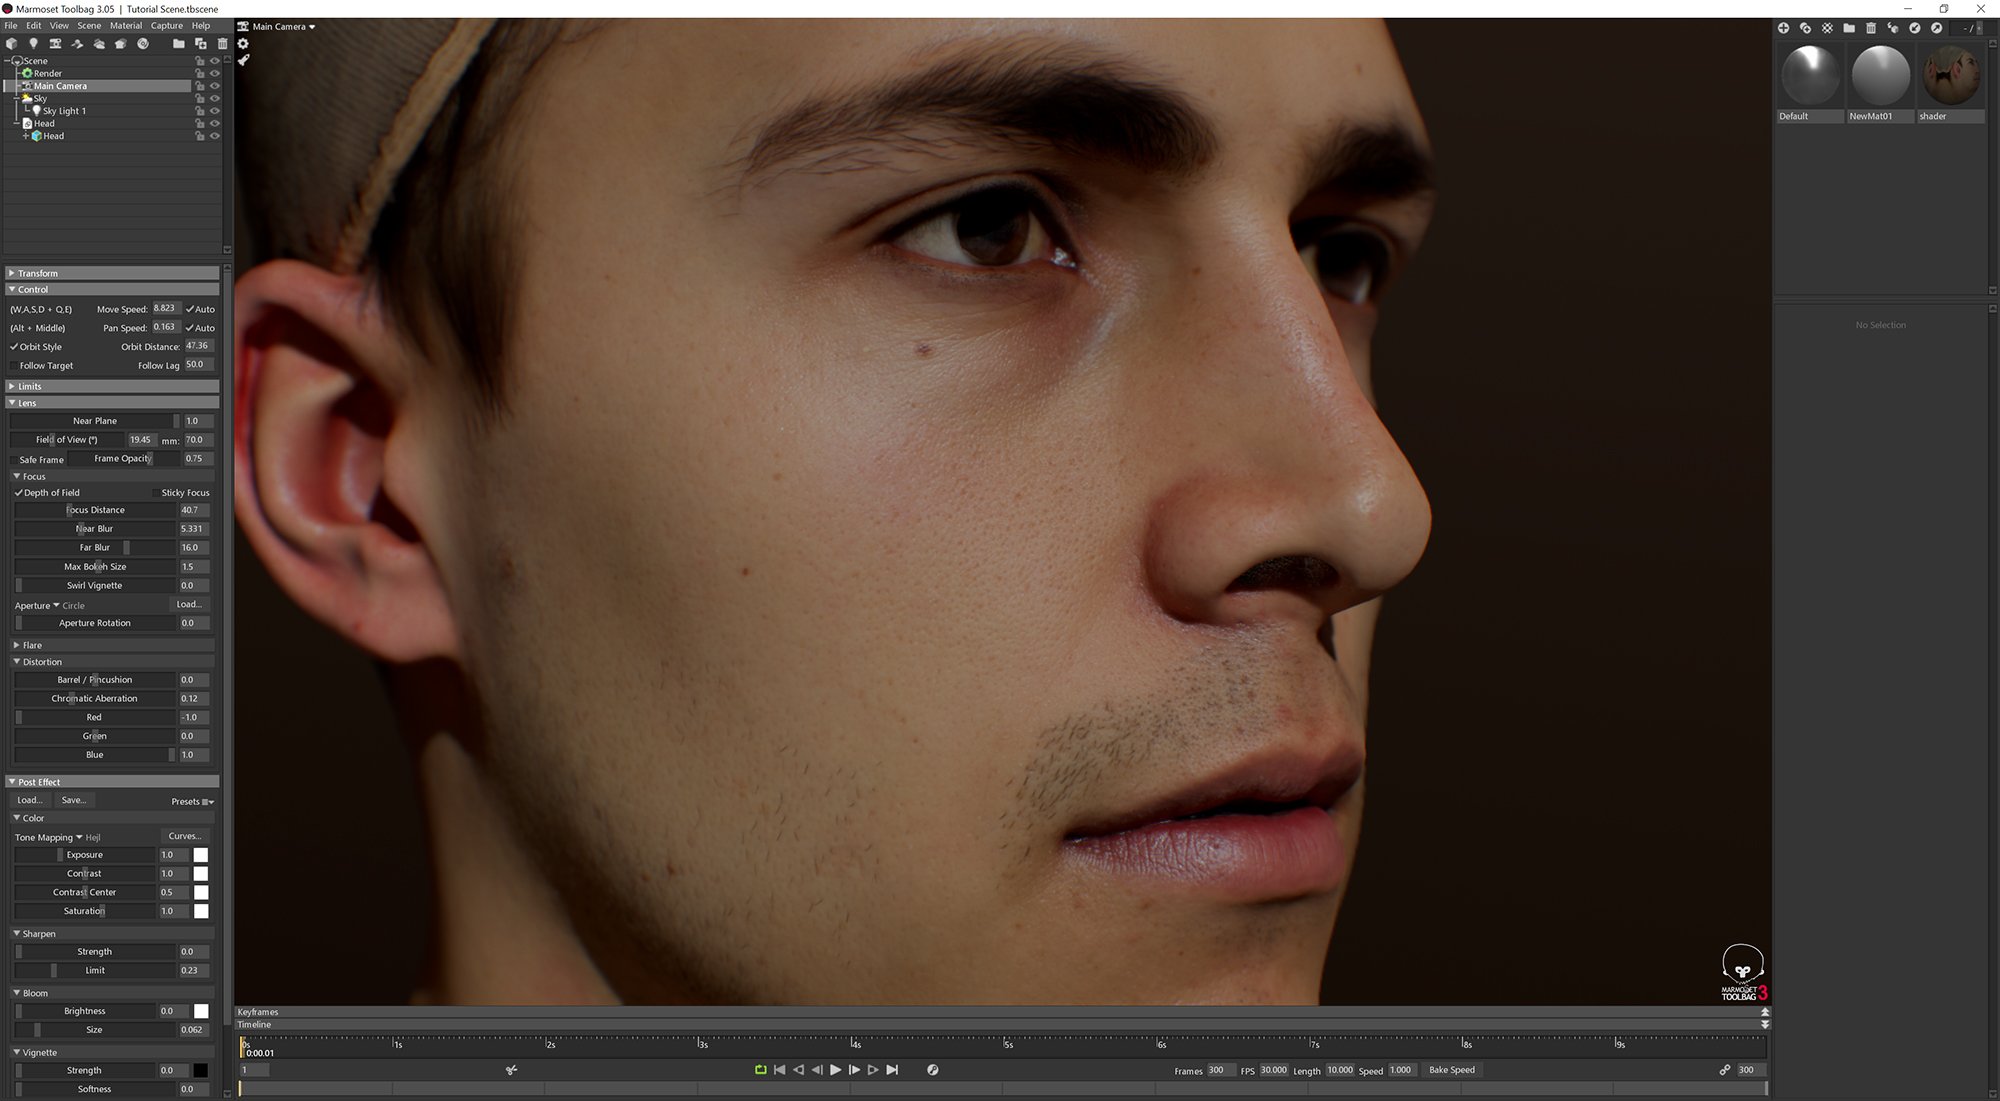
Depth of Field
Everyone loves a bit of DOF! it help pull everything together and combined with the chromatic adoration gives your renders a nice photographic quality. Make sure you tick on "Sticky Focus" this means the focal distance will always remain the same no matter how much you move the camera in the scene. If your using a mouse you can simply use the middle mouse button to set the focal point or distance as it's called in marmoset.
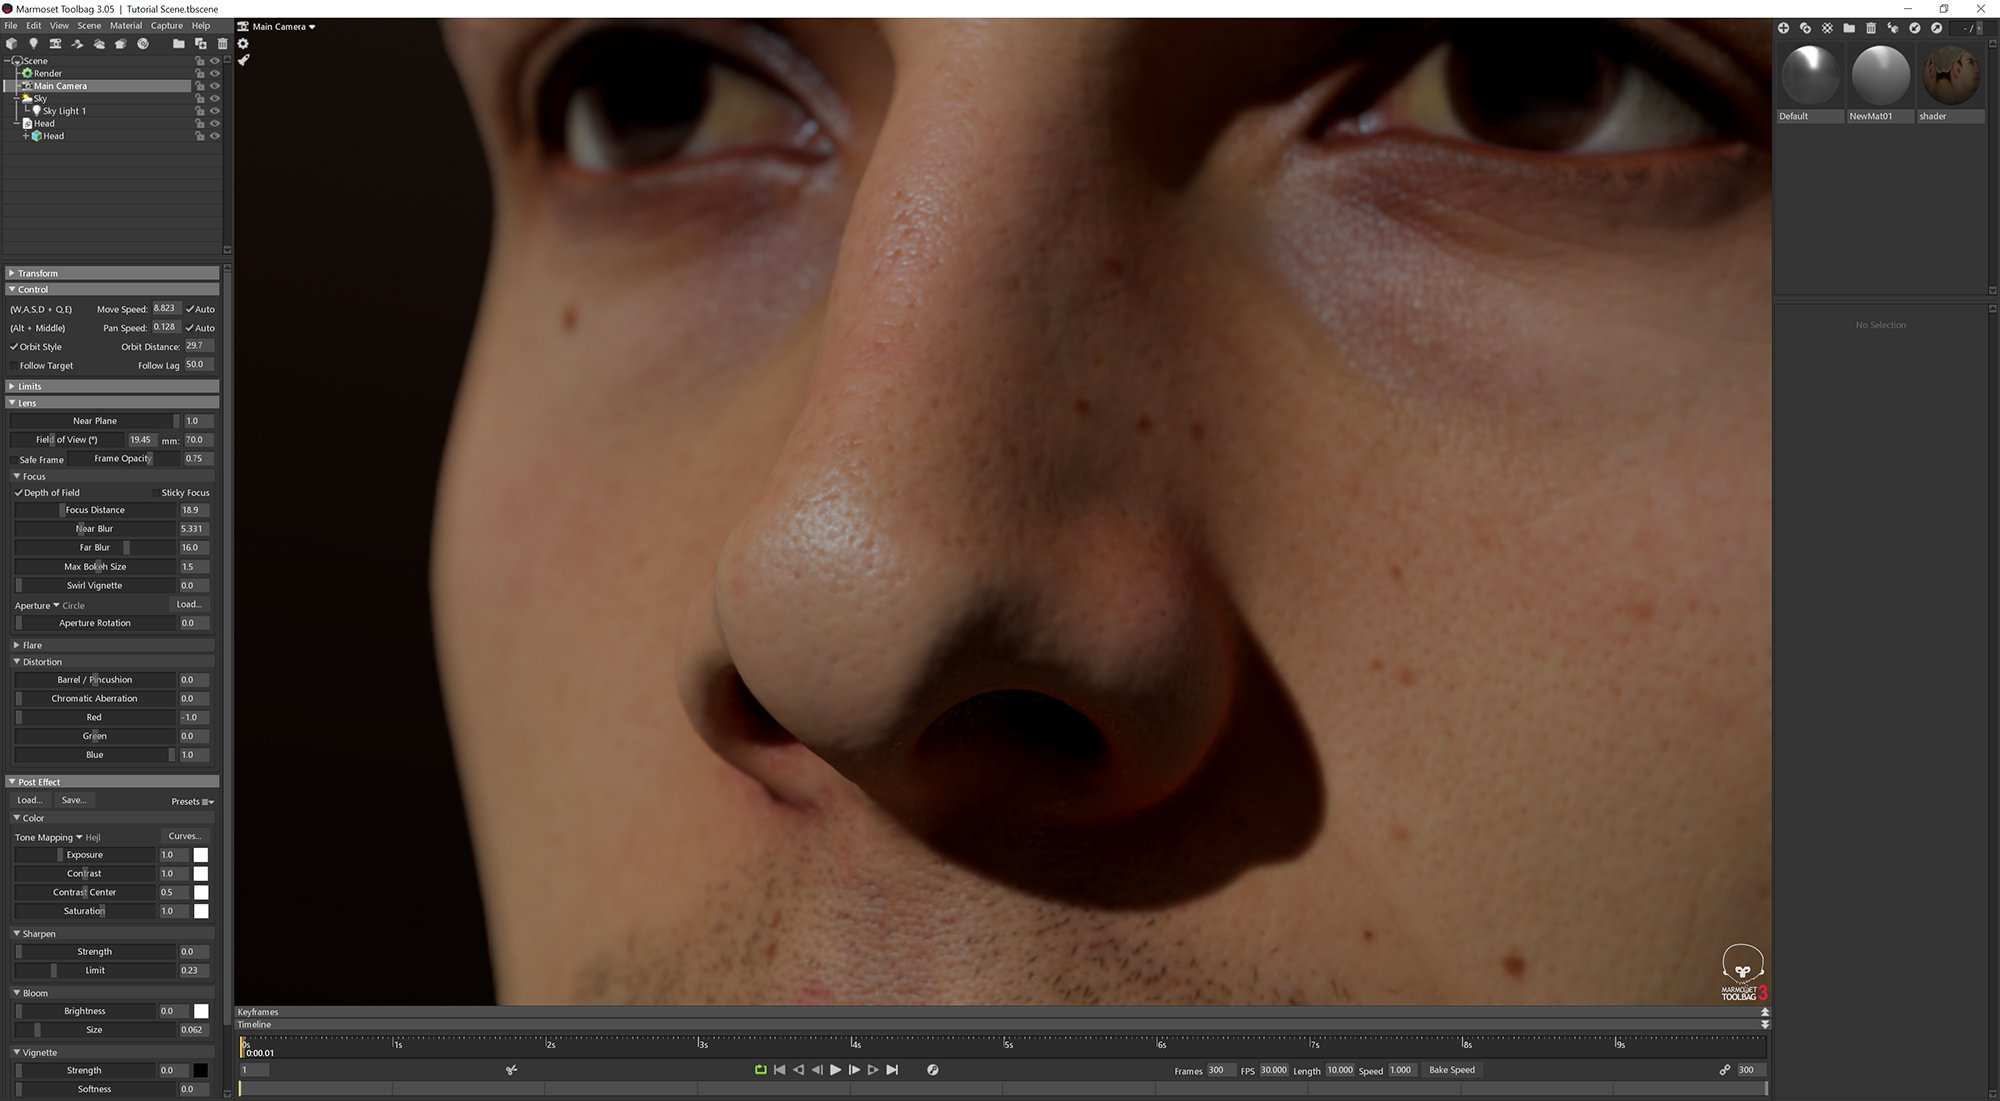
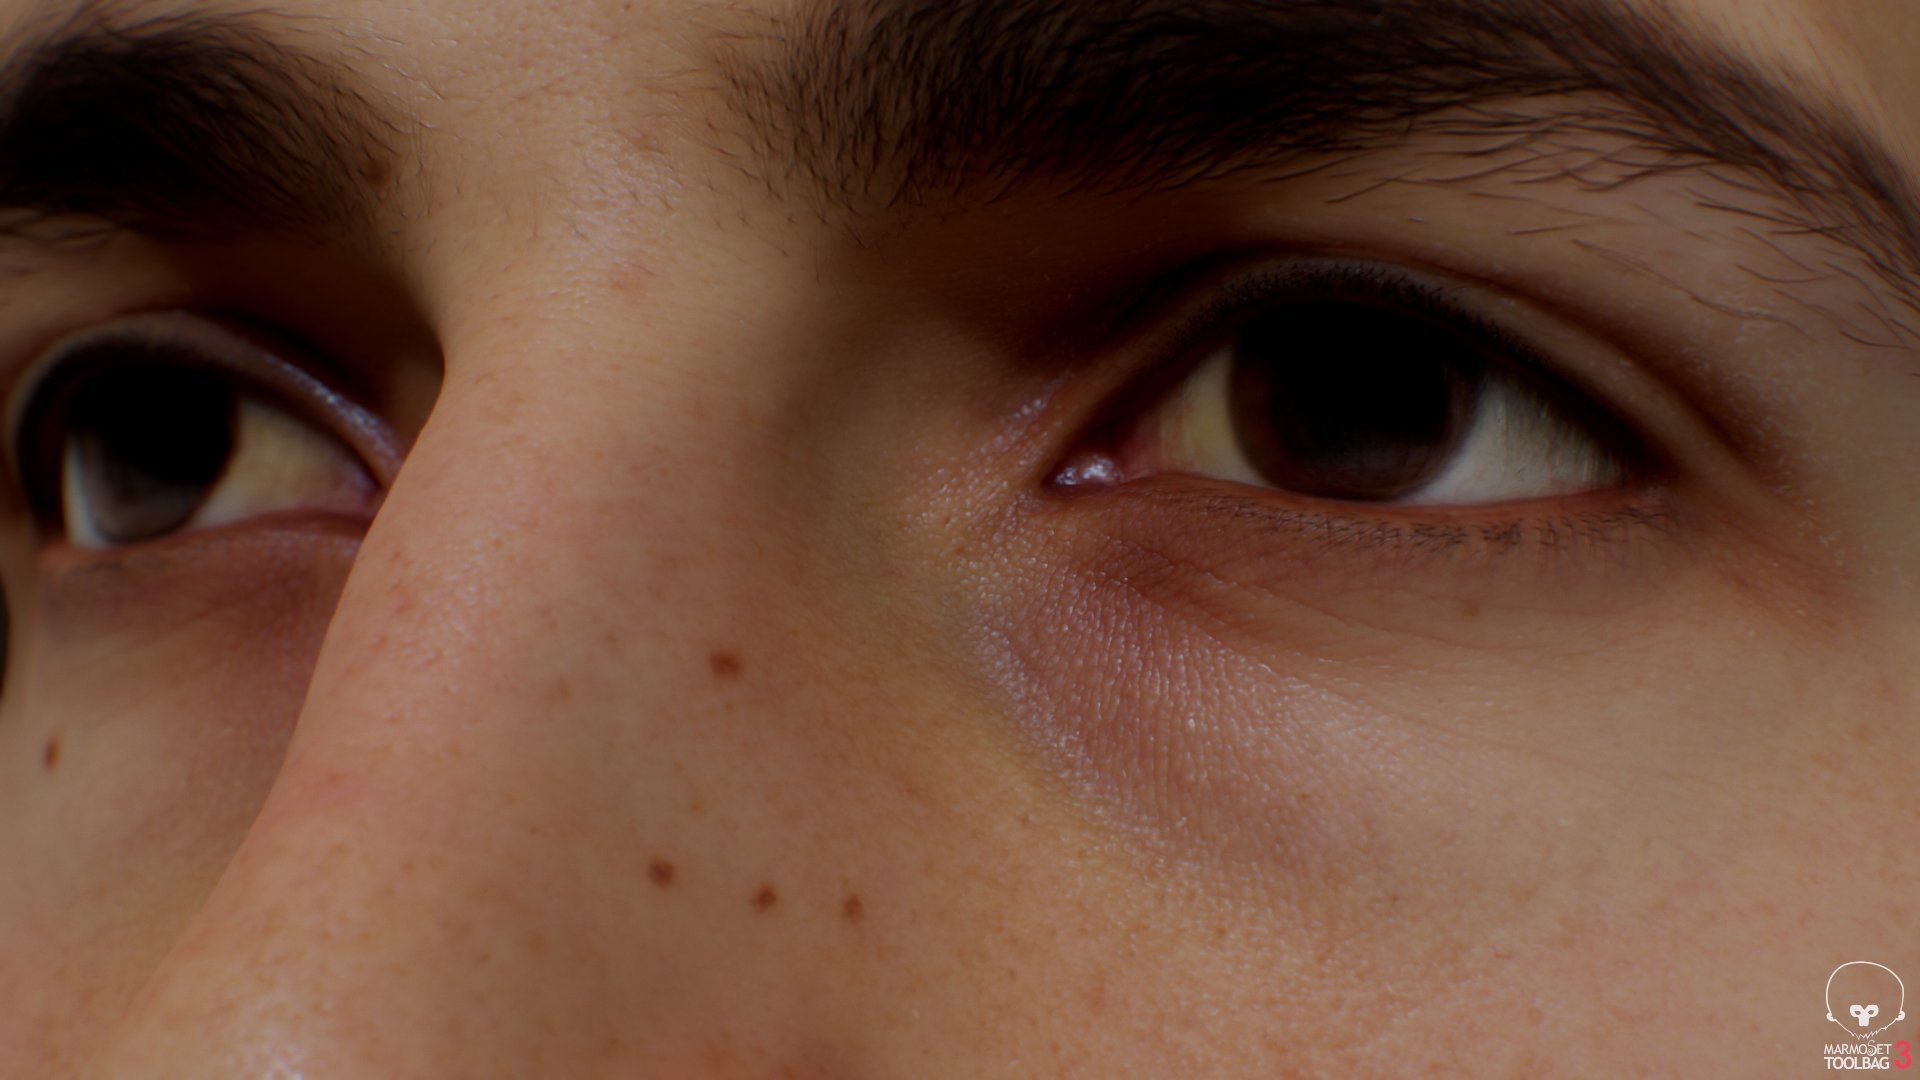
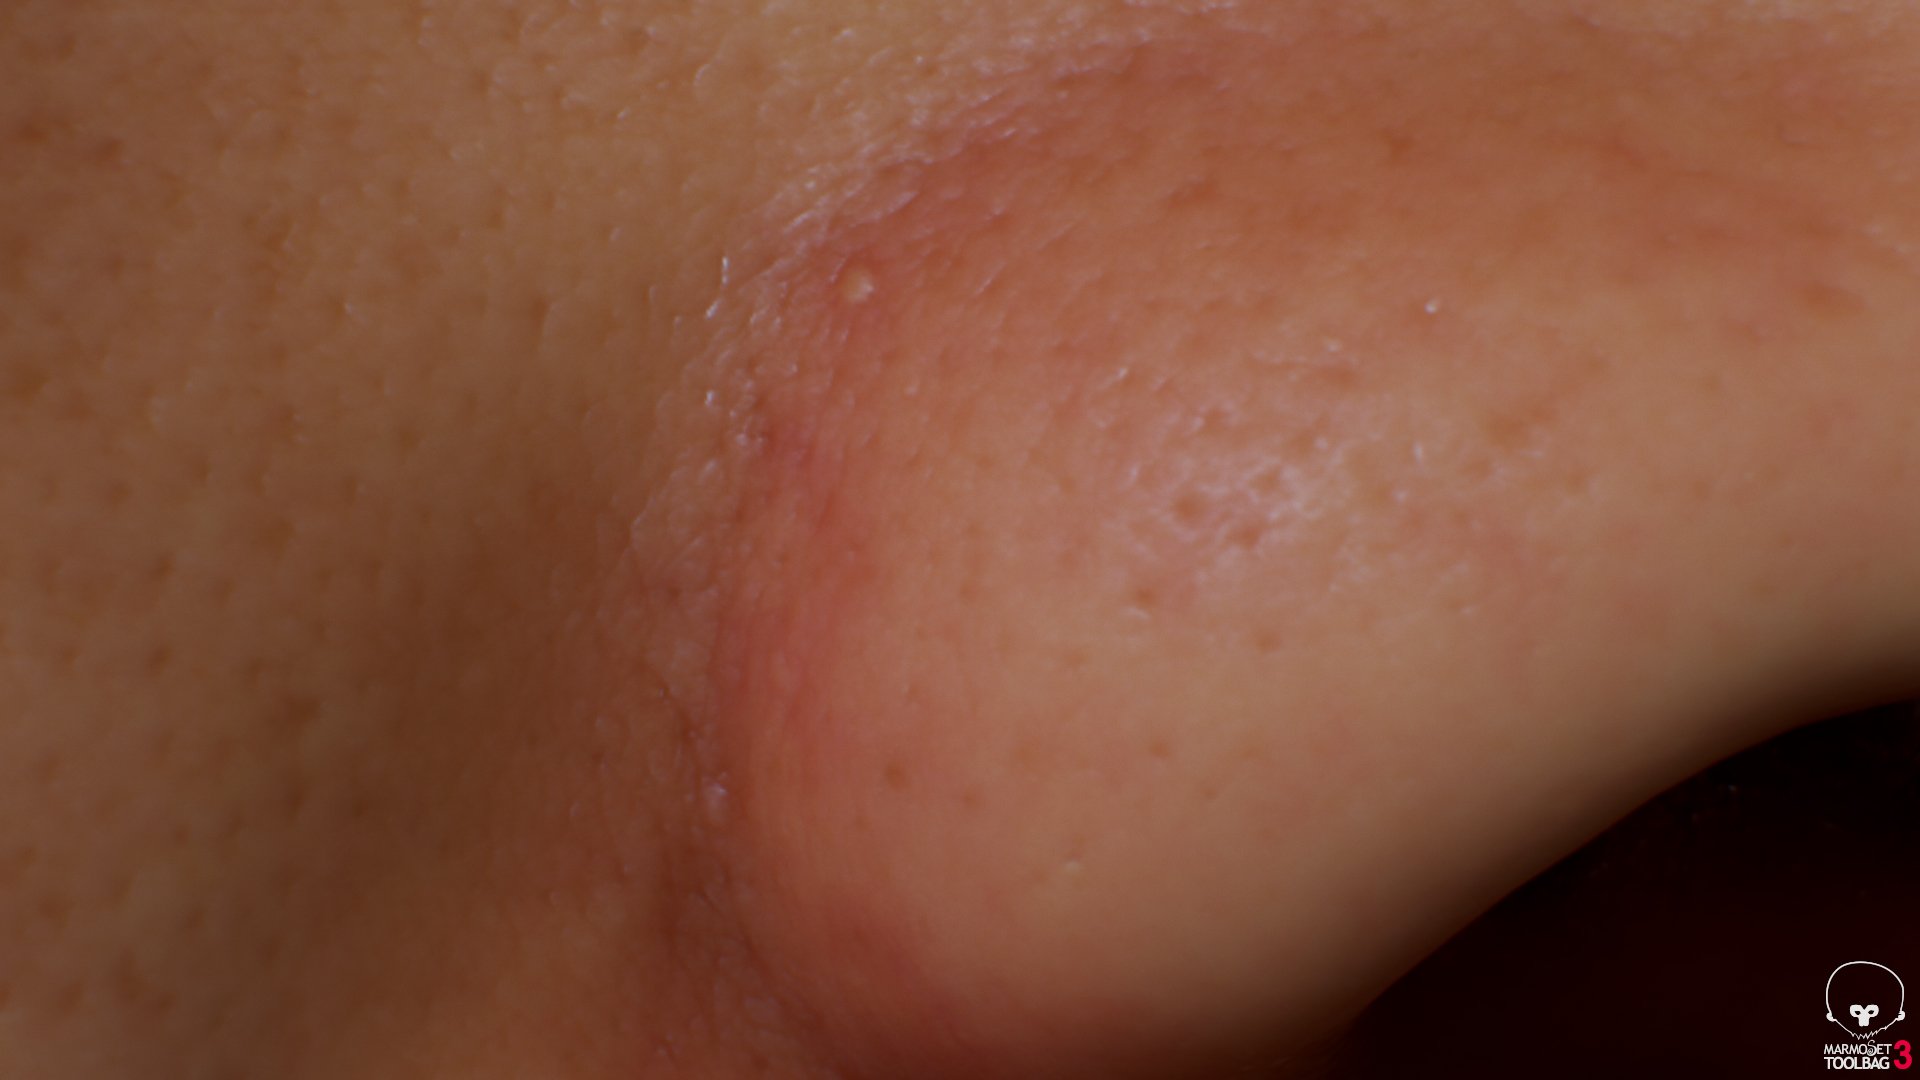
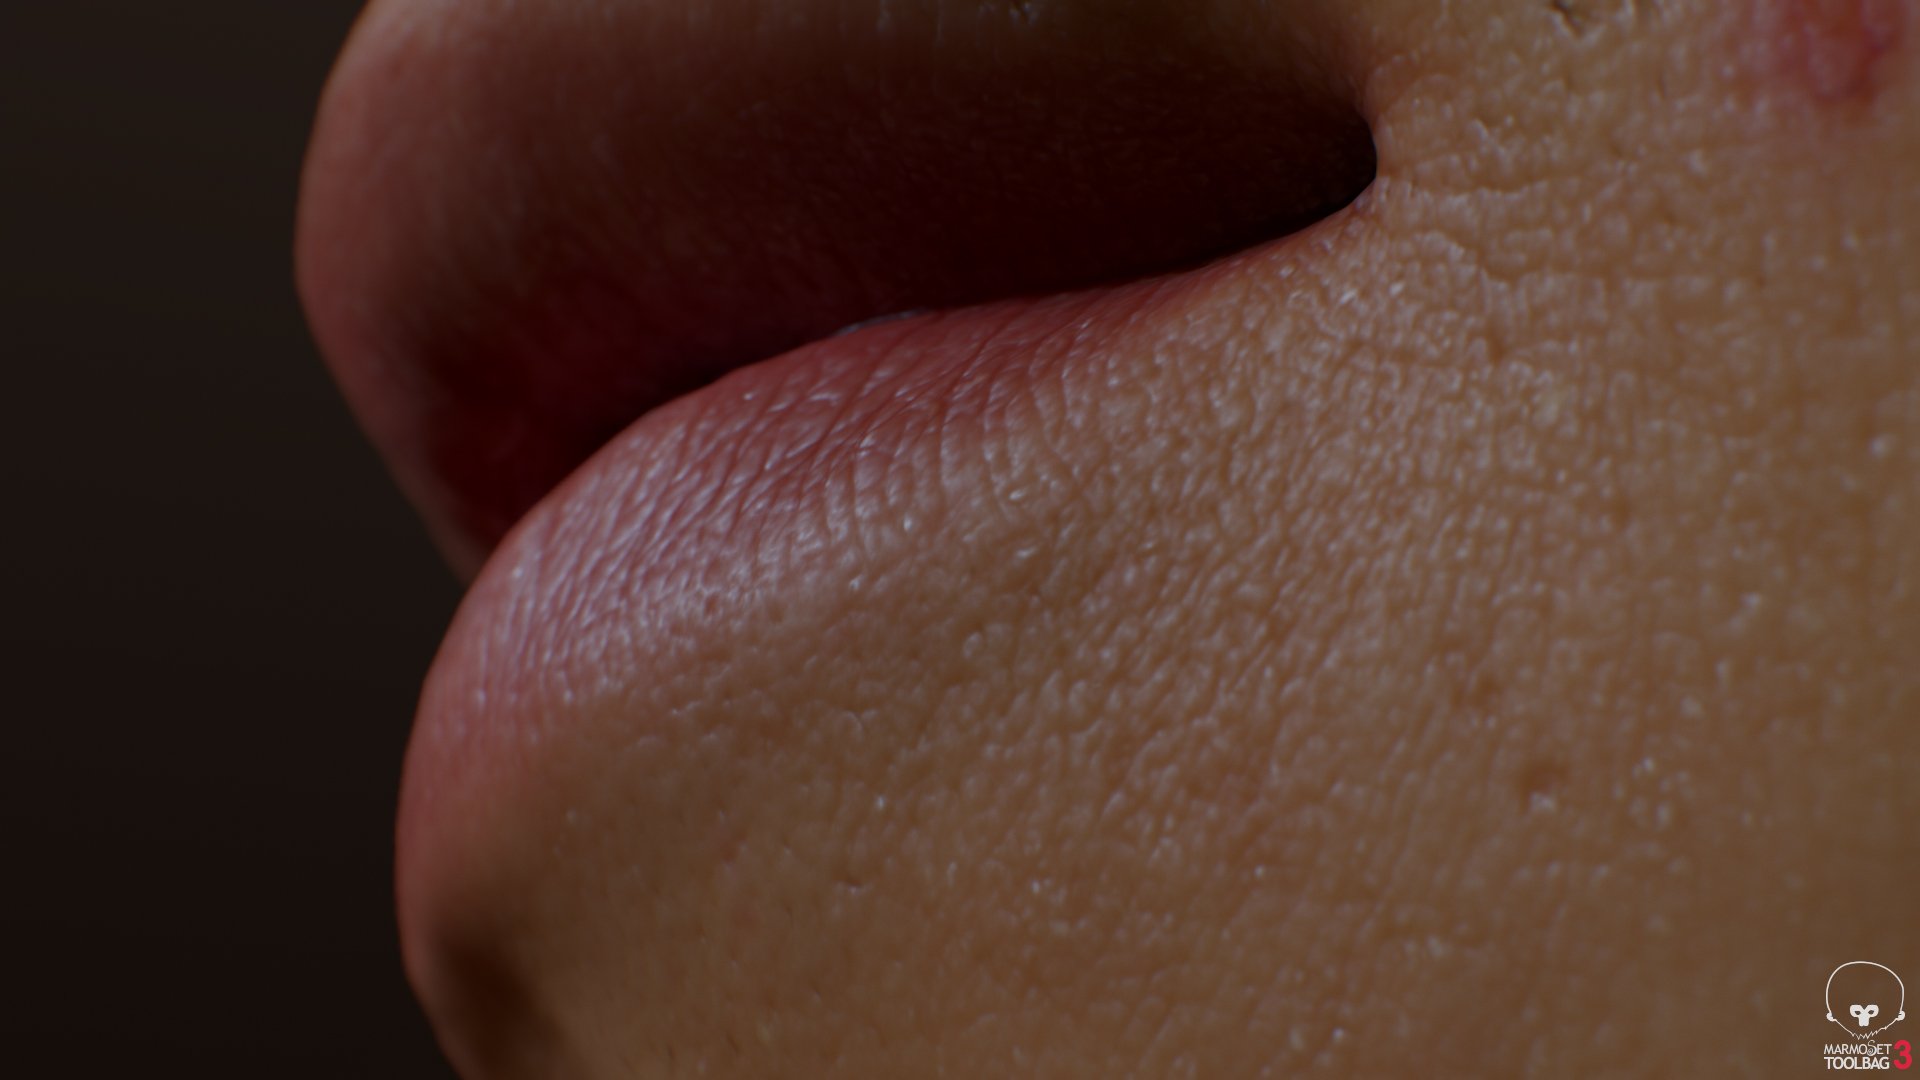
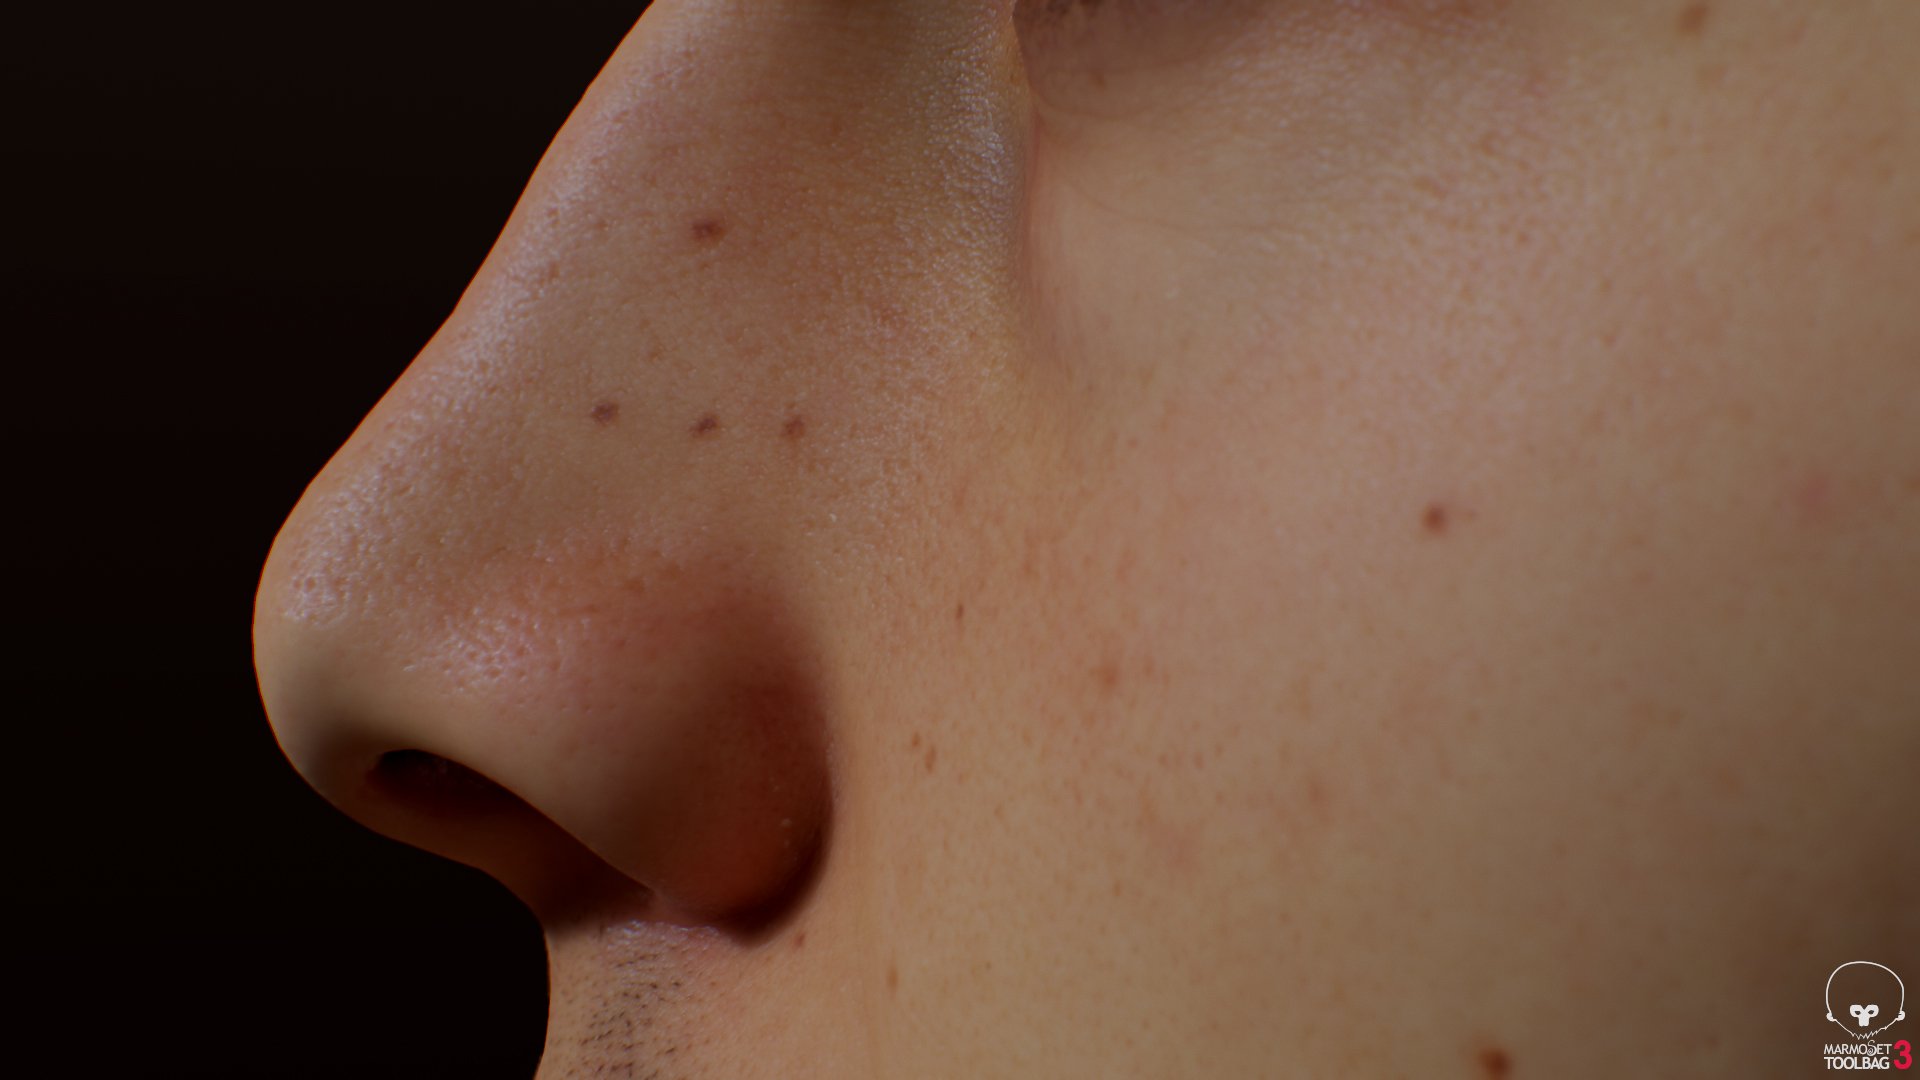
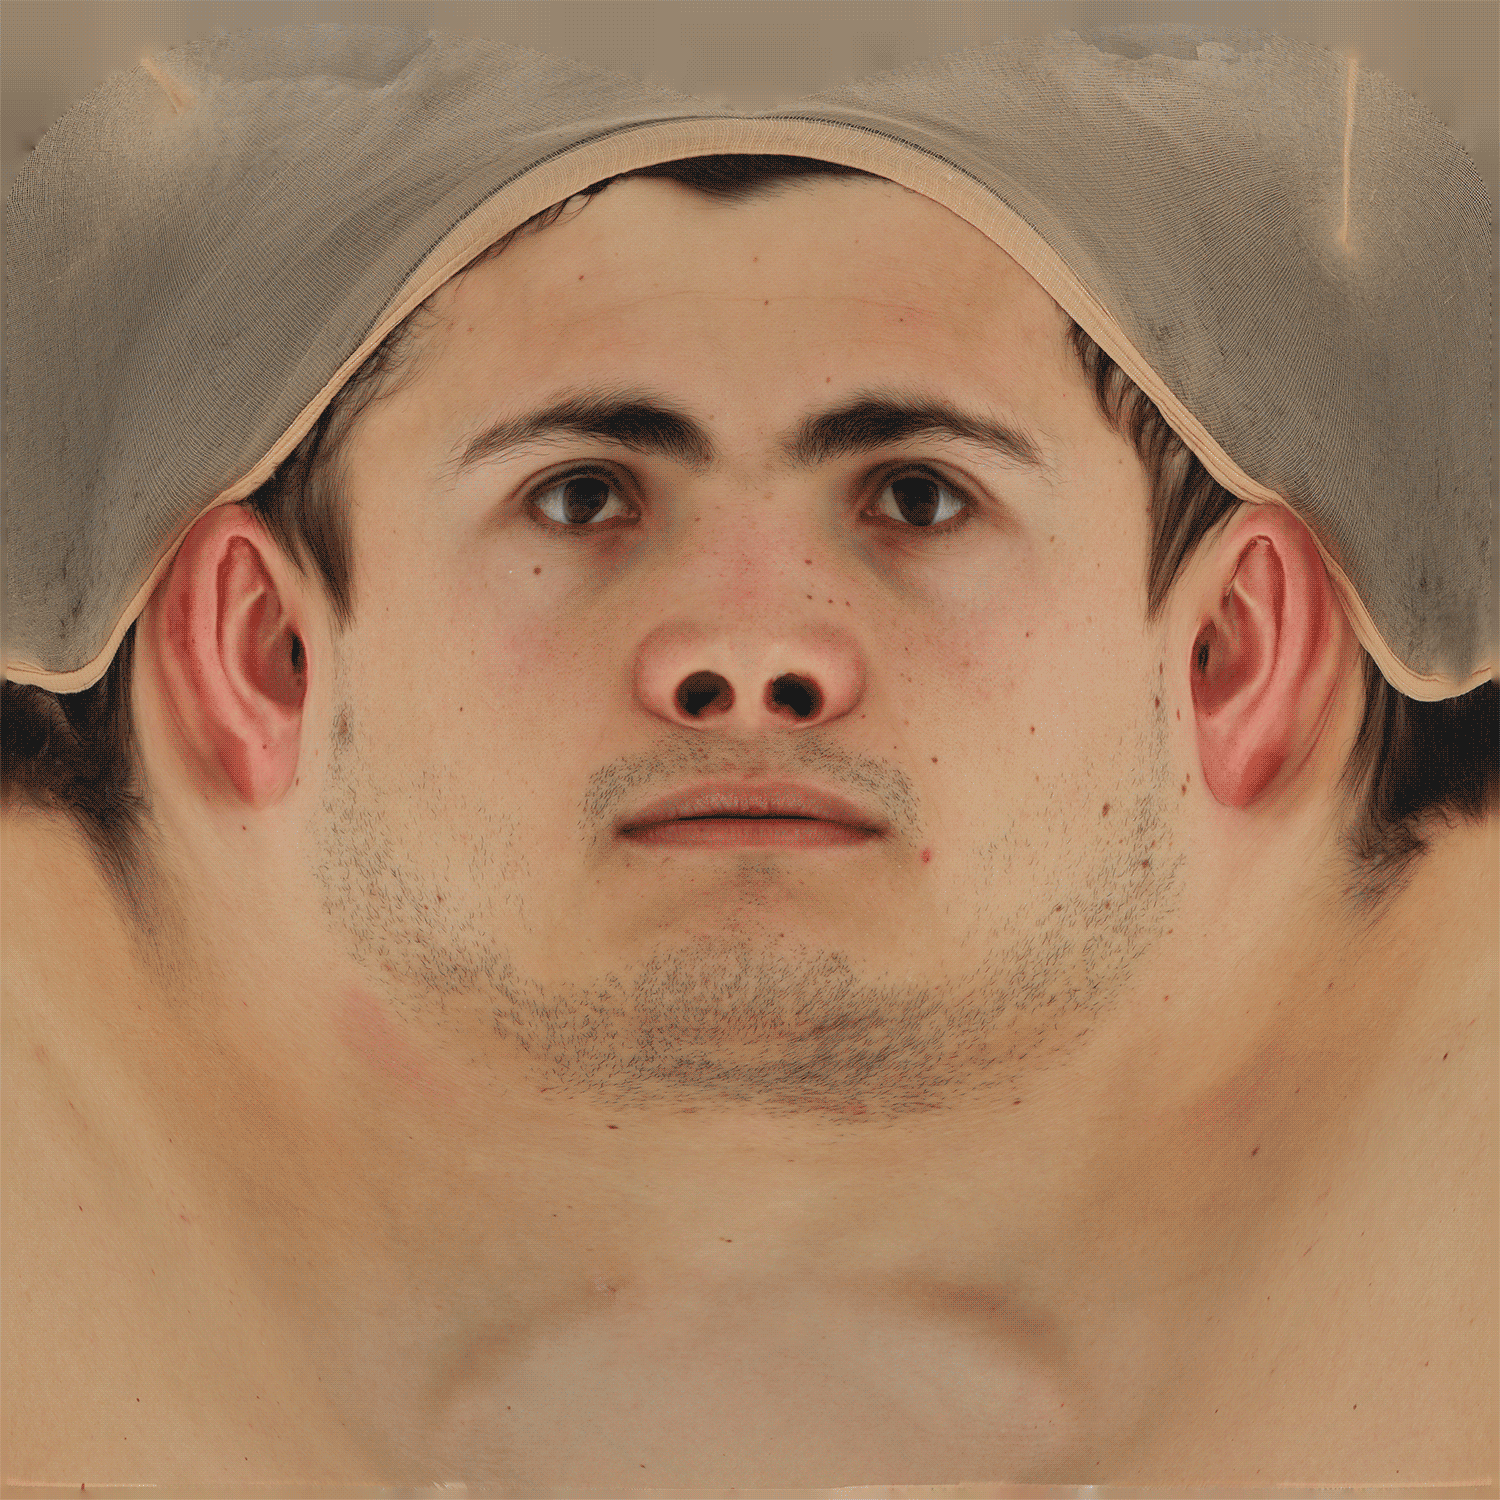
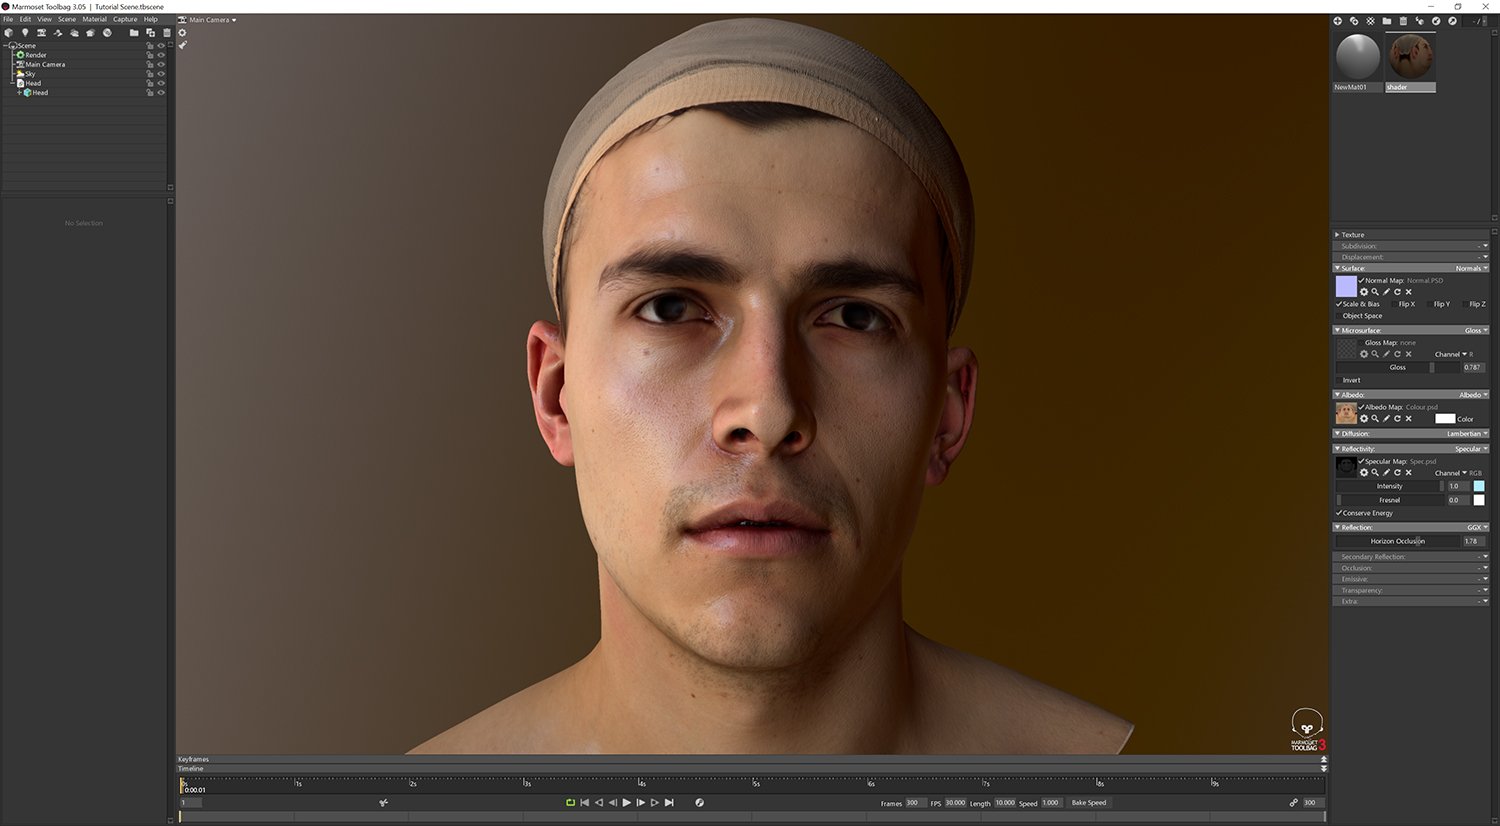
Final Renders
Screen shots captured from Marmoset Toolbag 3 using the high res image capture function "F11"